Nissan 240SX Forums banner
1 - 20 of 36 Posts

Crazed hatch

· Registered
Joined
·
102 Posts
Discussion starter · #1 ·
been lurking for years, i guess its my turn to make one of these.

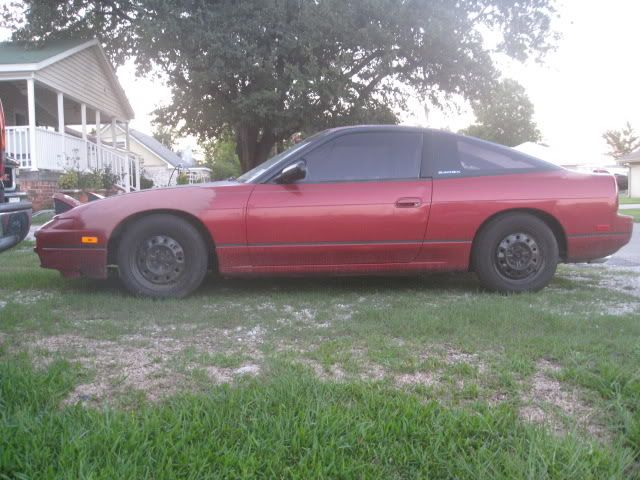
first one i built way back when

Image


Image


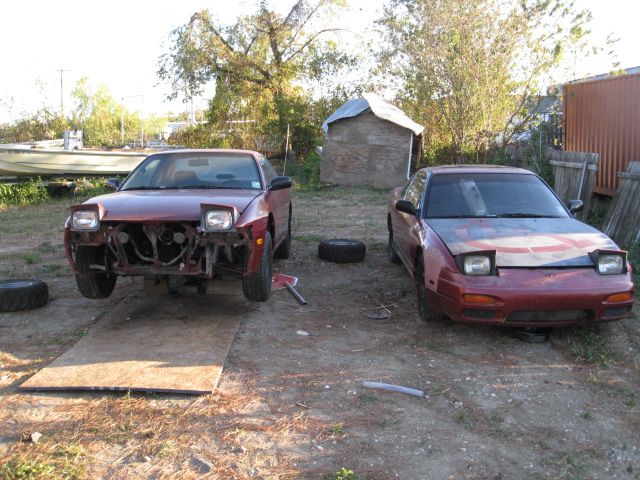
decided to pick up something a little less beat up

Image


Image


Image


Image


Image


and what is going in it

Image


so i got busy and stated pulling stuff out

Image


Image


figured everything was out so i might as well start cleaning a little

Image


Image


Image


picked up a few parts to get my started

Image


Image


Image


Image


Image


so thats where im at now. i have been slowing down working on it cause its been getting cold outside and im not lucky enough to have a garage to put it in. ill post more updates along the way
 
Discussion starter · #4 ·
gotta have the pink lettering :)

Image


Image


mock up, still a little off

Image


i had a question about power steering. on the hatch the pulley is on the driver side and in the coupe its on passenger side. like so

Image


Image


now are those interchangeable or is there something special i have to do? obviously to mount it to the motor it has to be on the drivers side.
 
Discussion starter · #7 ·
little update today

decided to go out and switch the power steering lines and pump over to the drivers side. all went well, besides it being a pain in the ass. i was going to tear down the sr20 and have it ready to be pulled tomorrow but the mosquito's decided it was time for me to go inside.

i also found this today when i was taking off the hot pipe to get the the power steering lines

Image
 
Discussion starter · #12 ·
i havent done anything in a while now. i lost my access to an engine hoist and i dont have the money to buy one so i kinda hit a dead spot, but i did decided to go outside today and start tearing my interior apart and do some cleaning and tar removing.
Image

after i removed all the carpet. it wasnt too dirty besides the random pieces of corn under the back seat
Image

the only rust i found on the car was in the trunk, nothing a little silicon and sanding cant fix
Image

gotta love the backyard during a build
Image


once i get paid next month, ill be off to ice house to get some dry ice and start the long process.
 
Discussion starter · #14 ·
sorry for the long void in the build update guys. i have been really busy with school and havent really had a chance to do anything. until this past week :)

after some tweeks and chasing wires and plenty of oil

Image


Image


Image


Image


motor was swapped and stared on first key turn !!!

Image


so while i was waiting for check in the mail to go get her legal and registered, i decided to take off all that nasty old purple tint.

Image


Image


Image


Image


Image


Image


all clean!!!!

and just a little walk around of how the car sits now

Image


Image


Image


Image


i did notice that i had a crack in my turbo manifold the other day, so i am waiting on a new one to come in the mail. ill just weld up the old one and keep it as a spare. the windshield needs to be replaced because it has a nice crack all the way across it

Image


the last problem i have to tackle is im going to recirc my bov. ive heard that if you recirc your bov that it will fix the problem of the car dying when coming to a stop when the clutch is pushed in and running rich. which is two problems i am having right now. so im waiting on some stuff i ordered to see if i can fix it
 
Discussion starter · #17 ·
well i had some parts come in yesterday

new turbo manifold to replace my cracked one

recirc intake pipe

BOV adapter

some hose to go from the BOV to the instake pipe

Image


going to spend the better part of today hooking everything up and testing it all out

i might try and hook up a MBC i got off ebay but im not sure if i want to trust it
 
Discussion starter · #18 ·
Well today was going good, everything was coming off like it should of. I didnt break any studs off takeing the manifold off.

Image


Image


it is always nice to have parts scattered throughout the yard :)

Image


and in the attempt of taking off the O2 sensor i found this .....

Image


so i guess its time to order more parts.... i guess the good news is that this might kick me in gear to get a nice exhaust setup
 
That's a NASTY crack dude!

When you put the new manifold in, make sure to use the little support bracket that they usually come with; it will lessen the chances of it cracking on you. Also, to run that turbine inlet pipe, you need a 2-bolt flange adapter IIRC.
 
1 - 20 of 36 Posts