

Hey guys,
So I've been a long time lurker of this site and several other 240sx related websites; Ive always wanted to do an sr20det swap but never really had the money to do it.
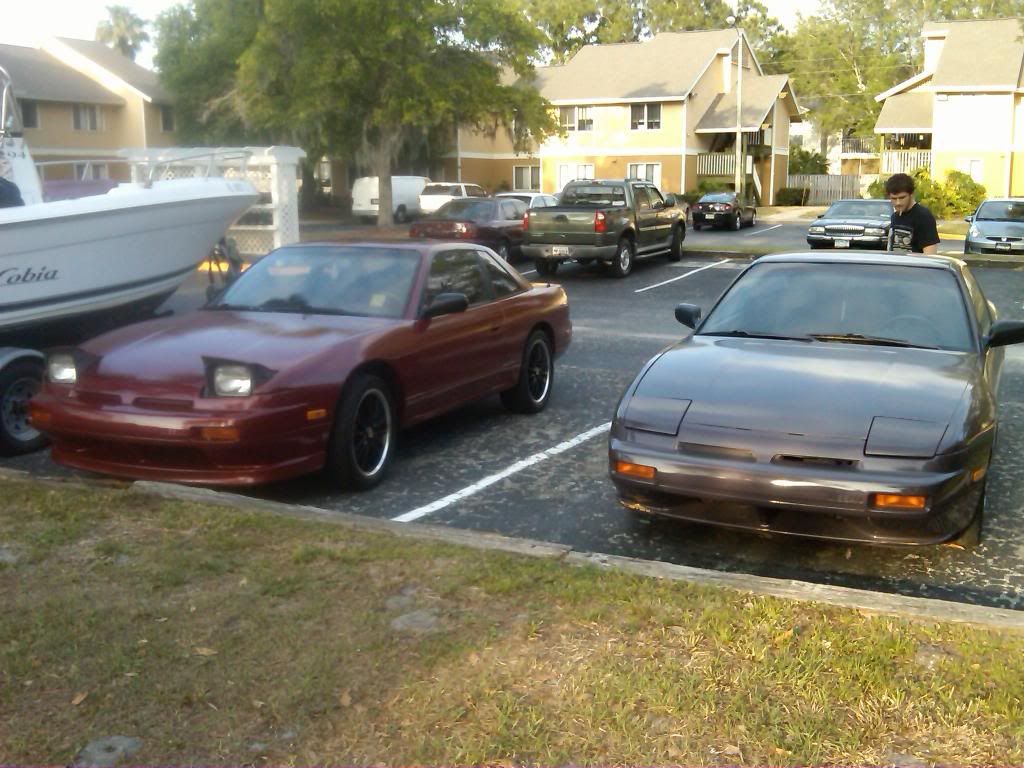
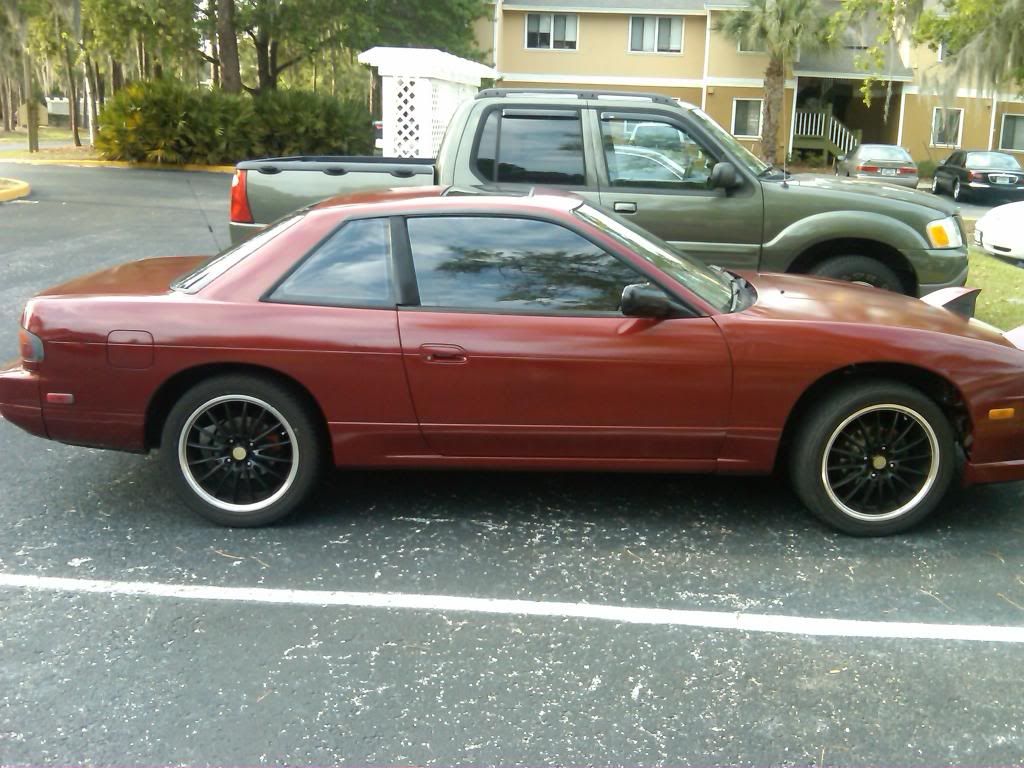
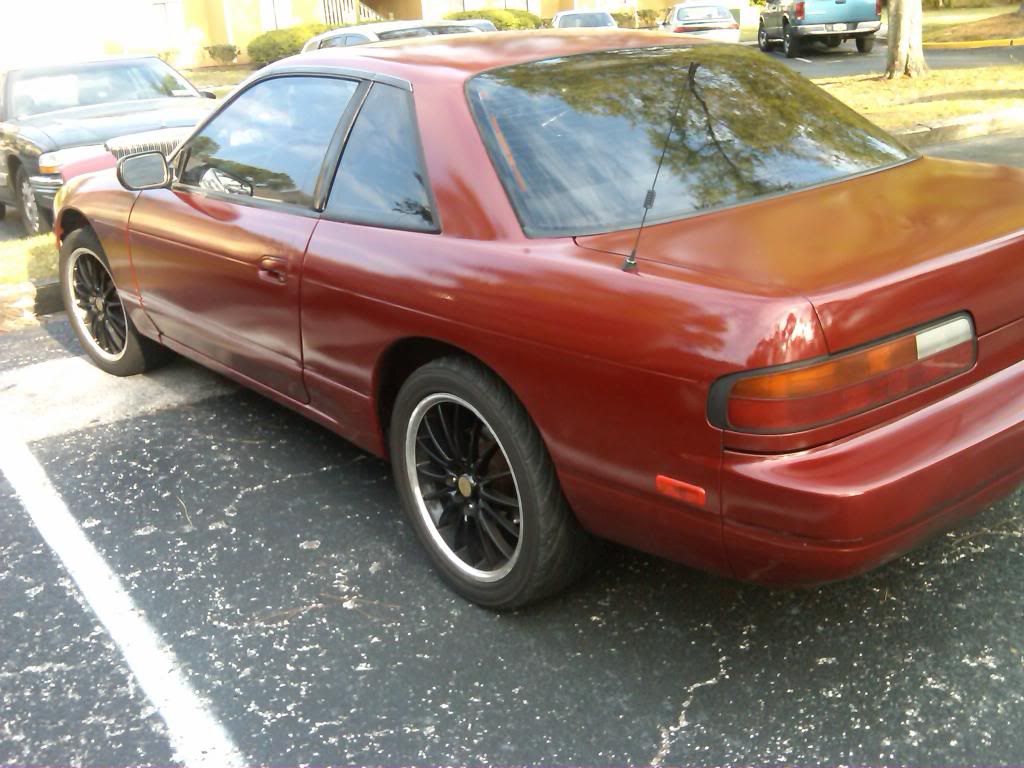
I originally picked up an s13 coupe when I was first introduced to the import scene; I was about 19 years old and I thought "Oh, Ill just get a 240 and then save up 2 grand and drop an SR in there!", haha wow, I was misinformed. I ended up having to get rid of the s13. Now, 5 years later, I realize that it was probably for the better, because I always wanted an s14 anyways.
![Image]()
![Image]()
![Image]()
So I picked up this stock s14 around December of 2011. Its a 95, 5-speed, no sunroof but still had the power windows and locks. Unfortunately, I dont really have a lot of pictures of it at the moment. The clear coat is wearing off on the hood and the paint overall isnt the greatest, but that's the final step right?? The car was pretty clean in every area, it had about 140k miles on it. The only negatives: there's a tiny chip in the dash (not really a crack like you usually see) and some minor 'cut' marks on the door panels, the inside smells a little bit like a dog, and a small rust spot on the trunk-- all easily fixable.
![Image]()
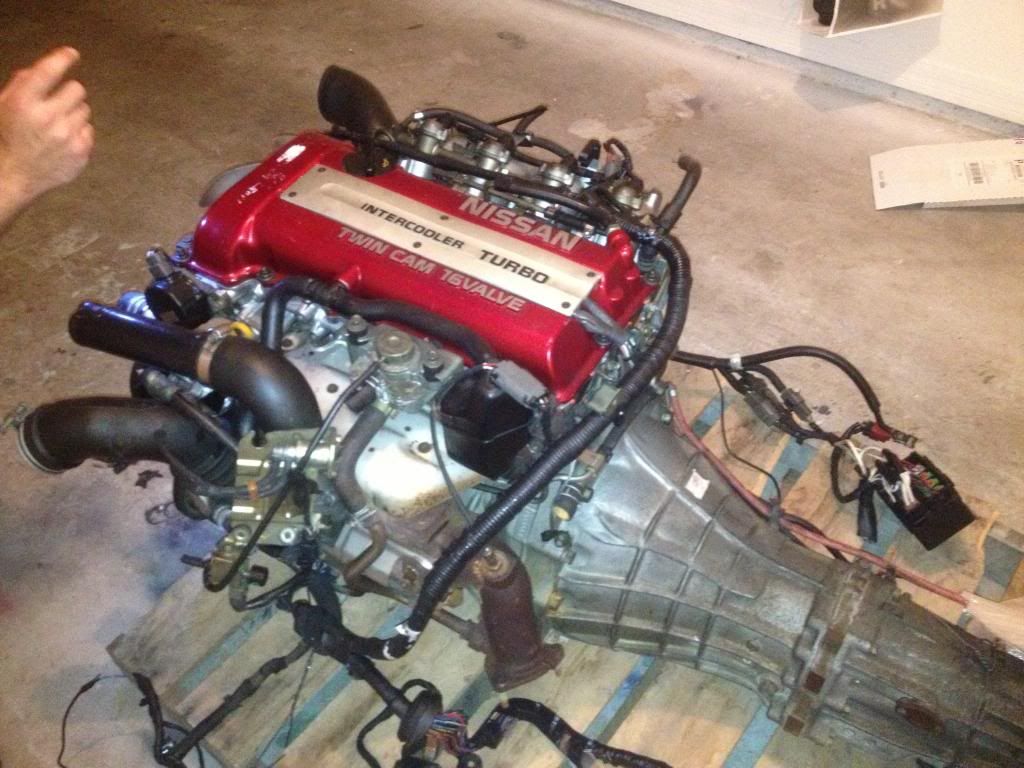
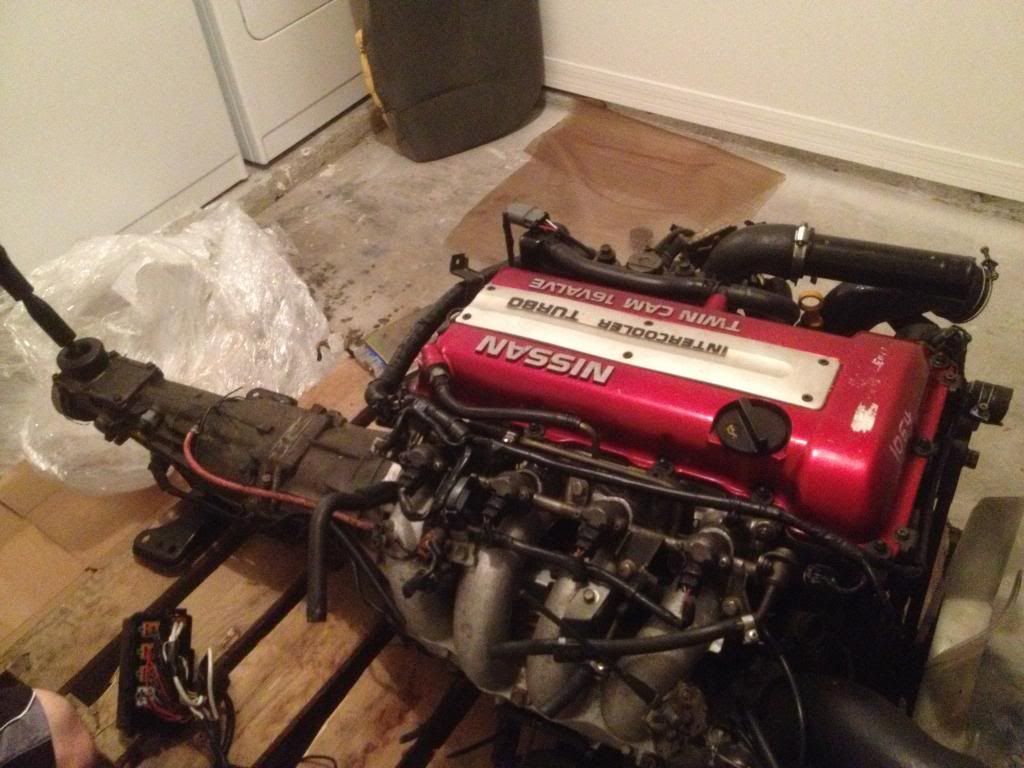
Fast forward to almost a year later, I decided that I had enough cash in the bank to start my project. So, around October I started ordering parts and keeping a little pile in my second bedroom. I was ready to order my SR20DET, I was thinking about going with osakajdmmotors.com, which is where I had been planning on ordering from for the past 6 years. I decided to see if I could find any info on them since it had been a while since looking into their company. I read to stay away from them right now as most of their inventory was tsunami flood damaged motors, and with them being located in Canada it would be real easy for them to fuck over an American buyer. Whew, dodged a potential bullet there! So Im looking around all over the place to find 'the one', and I came across an s13 redtop on :O eBay. I would normally never consider buying something like a motor from ebay, however!, it was being sold by a performance shop (jspecauto.com), it looked super clean, it was located in Virginia, they claimed it only had 54,000 miles on it (no proof to back it up), but the main selling point was the fact that it was the only engine I could find that actually had a compression test video for it. 174, 173, 170, 174......I thought "wow I should probably buy this", so I did. It came out to $2,299 with free shipping, I bought it on a Sunday and it was at my doorstep by that Thursday! It was a little more expensive than the $1750 at Osaka, with $350 residential shipping, but I had peace of mind that if I got a bogus motor I could hop in the 240 with my AK and drive to the shop in a day") .
.
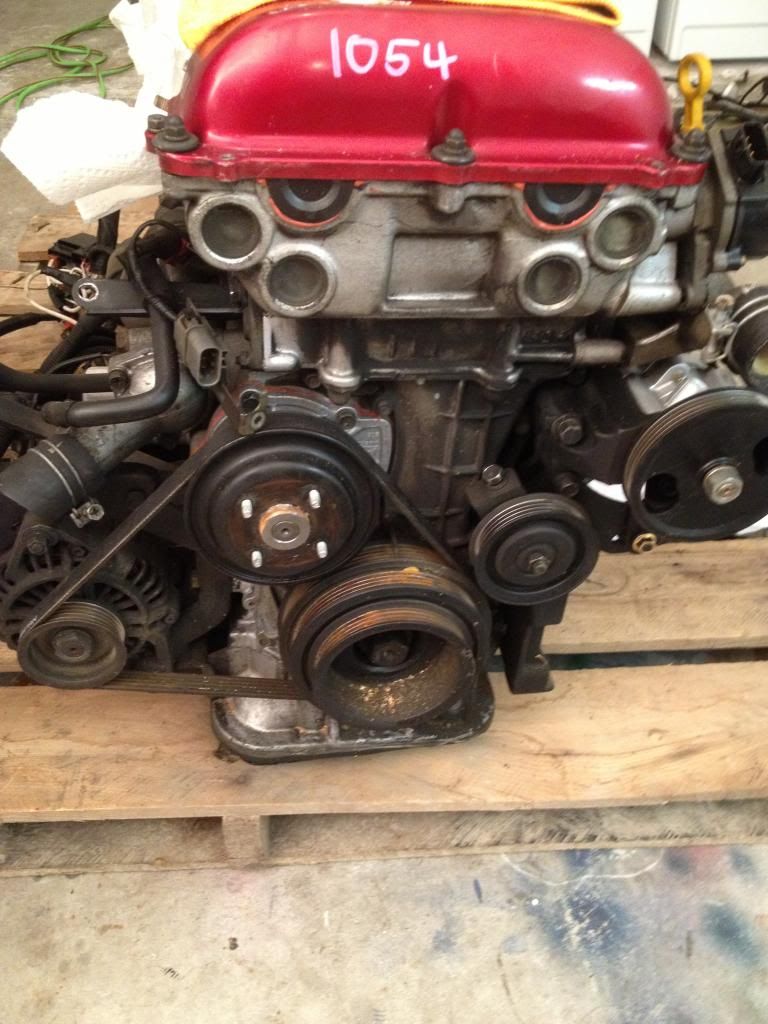
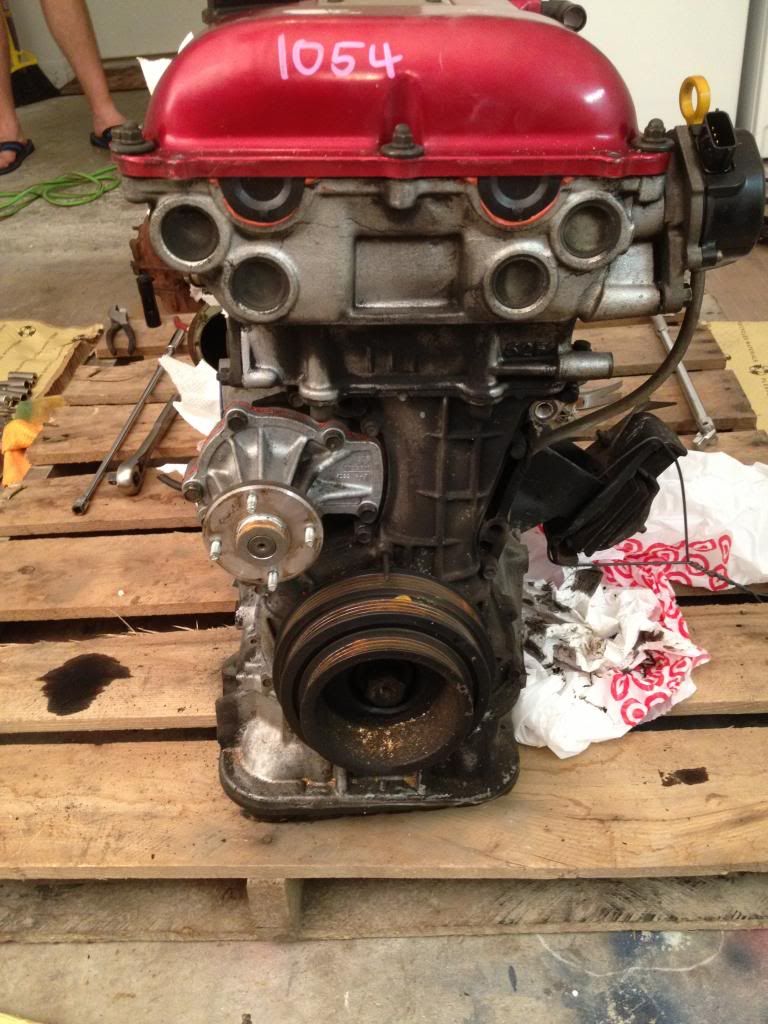
I didnt take any pictures of the motor wrapped up, but I quickly cut off the packaging and snapped these 2 photos:
![Image]()
![Image]()
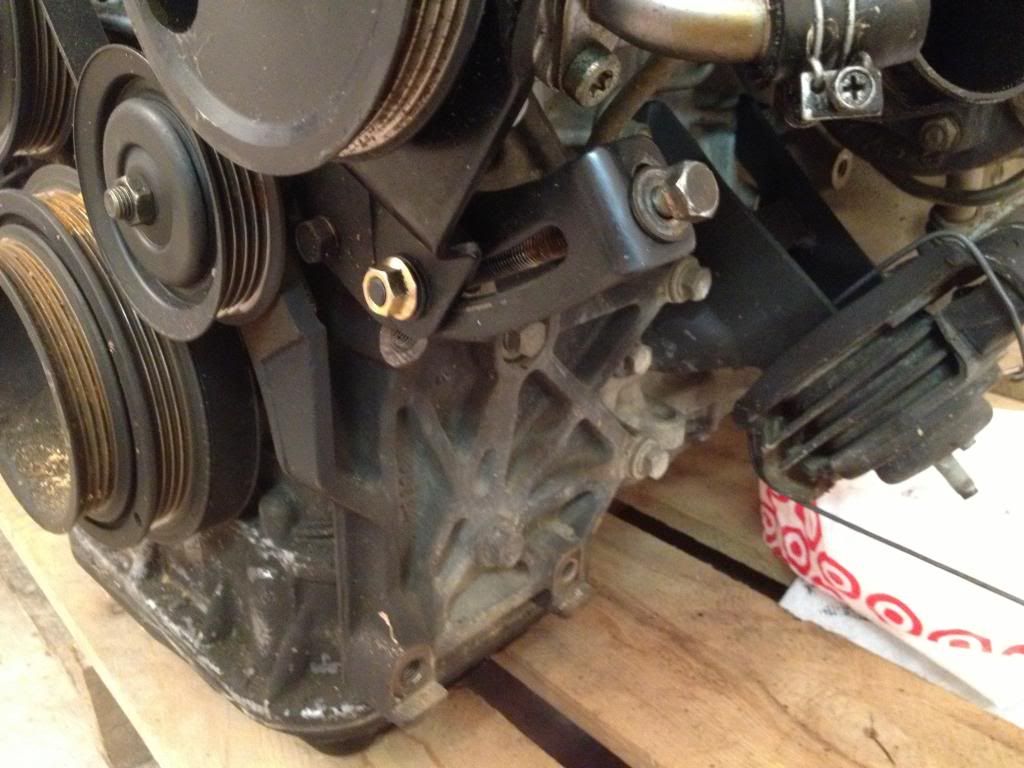
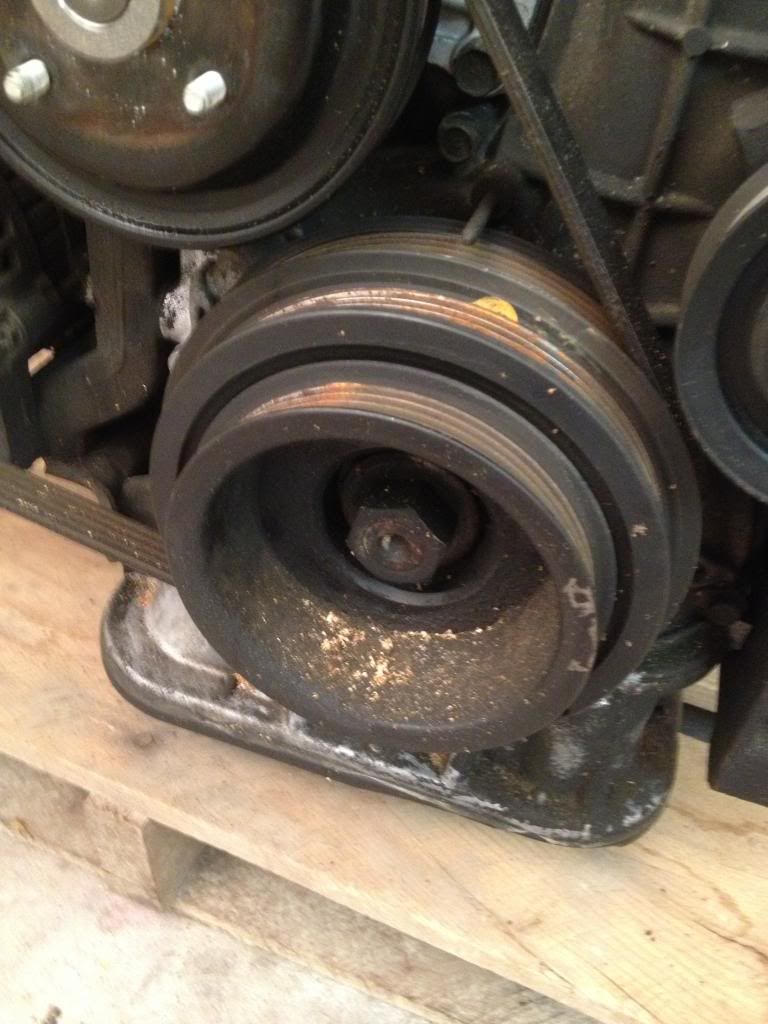
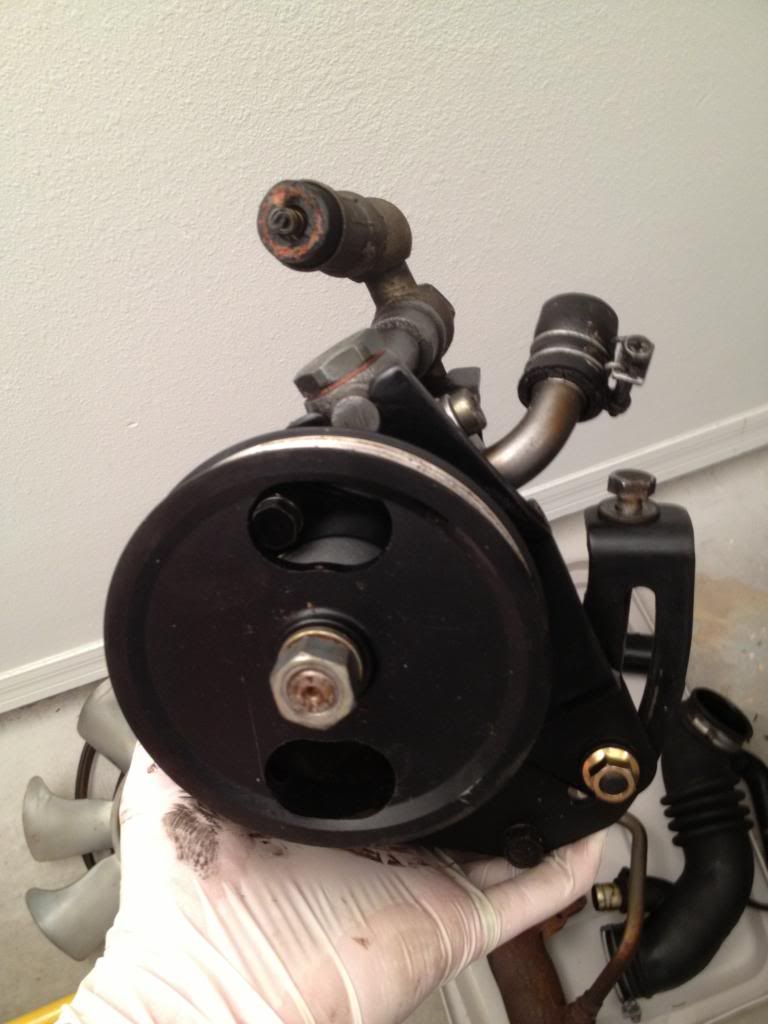
My buddy was over and we decided to just give it a look-over that night. As we started inspecting things, we noticed that there were a lot of parts that looked pretty much brand new. After further inspection, it turns out that just about everything that looked brand new actually had a little dab of green paint...we thought maybe this is how they had marked parts that they had replaced? Who knows...anyways, the parts that had the paint were: injectors, throttle body and cable assembly, idle air control valve, and the throttle positioning sensor. Some other parts looked brand new: water pump, the belts, and the power steering pump. I might be forgetting one or two things, this was almost a month ago now.
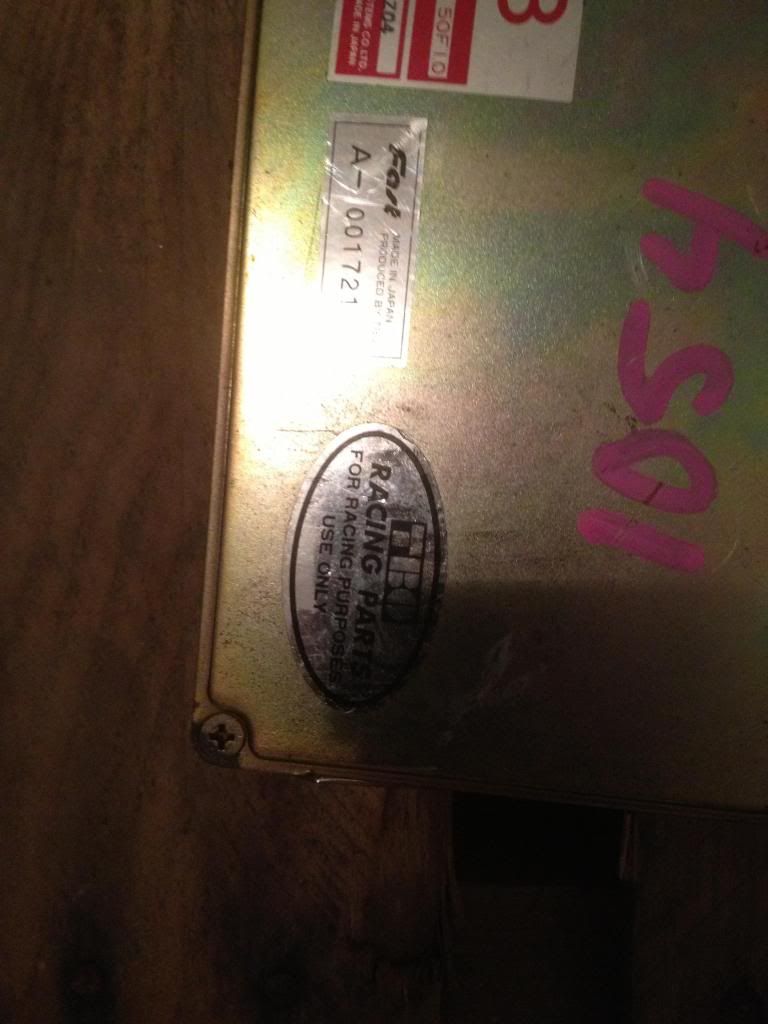
One thing that caught our eye, that Im still a little concerned about today, was the ECU. It had 2 stickers on the top, "TBO Racing Parts For Racing Purposes Use Only", and "FAST Made in Japan". There were also "fast" stickers along the sides, so that if the ECU was opened up you would have to break the stickers. I attempted looking these companies up, but I found very little information. All I could find about TBO was that they made aero parts, which wouldnt make any sense why there would be a TBO sticker on the ECU. Secondly, the information for FAST was alaso very limited -- I found that it stands for "Fuel Air Spark Timing" and apparently was a tuning company in Japan? Im guessing that this ECU is chipped, and Im really hoping that the tune on here isnt funky...and that it actually runs for now
![Image]()
Anyways, this thread is going to be pretty picture intensive. I took all of the pictures with my phone, its an iphone 4s, so they might not be the best of quality but I dont have a digital camera. I might not list a description for every picture, so if you have any questions just ask.
Ill start with the parts that Ive been ordering:
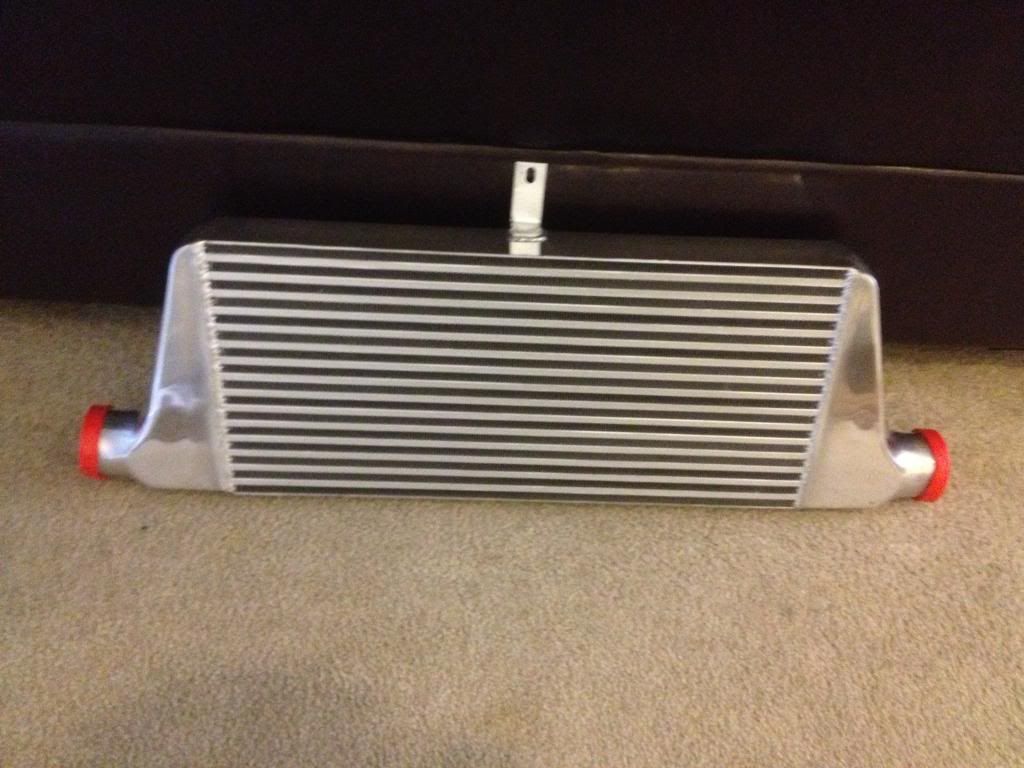
My first order came in: (enjukuracing)
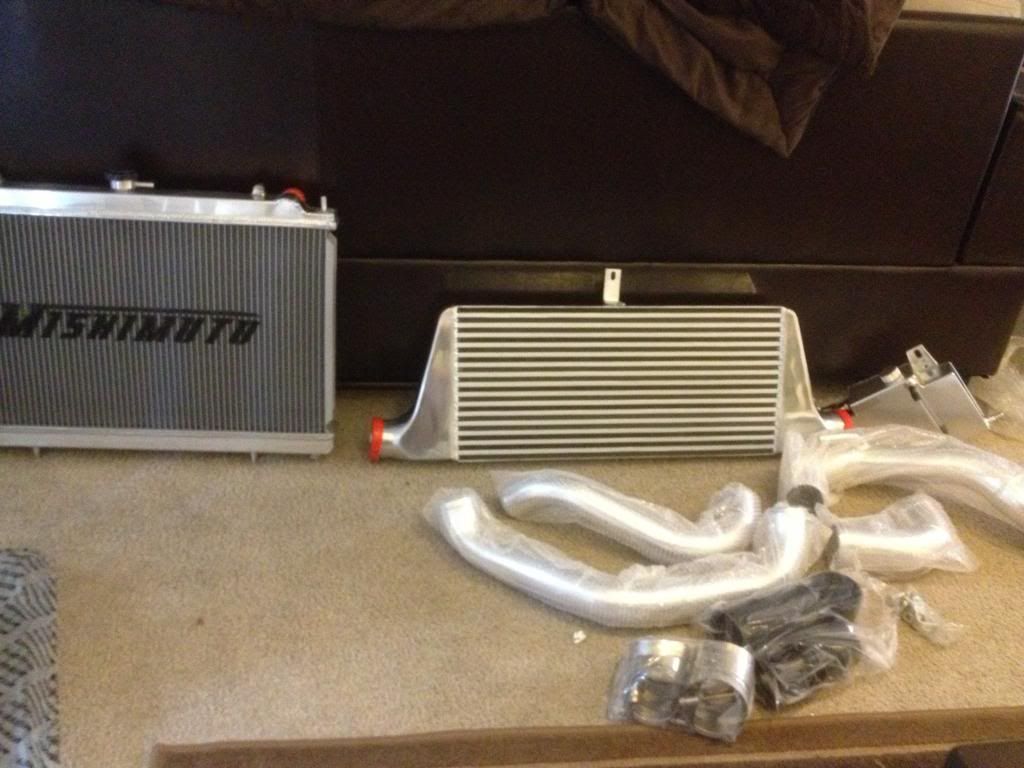
Isis m-spec FMIC with piping pre-flanged for a Greddy BOV. I heard that this front mount is identical to the Greddy M-spec.
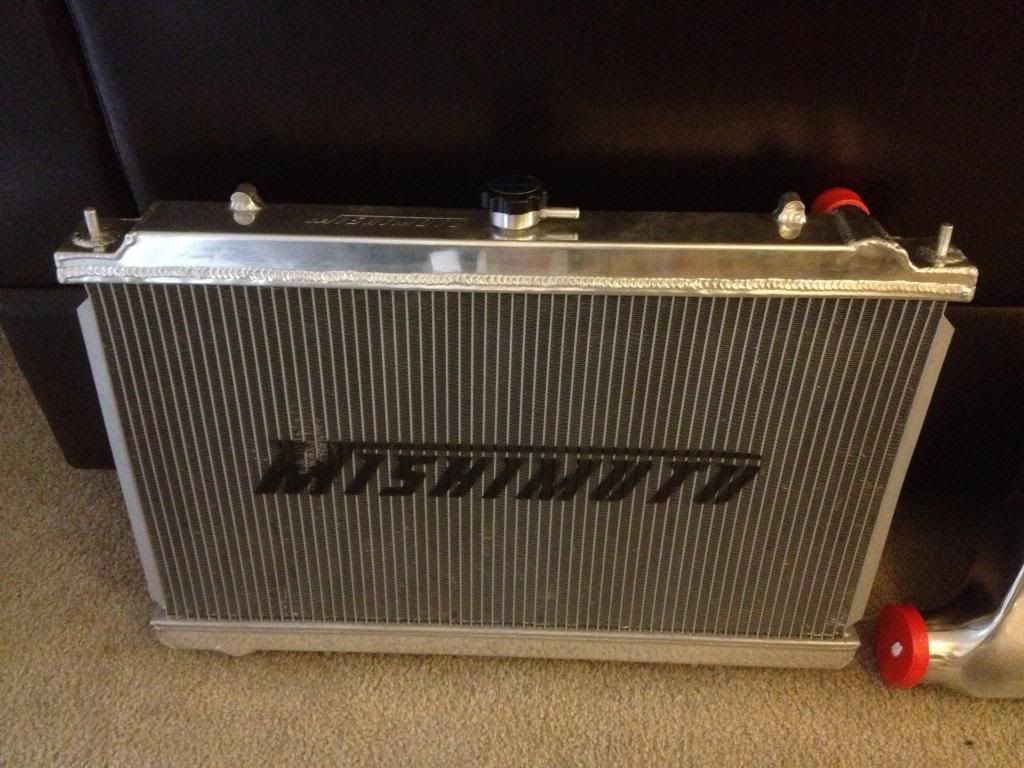
Mishimoto aluminum radiator
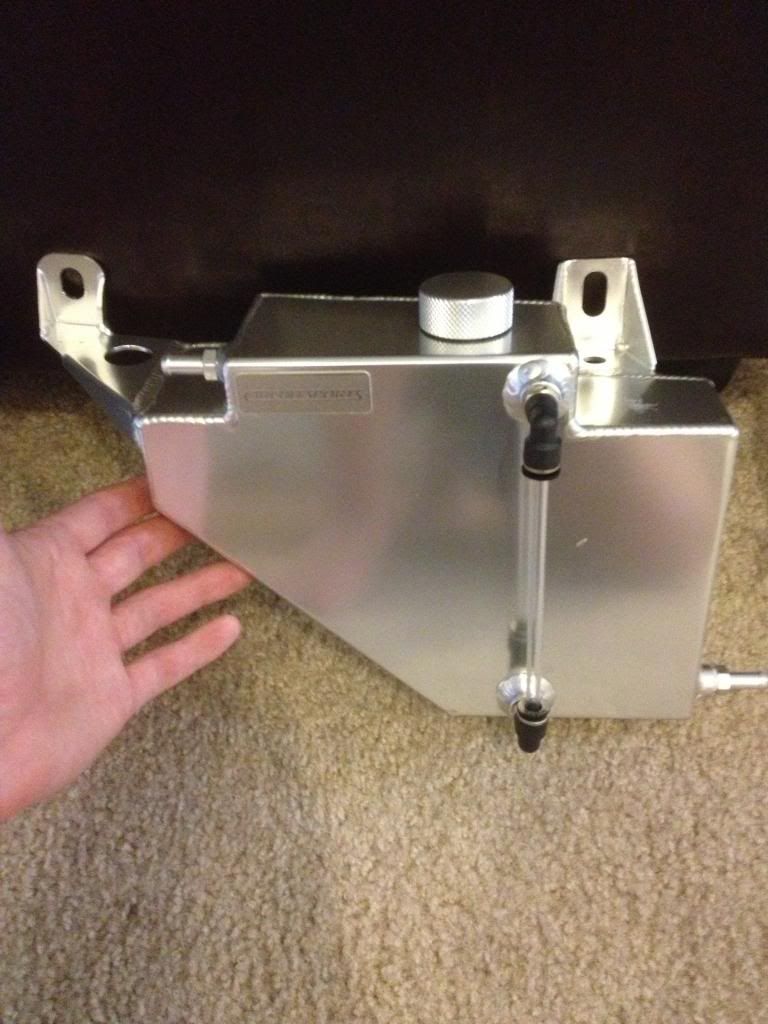
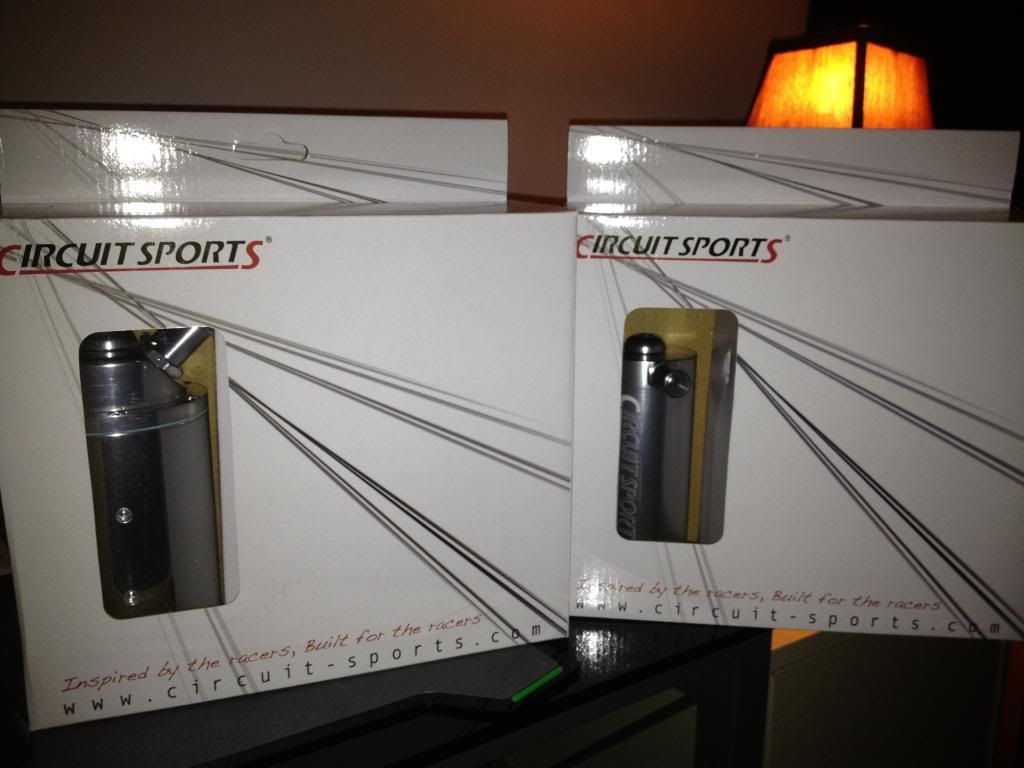
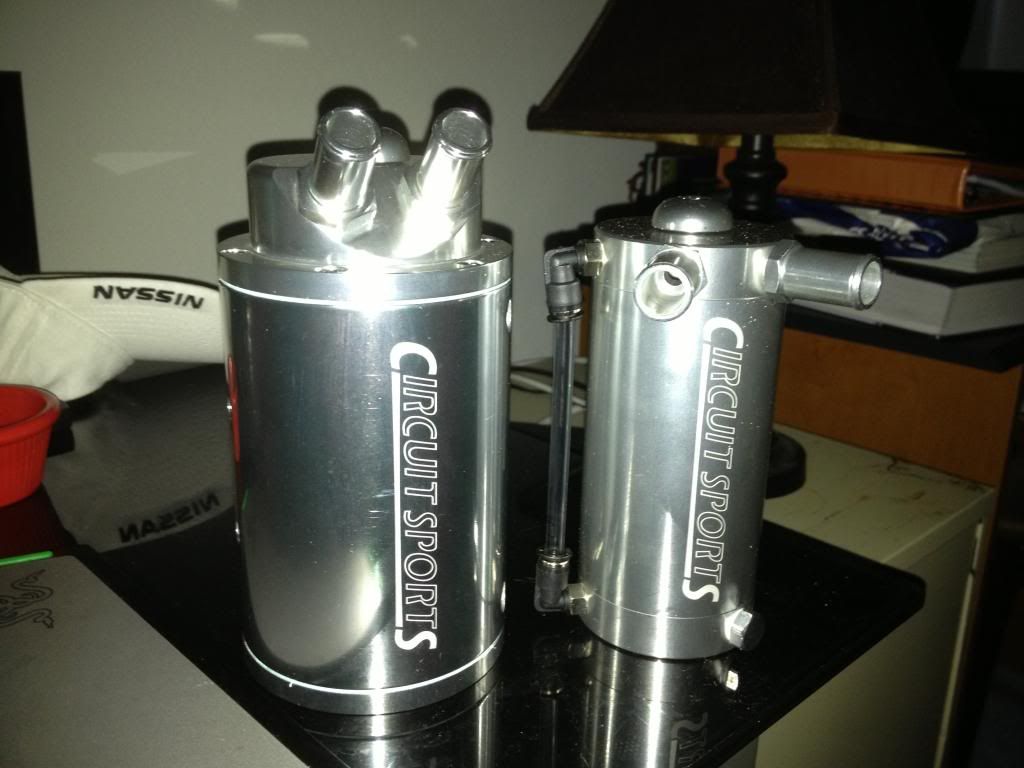
Circuit sports metal coolant overflow tank (my plastic one is all broken and the plastic was flaking into the coolant)
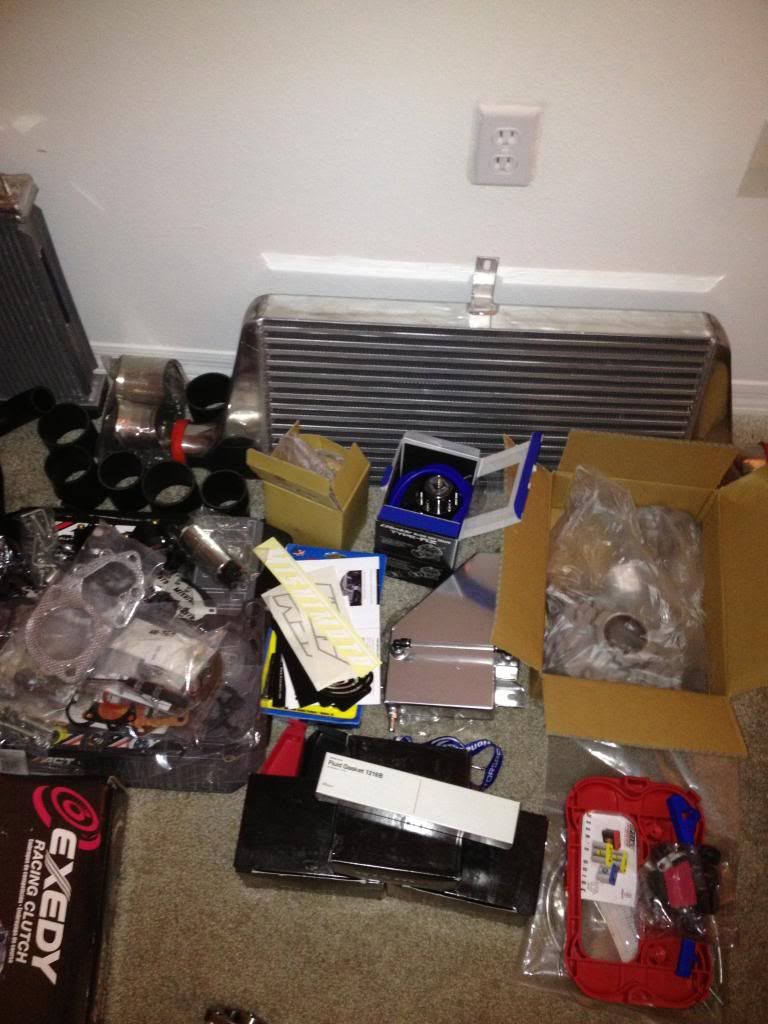
![Image]()
![Image]()
![Image]()
![Image]()
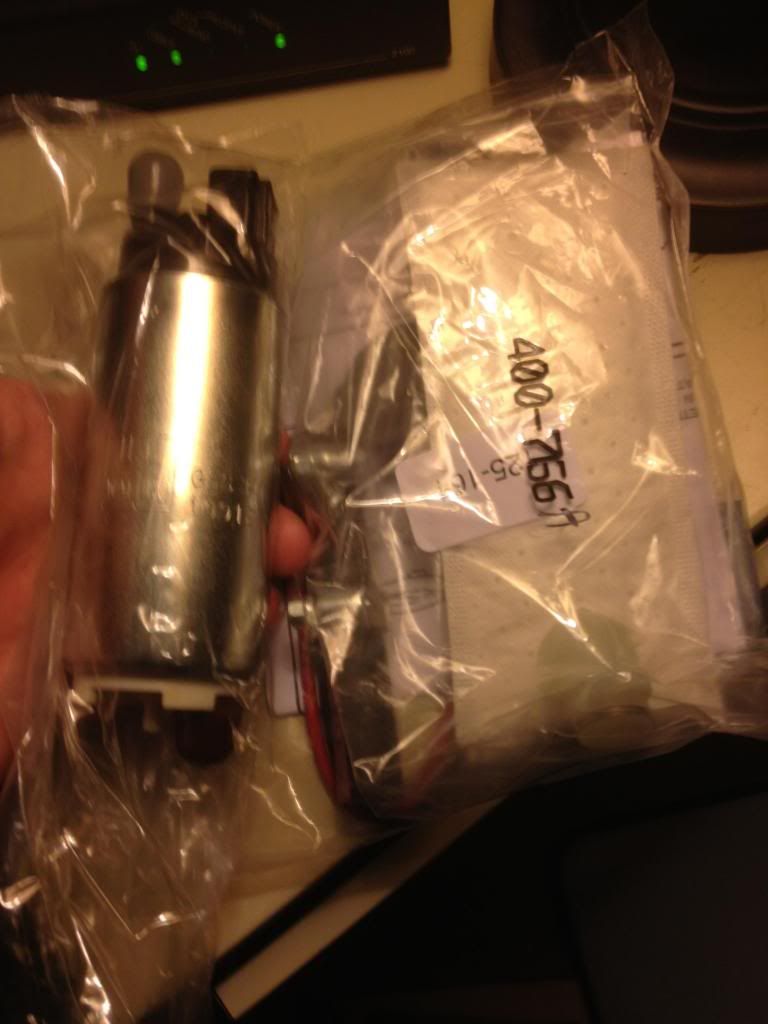
2nd thing to come in was my walbro 255 high pressure fuel pump
![Image]()
3rd order came with some exciting parts: (phase2motortrend)
OEM water pump (didnt snap a picture)
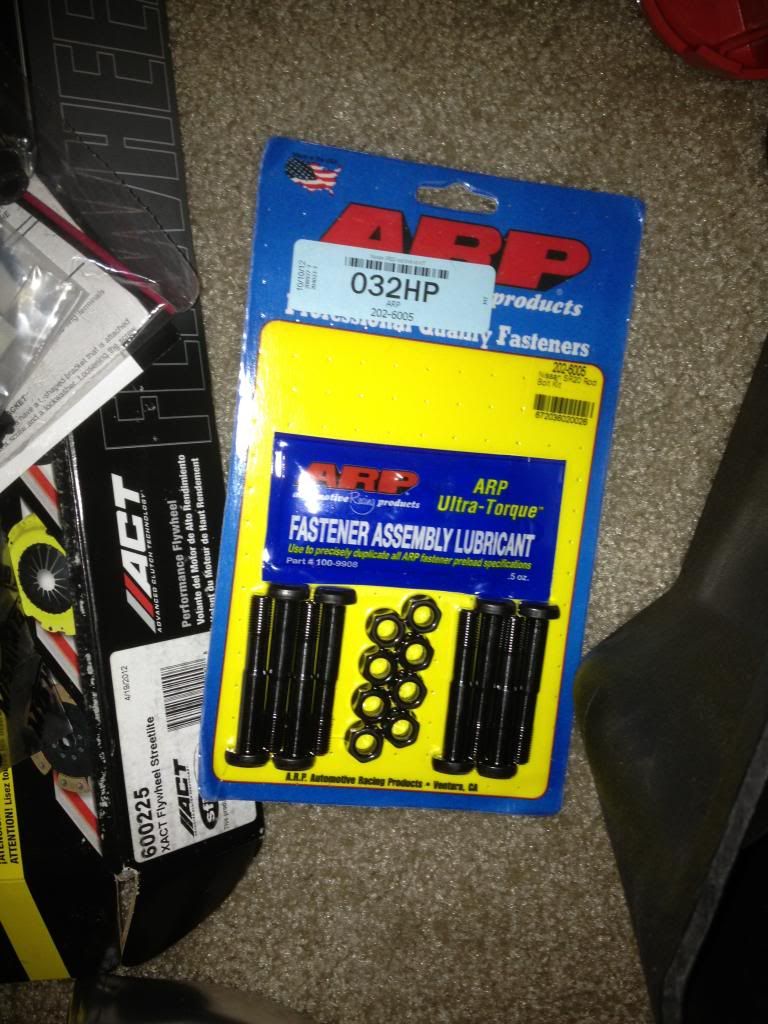
ARP head studs (also didnt take a picture)
Circuit Sports 3" downpipe with a flex section
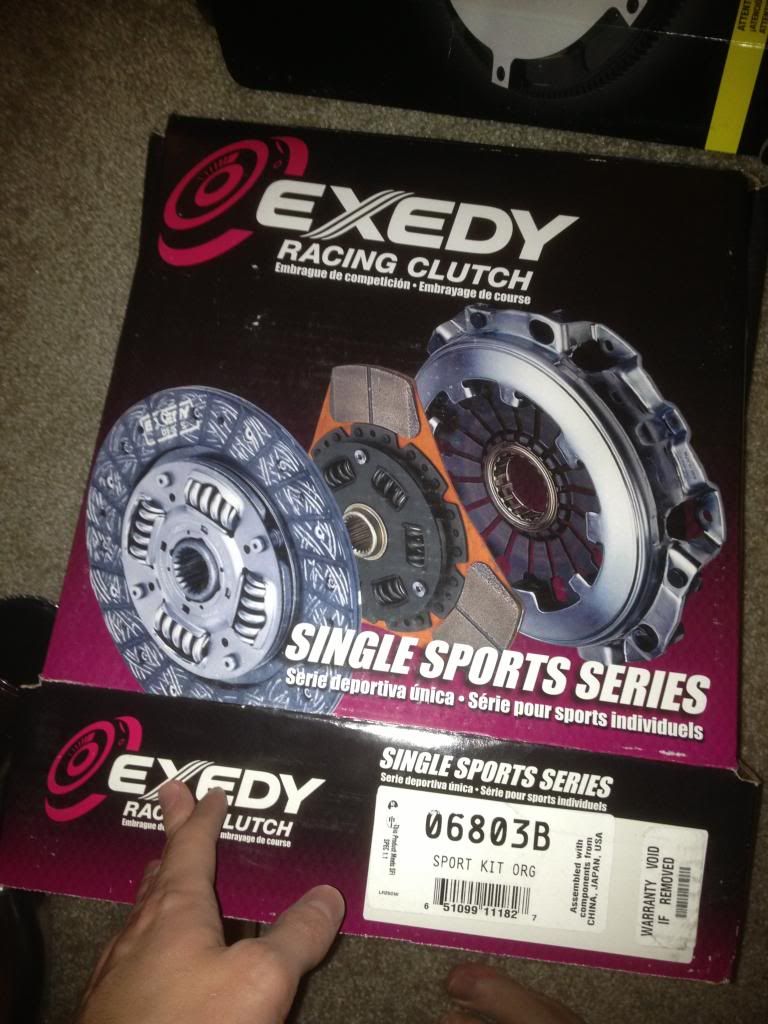
Exedy stage 1 organic clutch
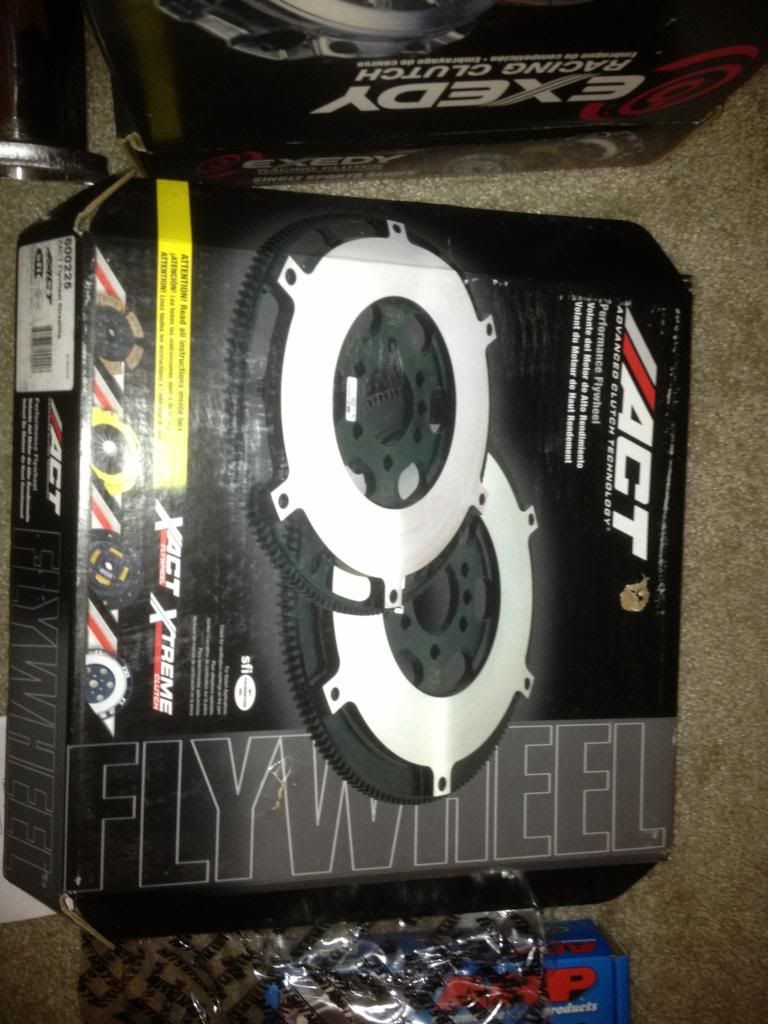
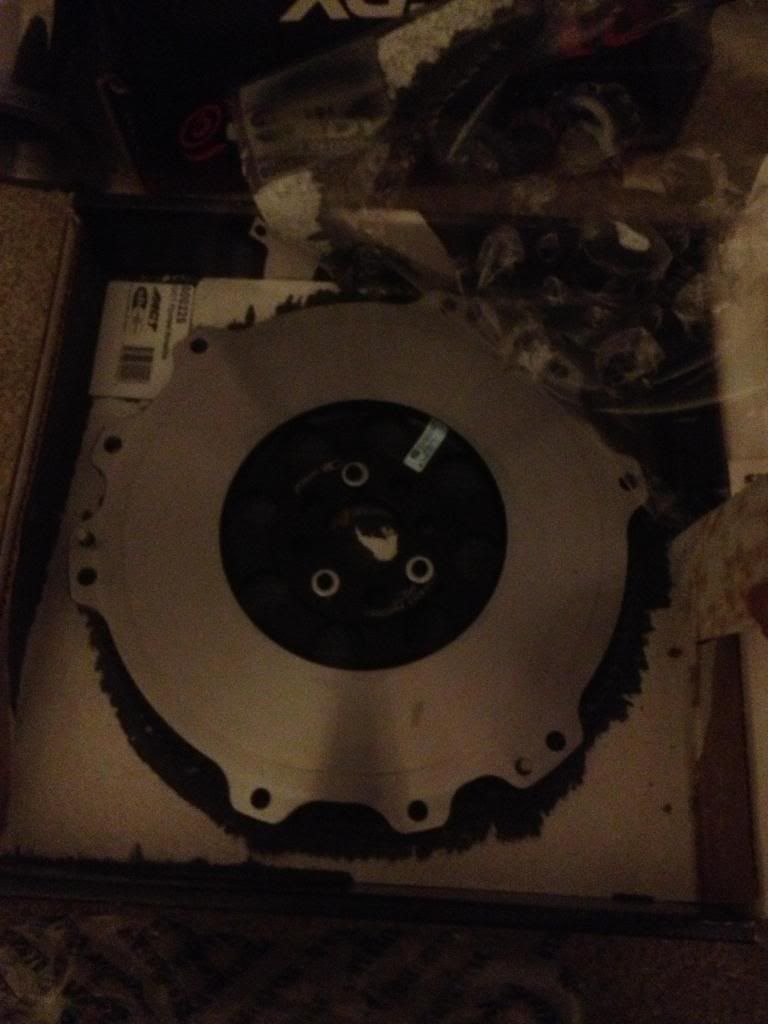
ACT streetlite flywheel
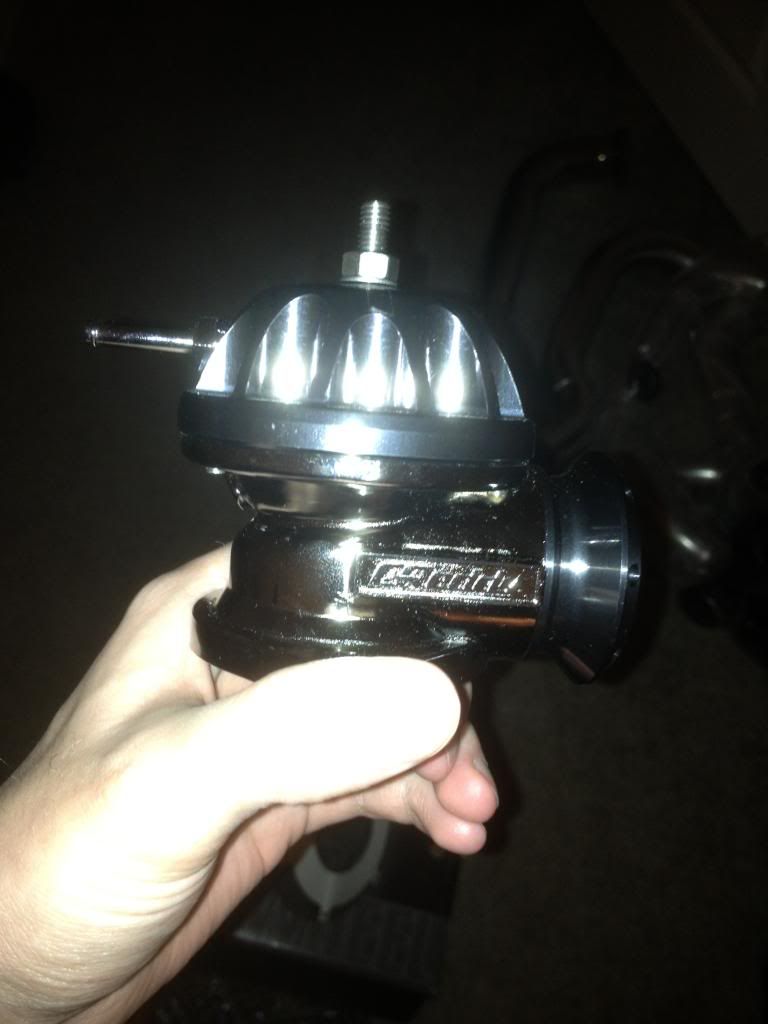
Greddy type RZ BOV
![Image]()
![Image]()
![Image]()
![Image]()
![Image]()
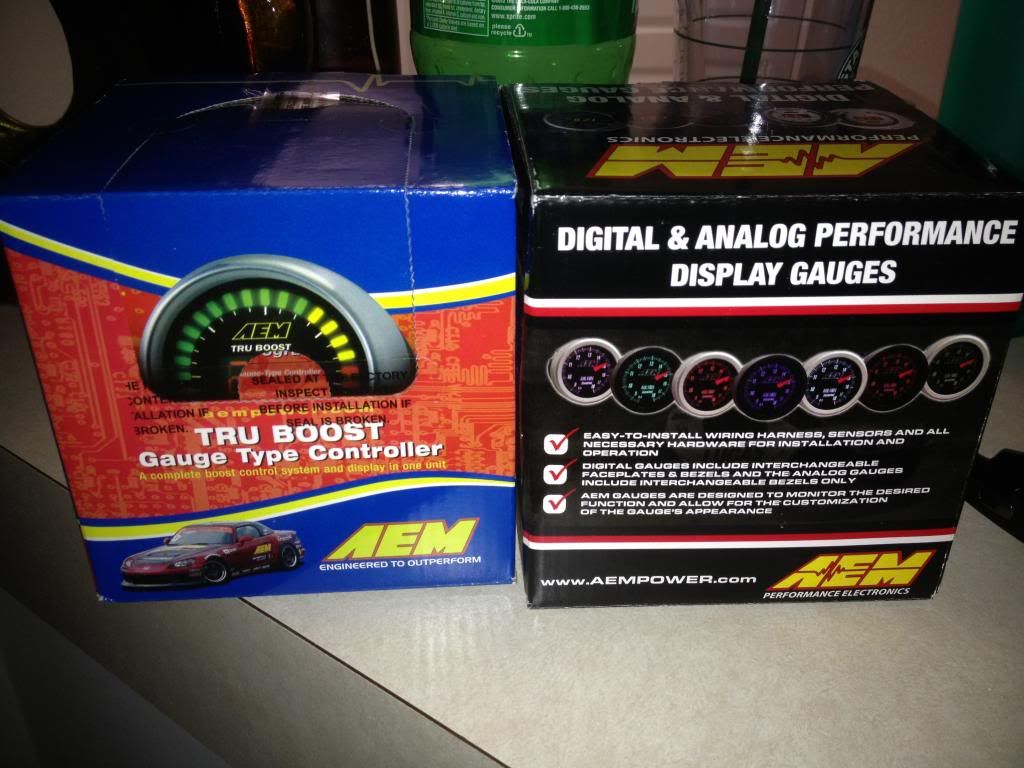
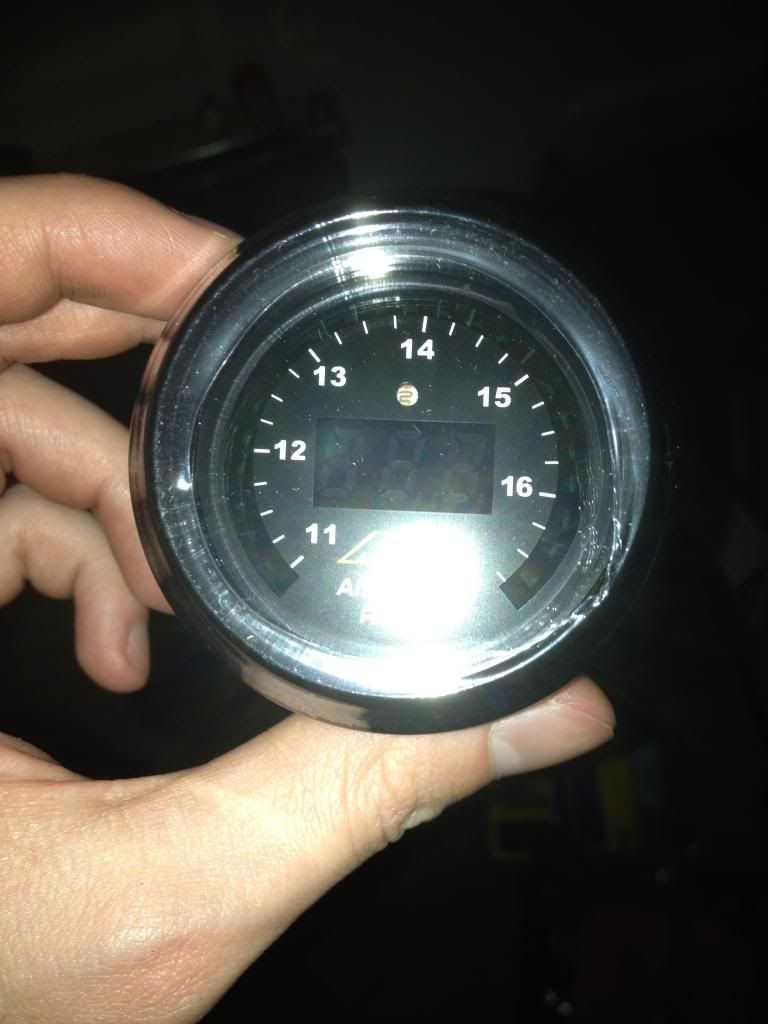
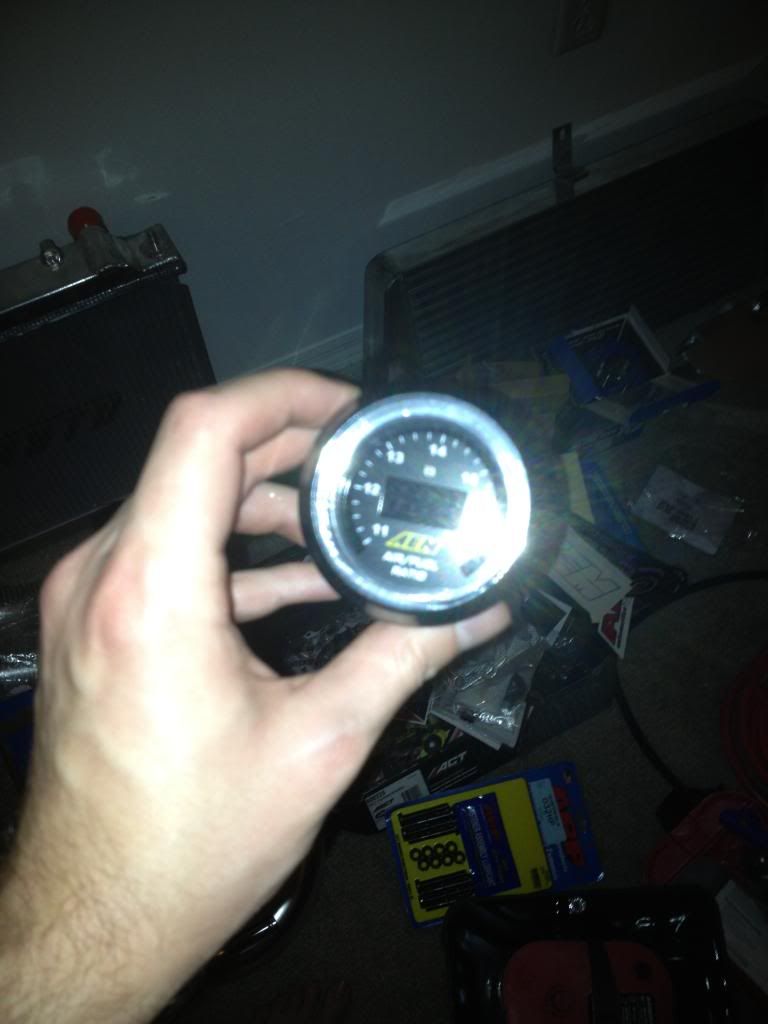
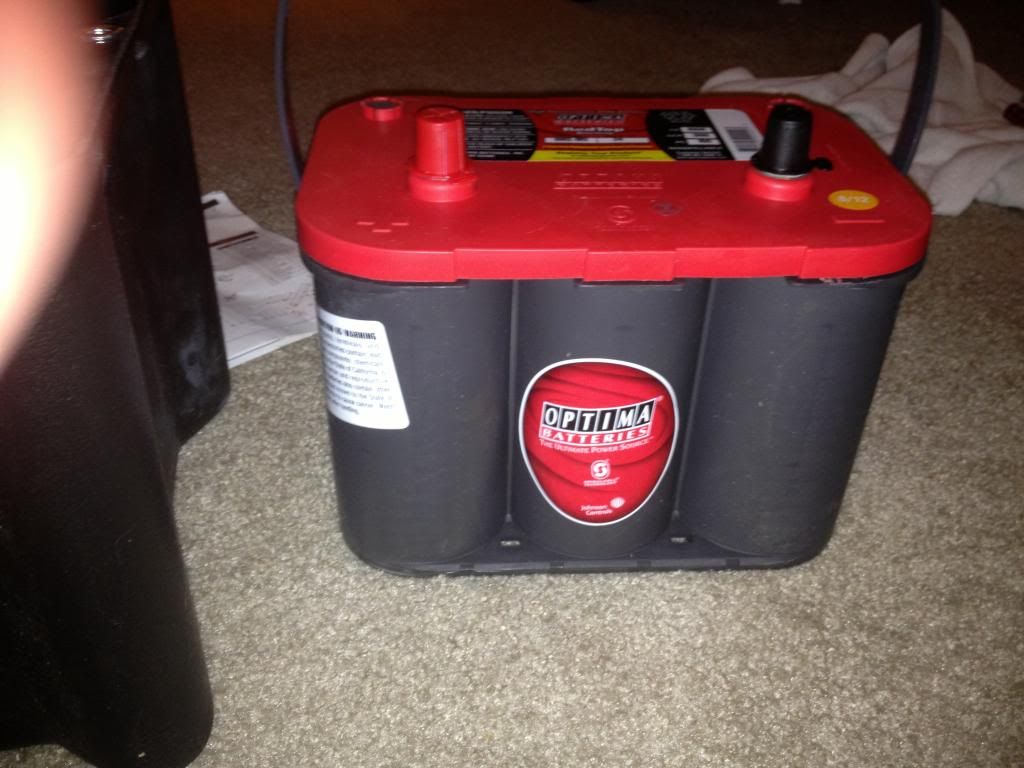
Then I received order 4 and 5 on the same day so Ill lump them all together: (amazon and FRsport)
AEM Uego A/F gauge
AEM Truboost b00st controller/gauge
Optima redtop battery
ARP rod bolts
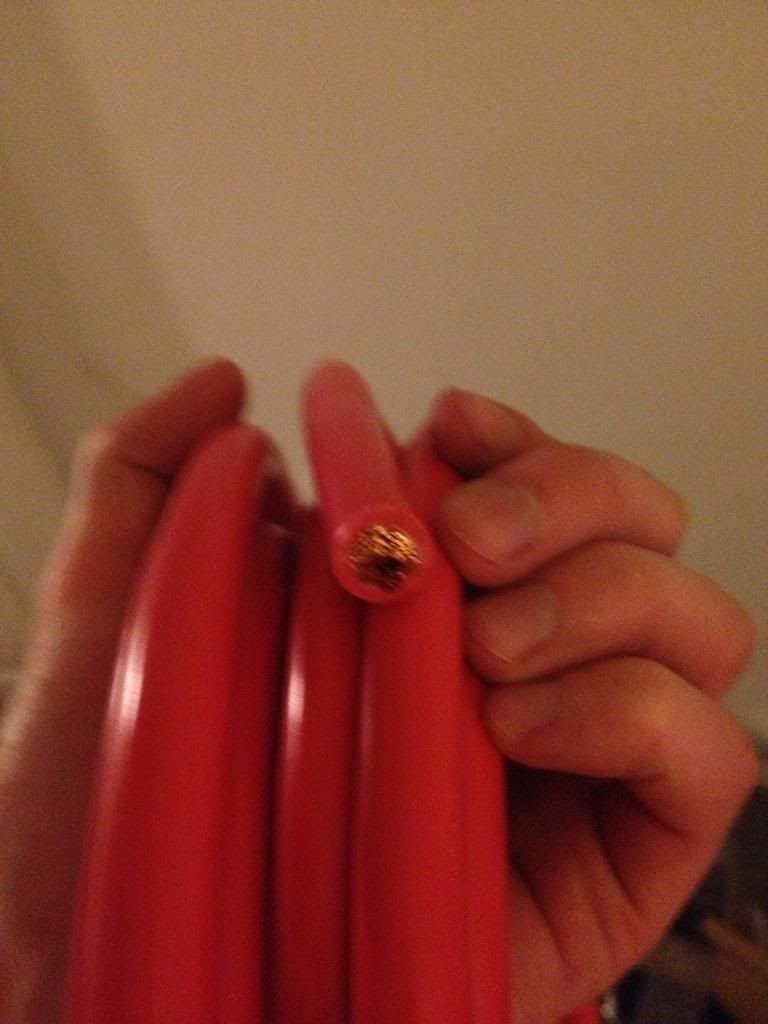
Summit racing battery relocation kit (I guess I only took a picture of the power cable..)
![Image]()
![Image]()
![Image]()
![Image]()
![Image]()
![Image]()
I had another order from Enjuku, however Ive only received 1 part so far:
Circuit sports 3" turbo elbow/up-pipe
Not yet shipped from this order:
steering wheel gauge pod
s14 to s13 A/C conversion bracket
OEM timing chain
NGK iridiums
belts
![Image]()
order 7 was actually the very first order I placed...and one of the last to be delivered (z1motorsports)
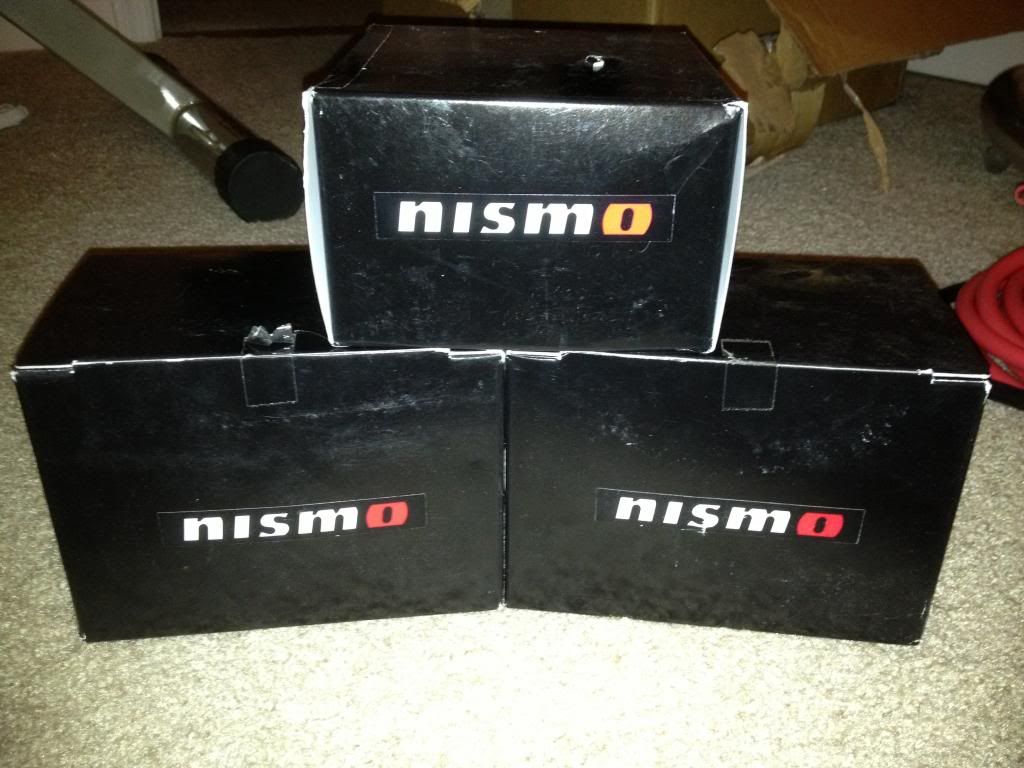
Nismo motor/tranny mounts
z1 silicone radiator hoses
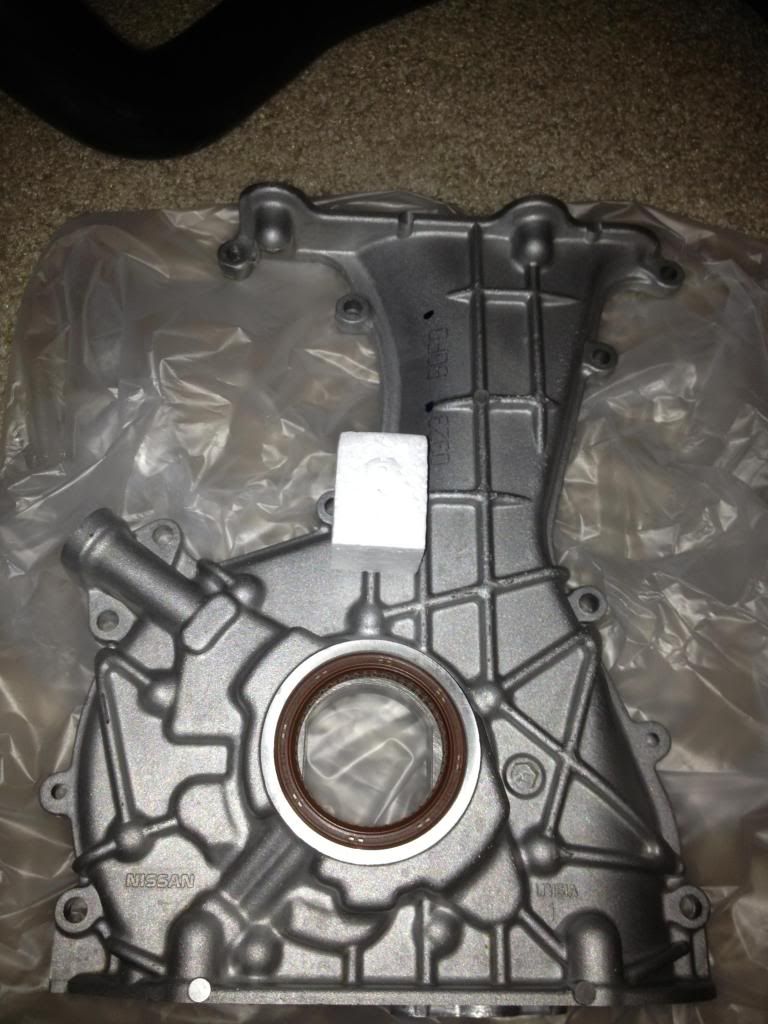
OEM oil pump assembly
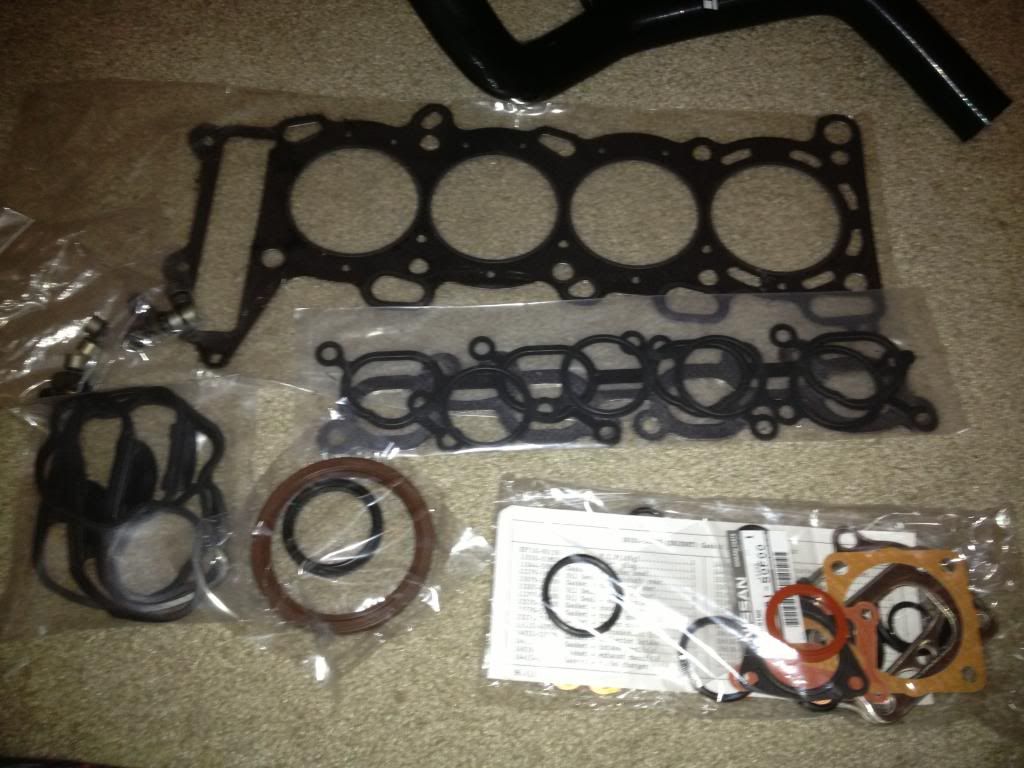
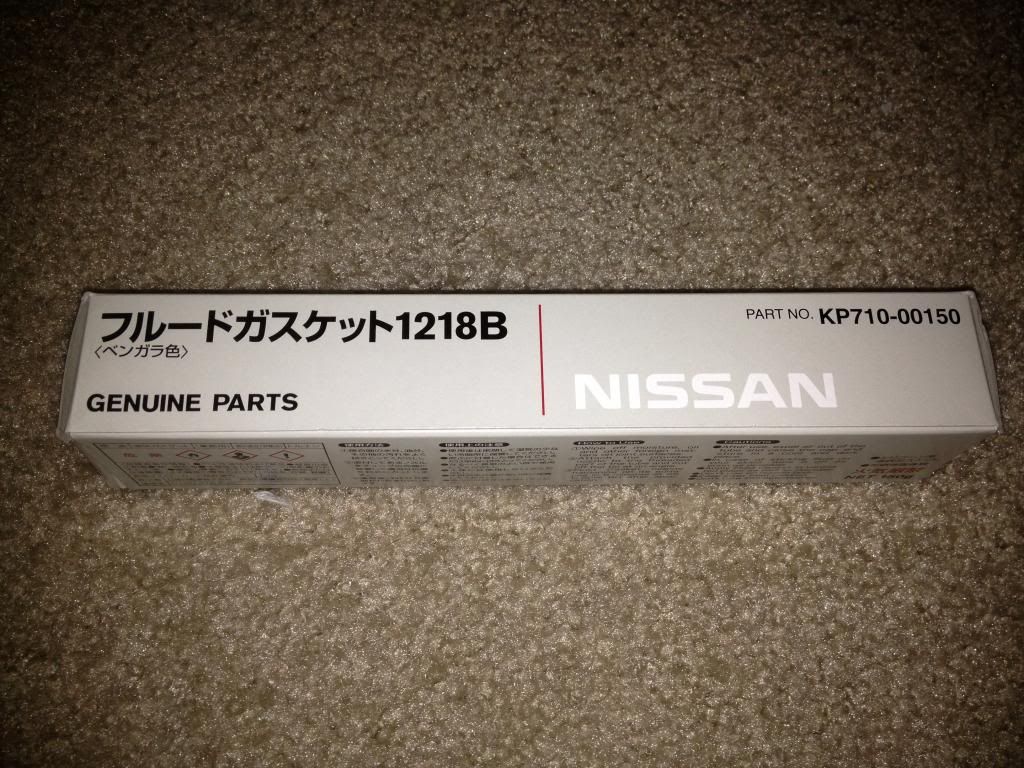
s13 redtop SR20 gasket kit
![Image]()
![Image]()
![Image]()
![Image]()
![Image]()
Also from order 7, but directly from GReddy:
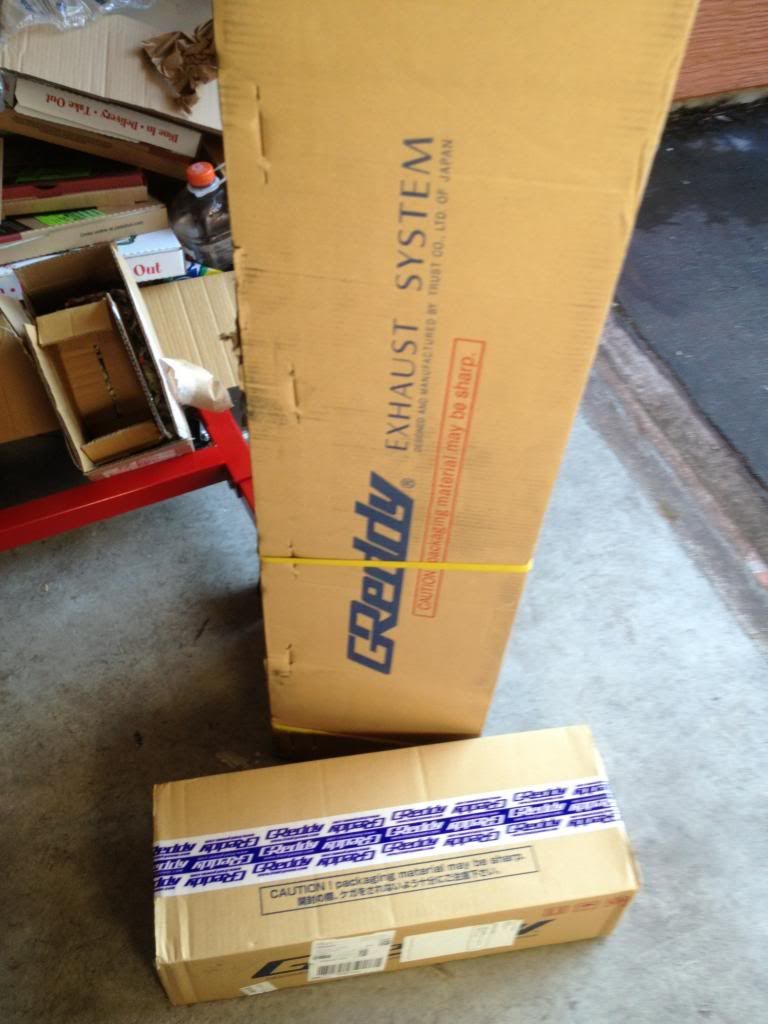
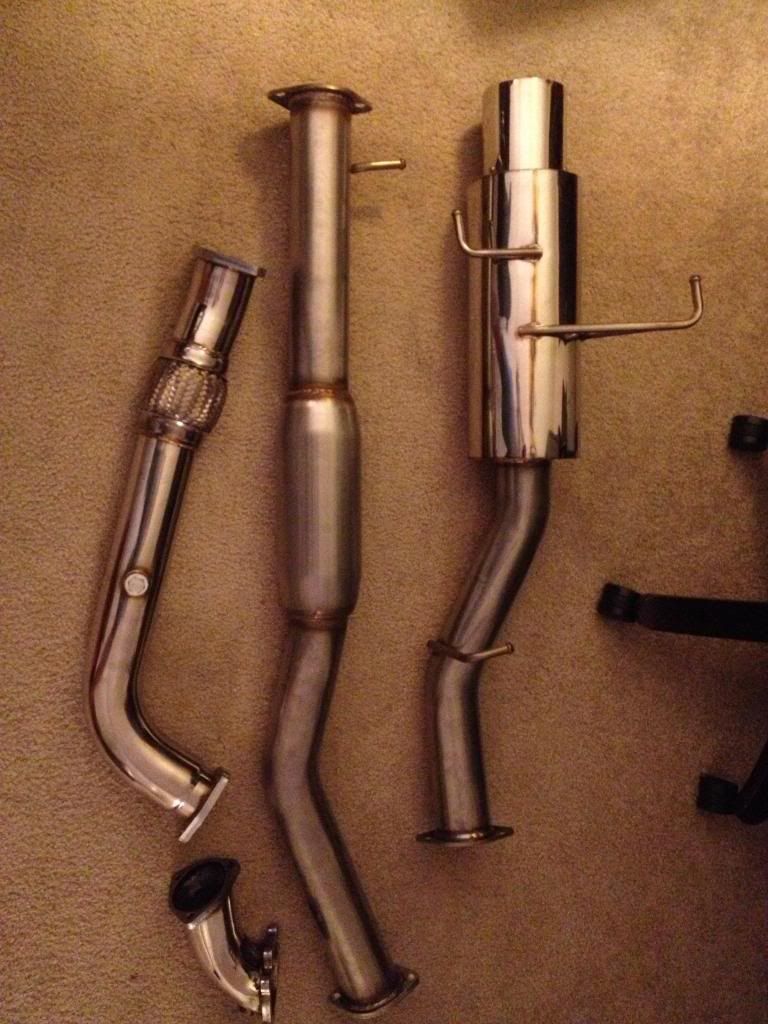
Greddy type RS 3" exhaust (I really really really wanted the TI-C, however, it was discontinued a year ago. I called just about every performance shop I could find and NO ONE had one left. I was told that the RS is the exact same exhaust, just minus the titanium / burnt tip.)
Greddy oversized oil pan (I guess I didnt take a picture of this..)
![Image]()
![Image]()
![Image]()
Order 8 was from FRsport again,
Circuitsports 480cc oil catch can
Circuitsports 250cc oil catch can
You can just call me TwoCan Sam!! My buddy has a pretty good idea for running these dual catch cans, more on this later
![Image]()
![Image]()
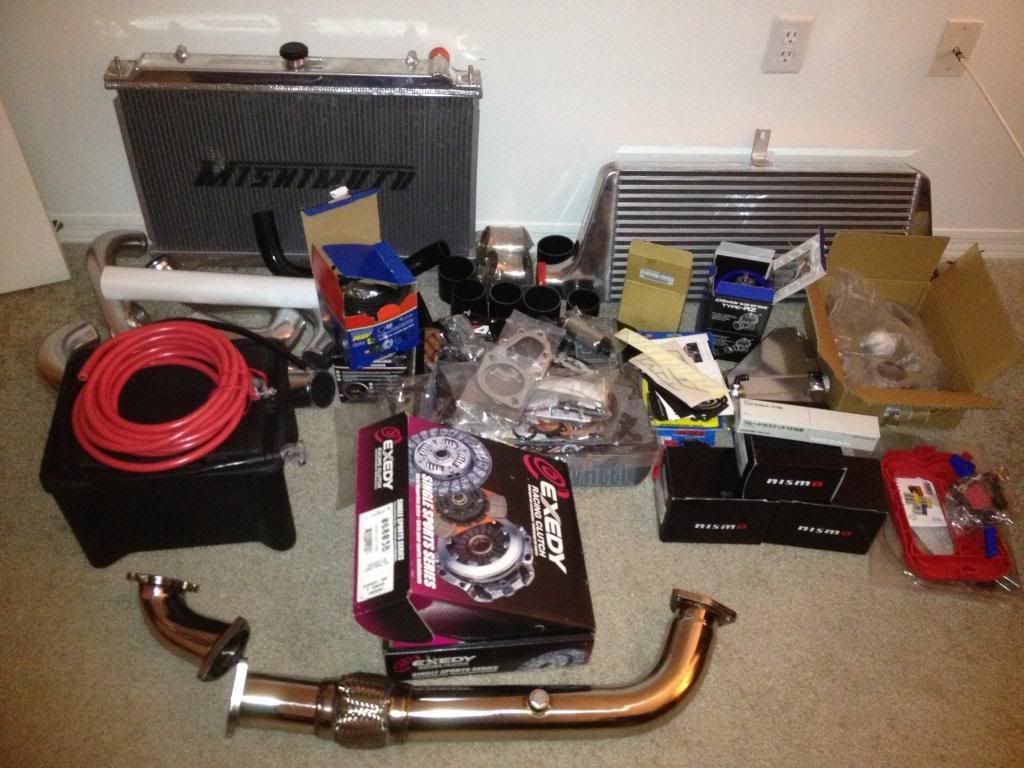
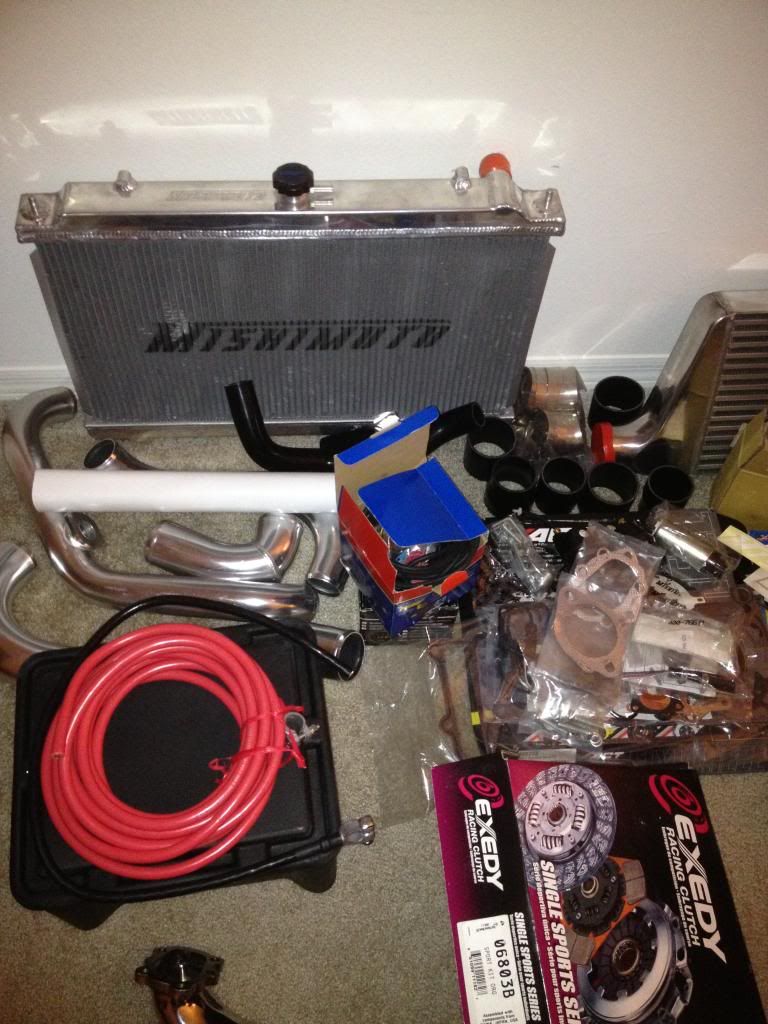
Here's the pile of parts that has been slowly growing in my 2nd bedroom. Coming home every day brings such mixed feelings, Im happy to see these and know that it will be awesome one day soon, but its also depressing looking at so much money just sitting there that I cant do anything with yet.
![Image]()
![Image]()
![Image]()
So thats about it for parts for now, if anyone has any comments or suggestions please let me know. As a side note, although these circuitsports items are made in china, the quality is far greater than expected. The welds on these things are absolutely sick as well, someone definitely took their time crafting this stuff.
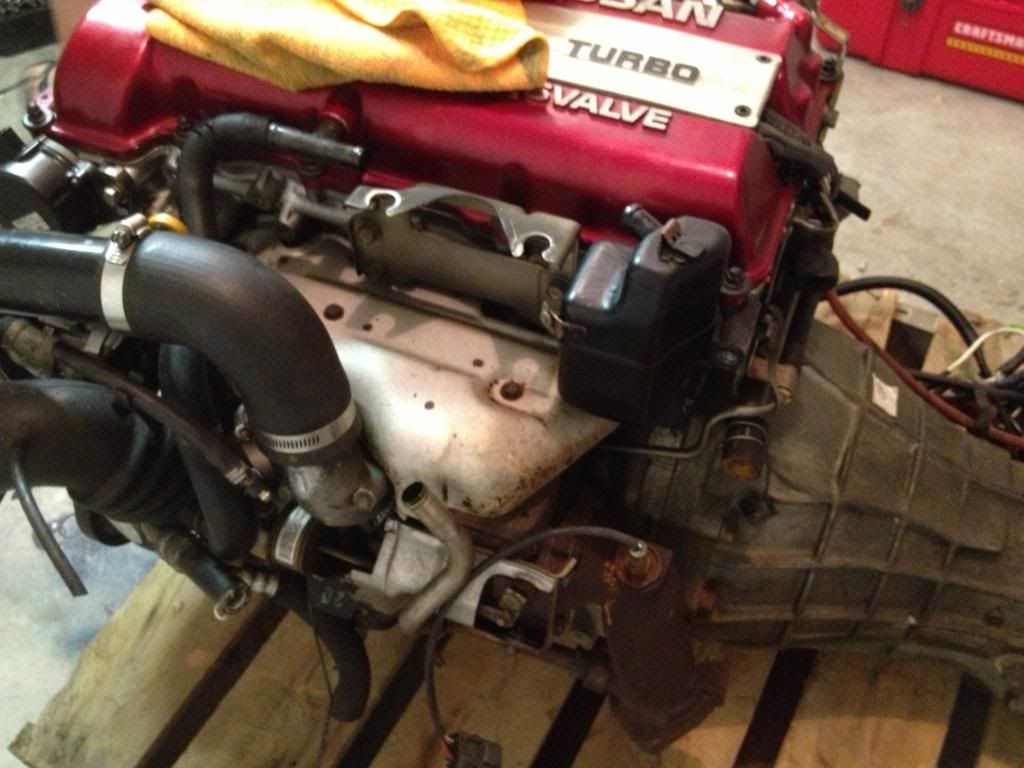
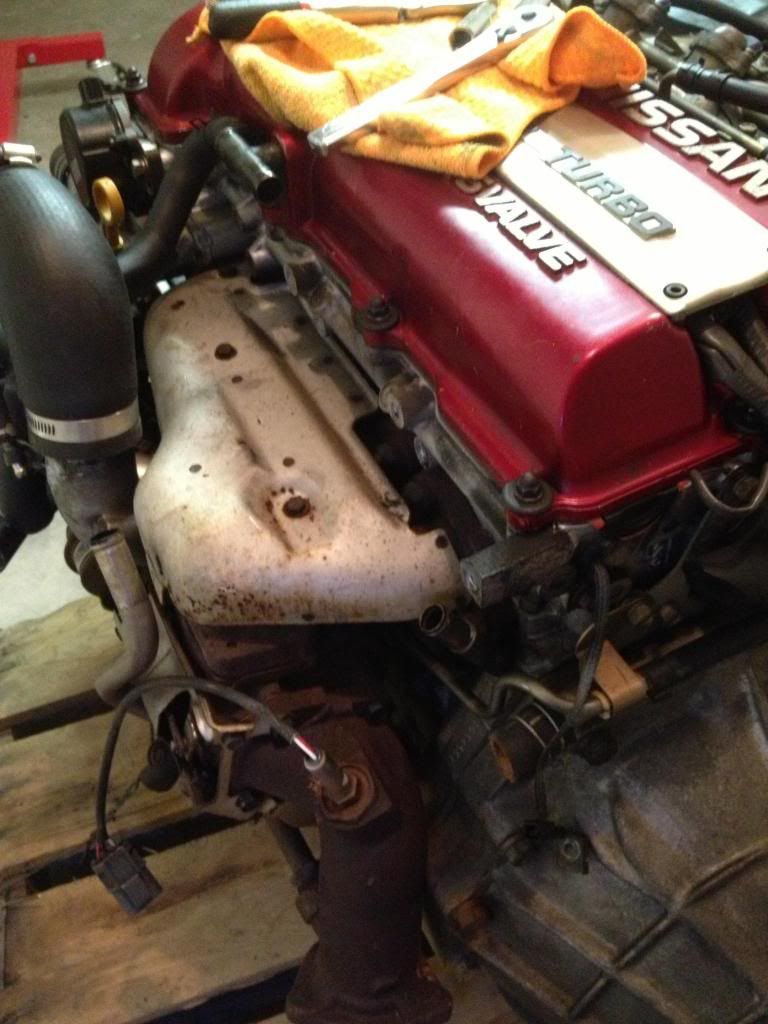
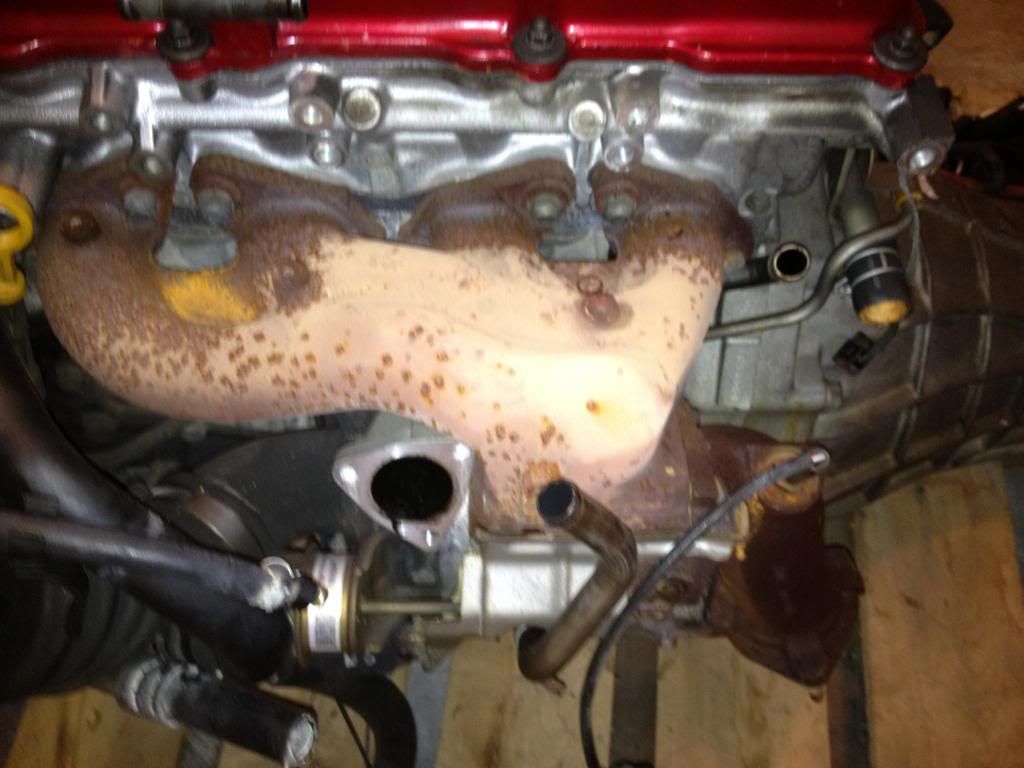
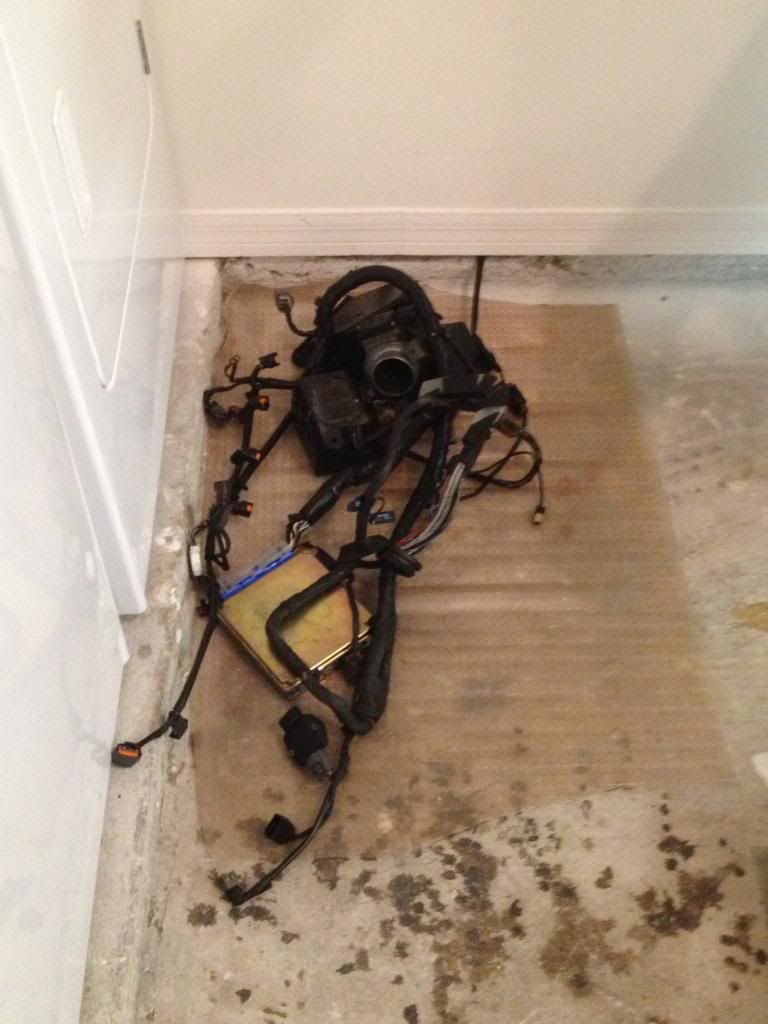
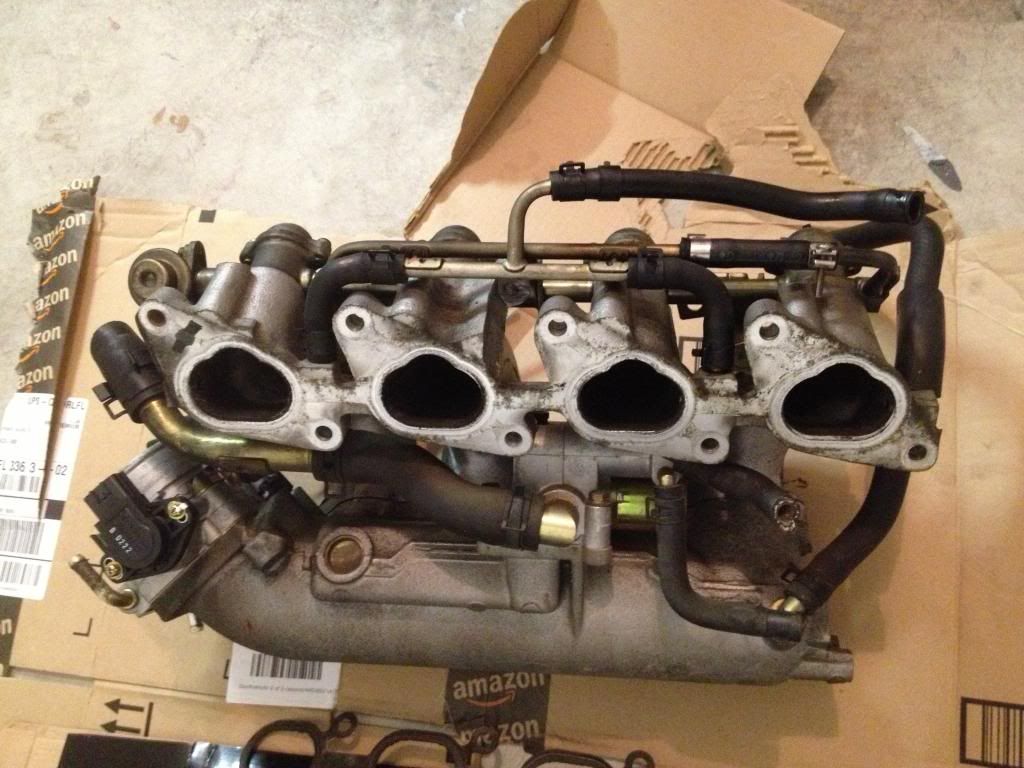
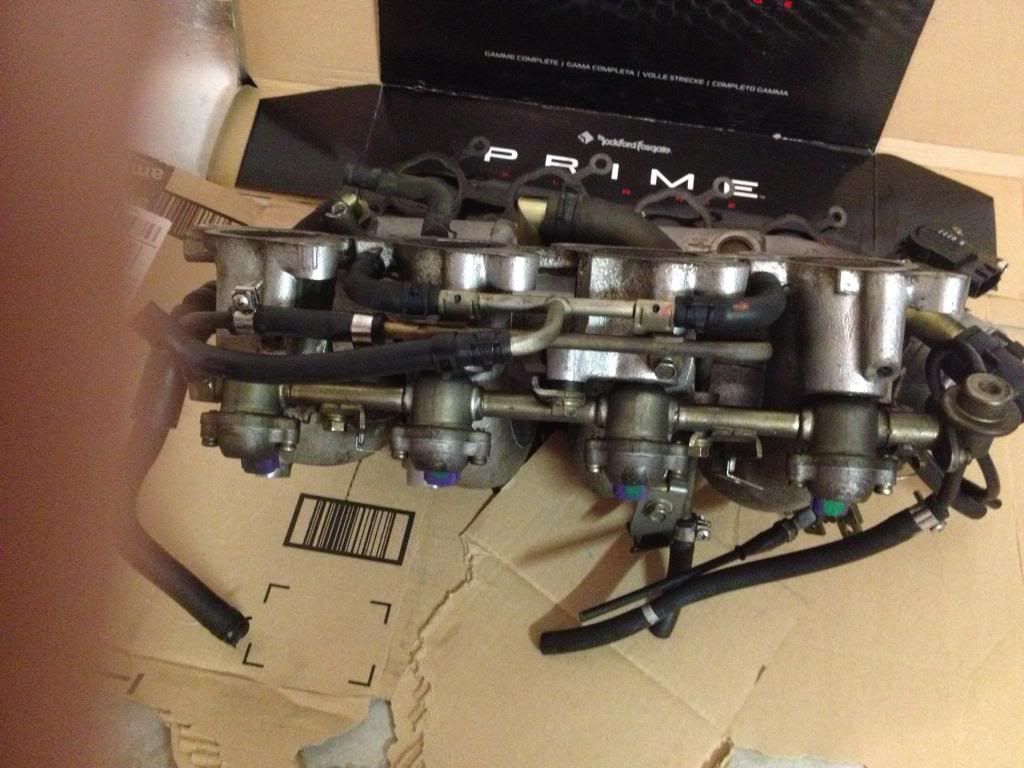
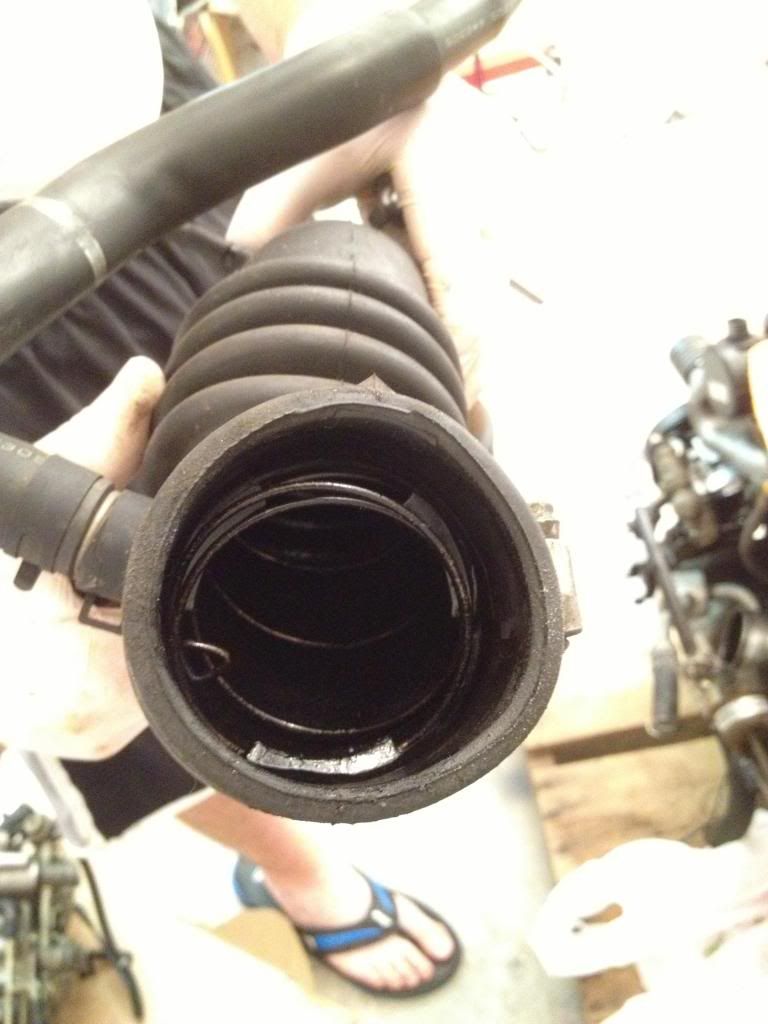
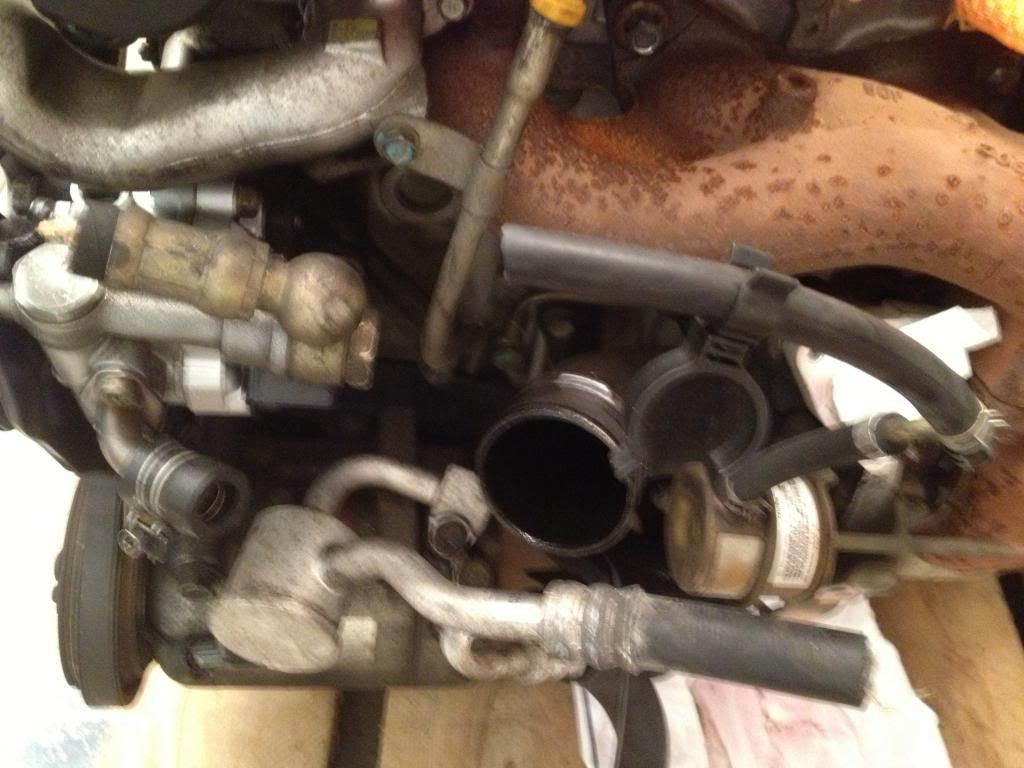
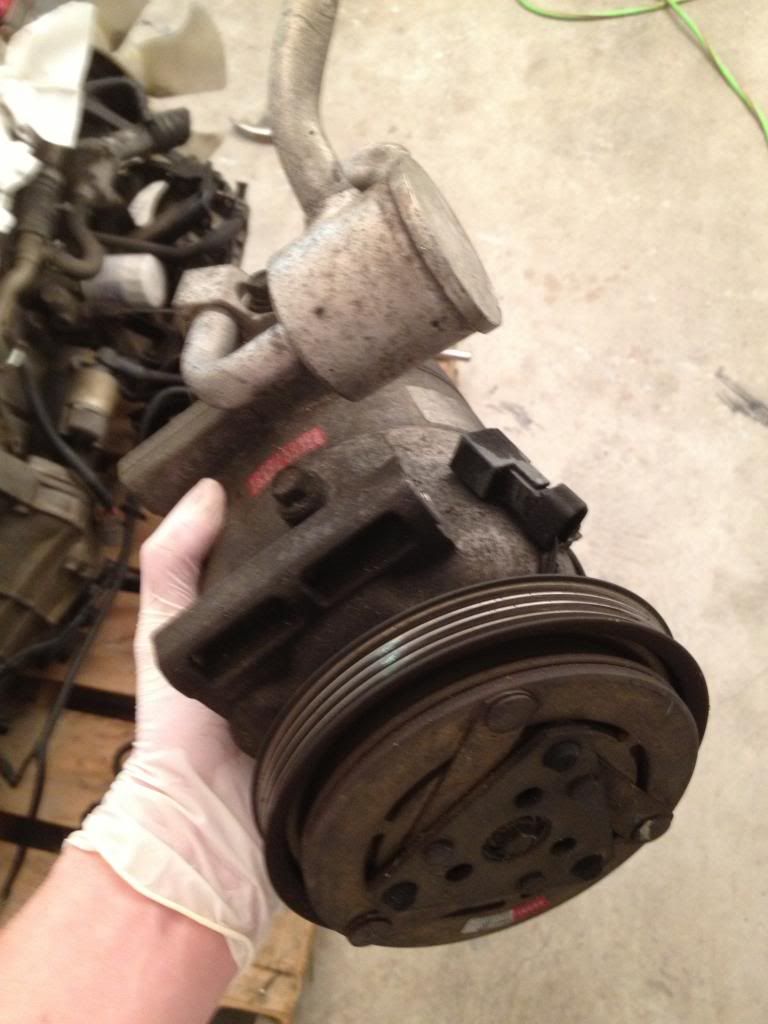
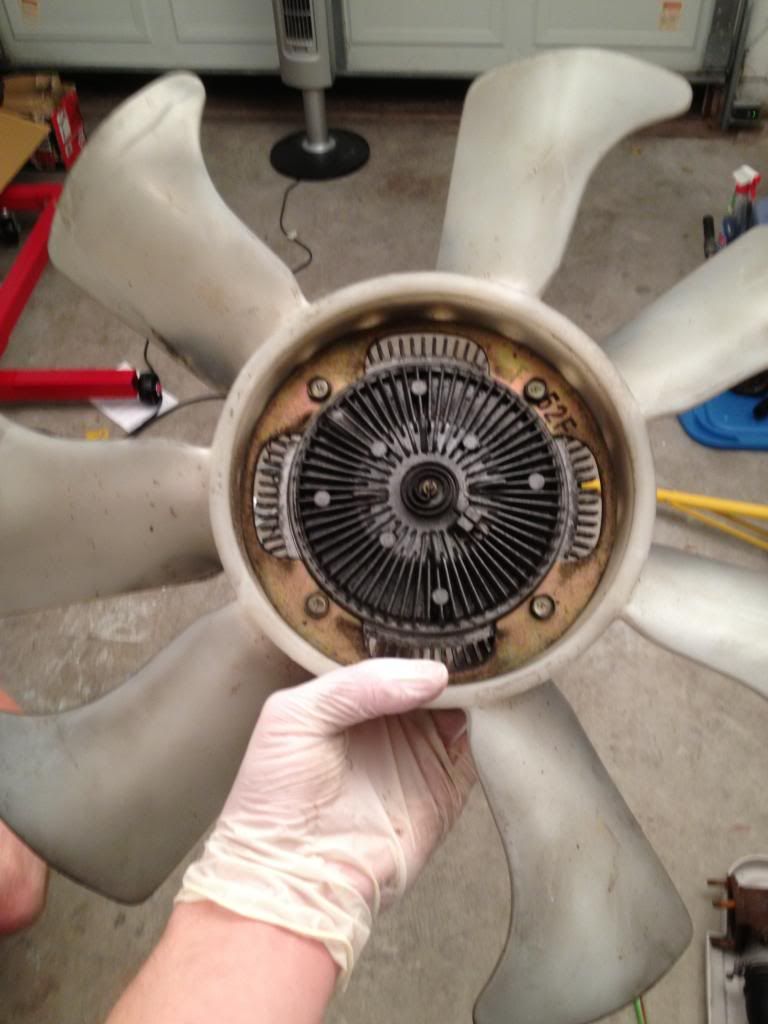
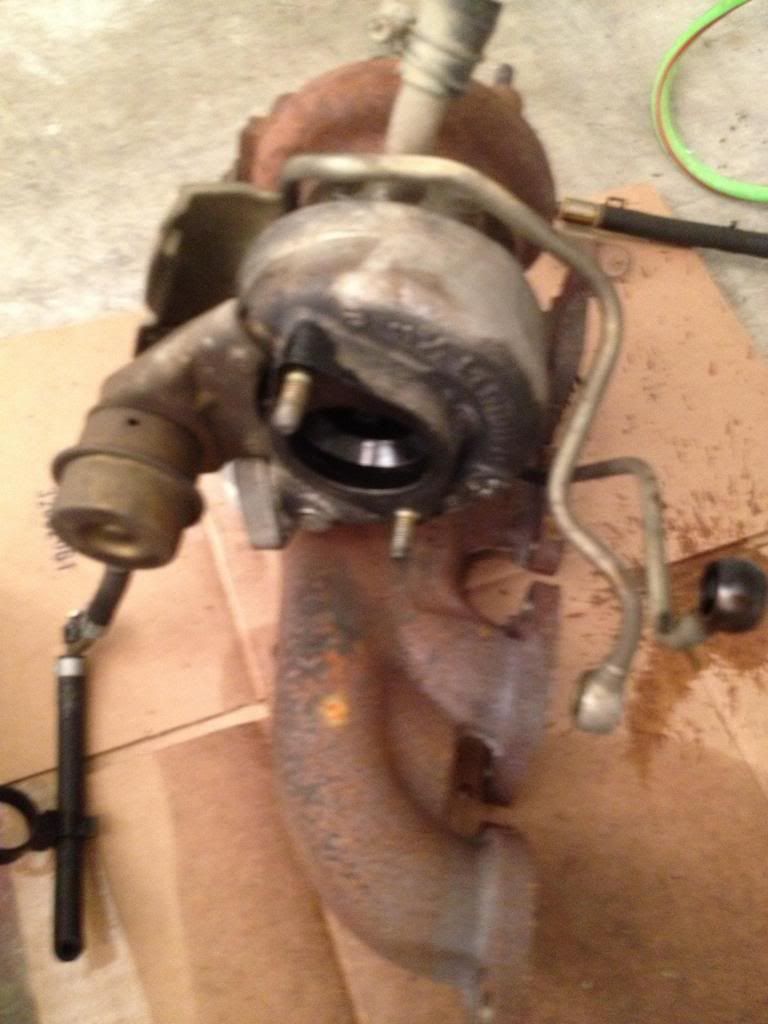
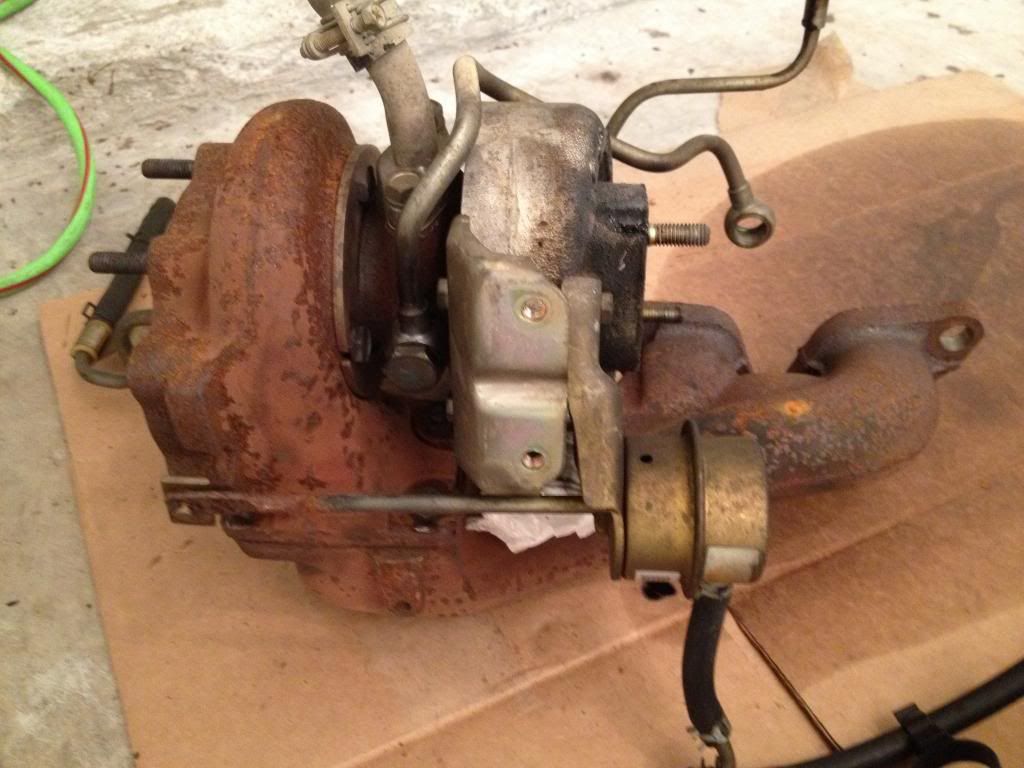
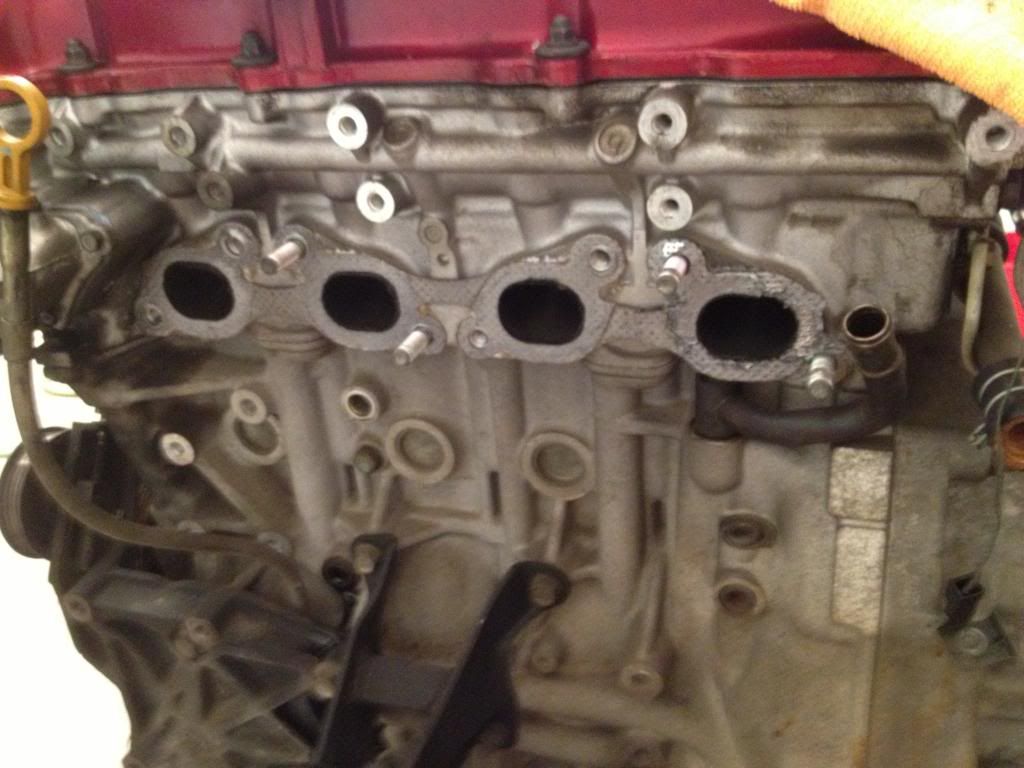
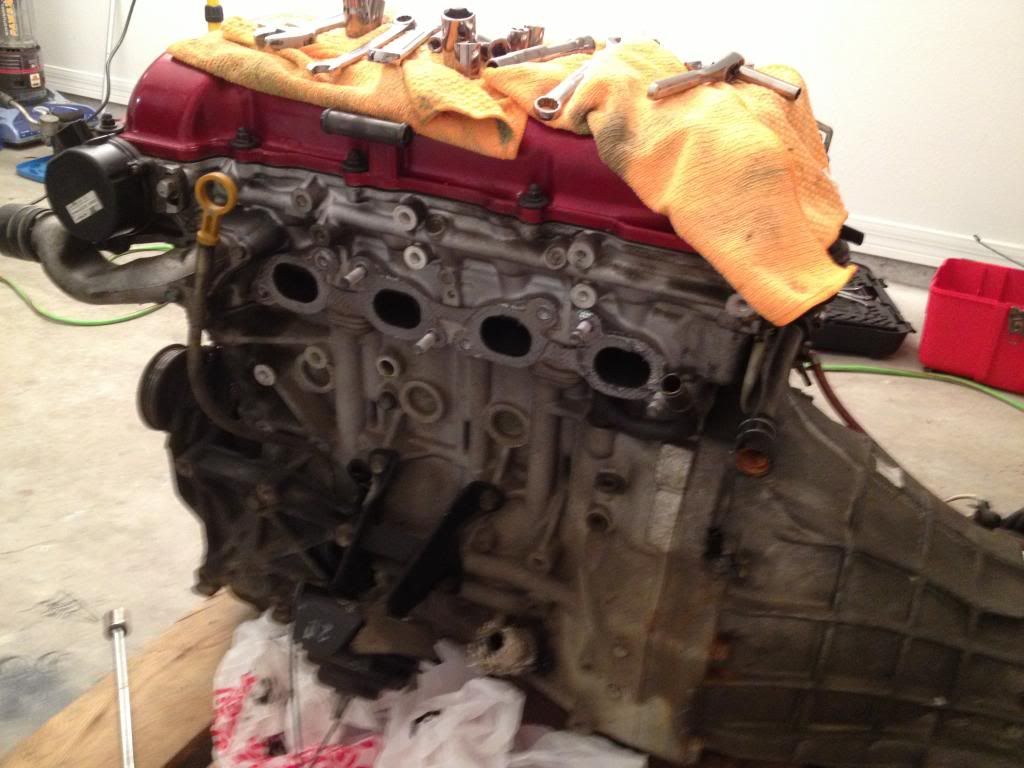
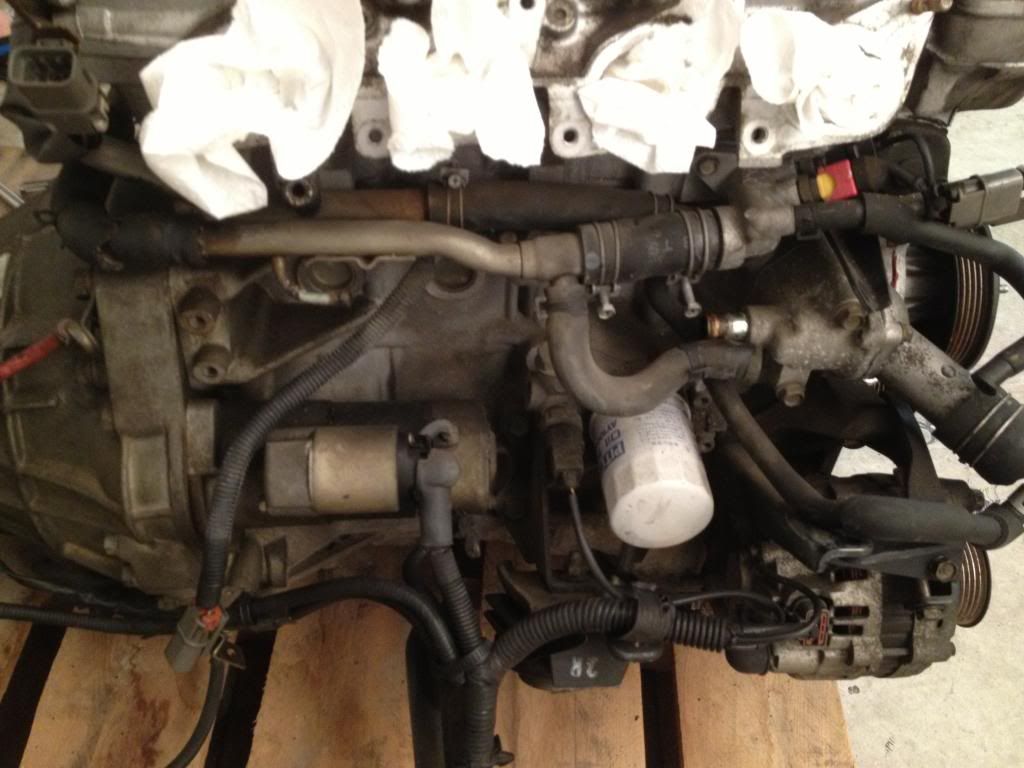
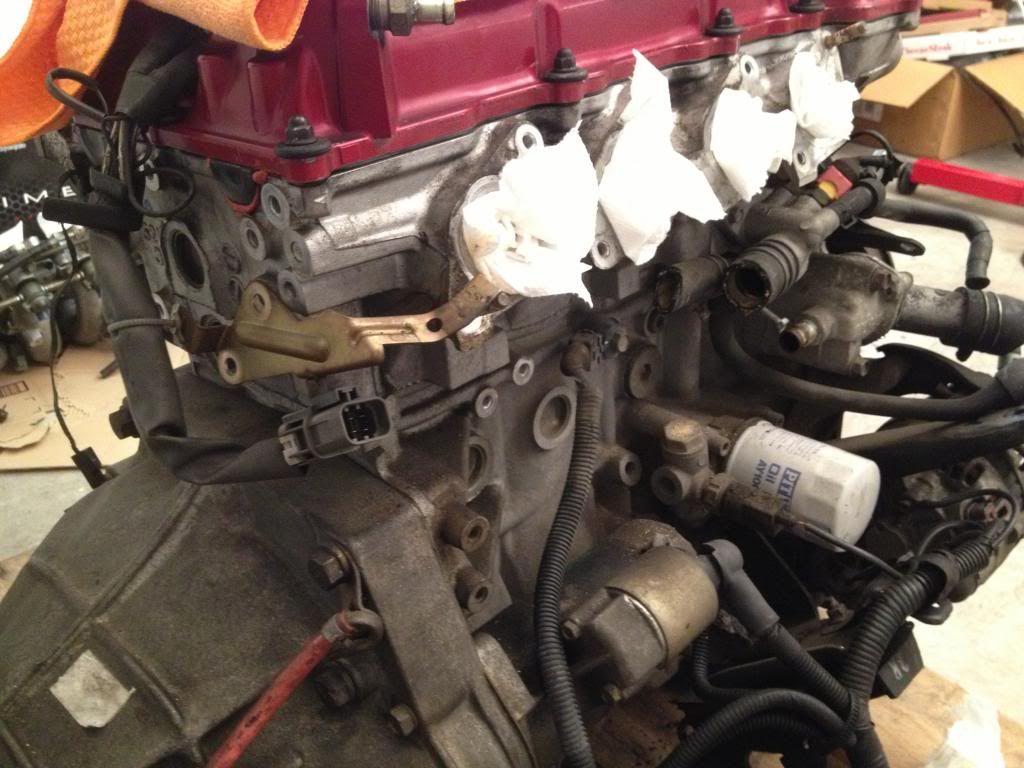
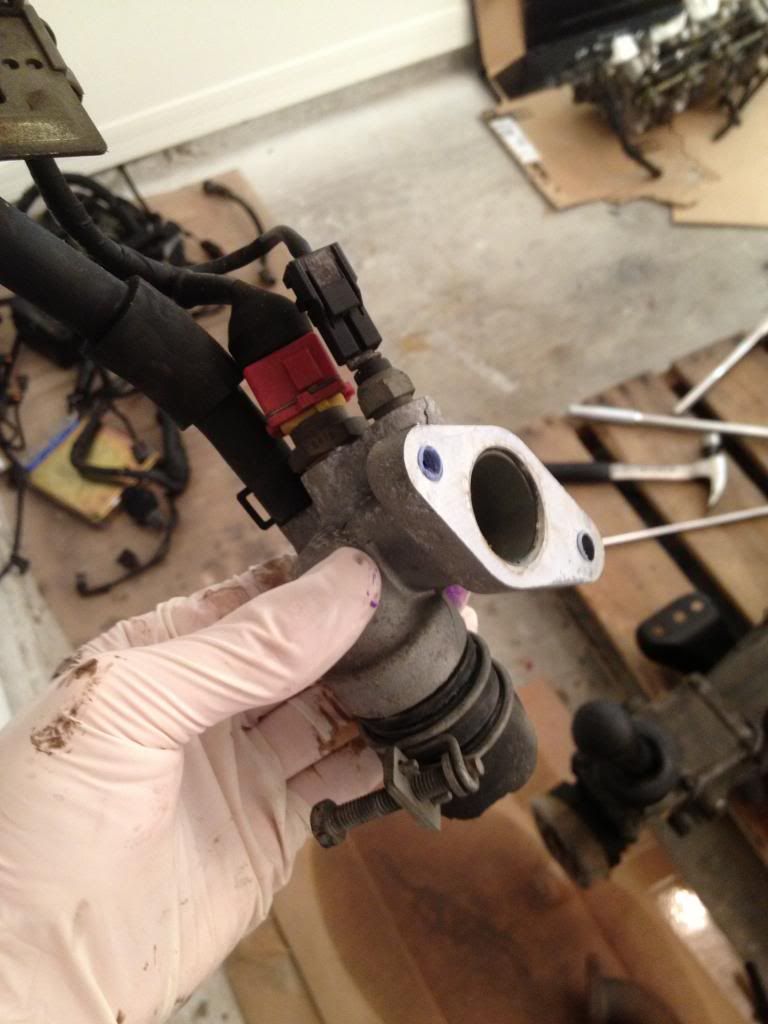
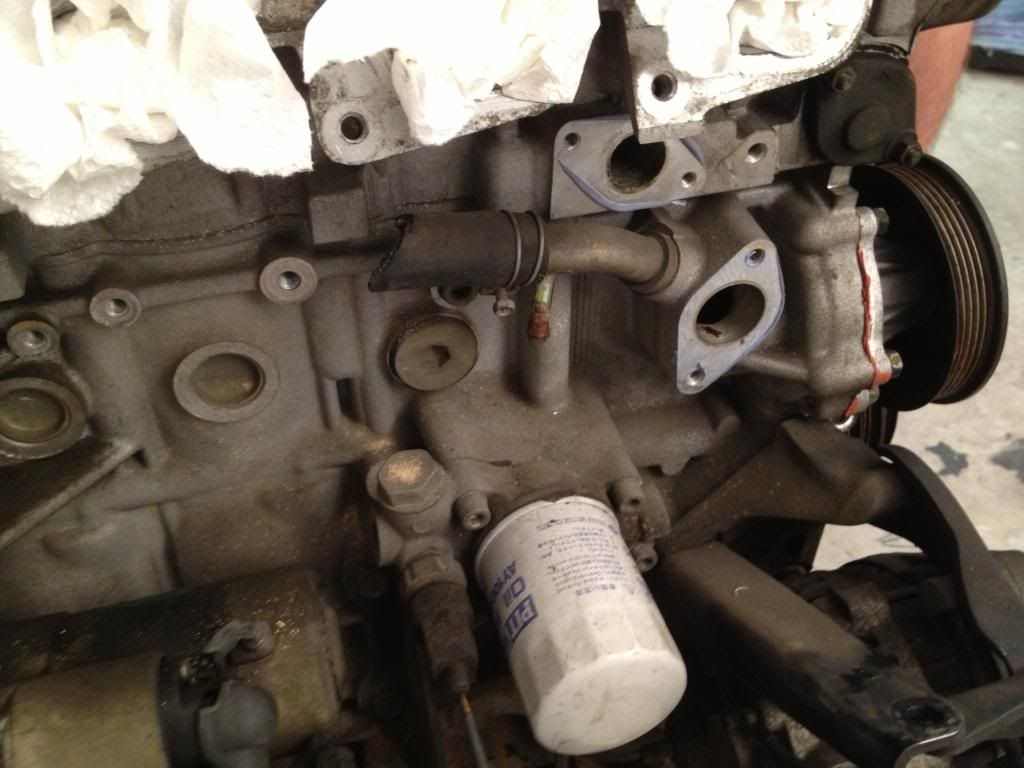
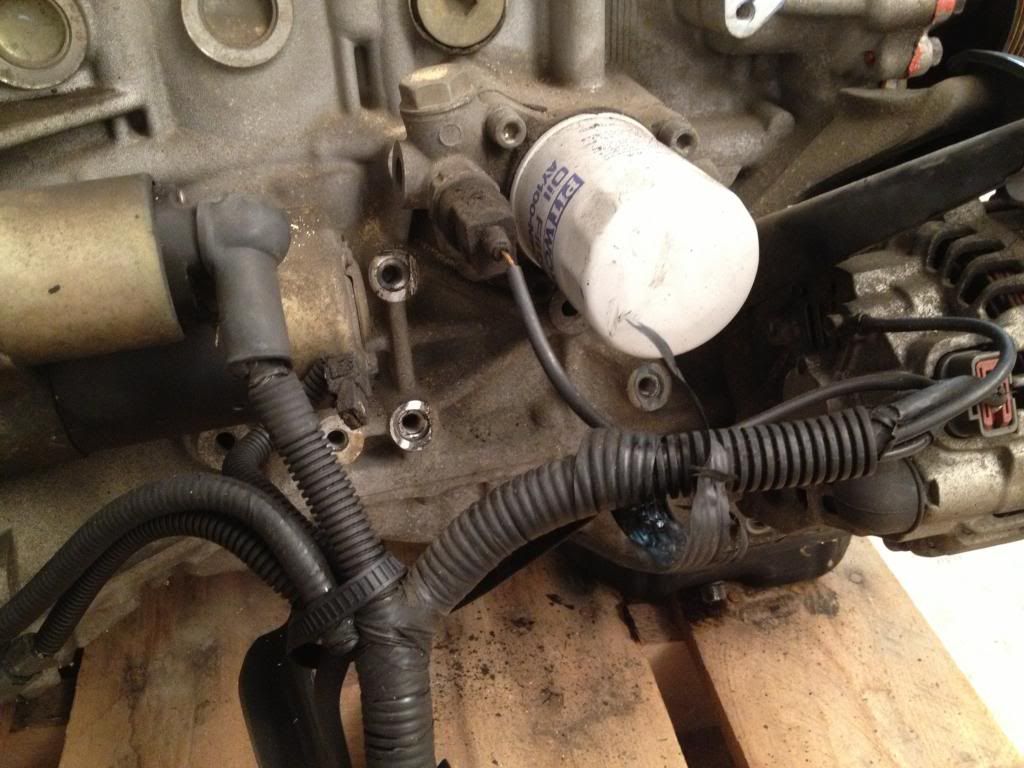
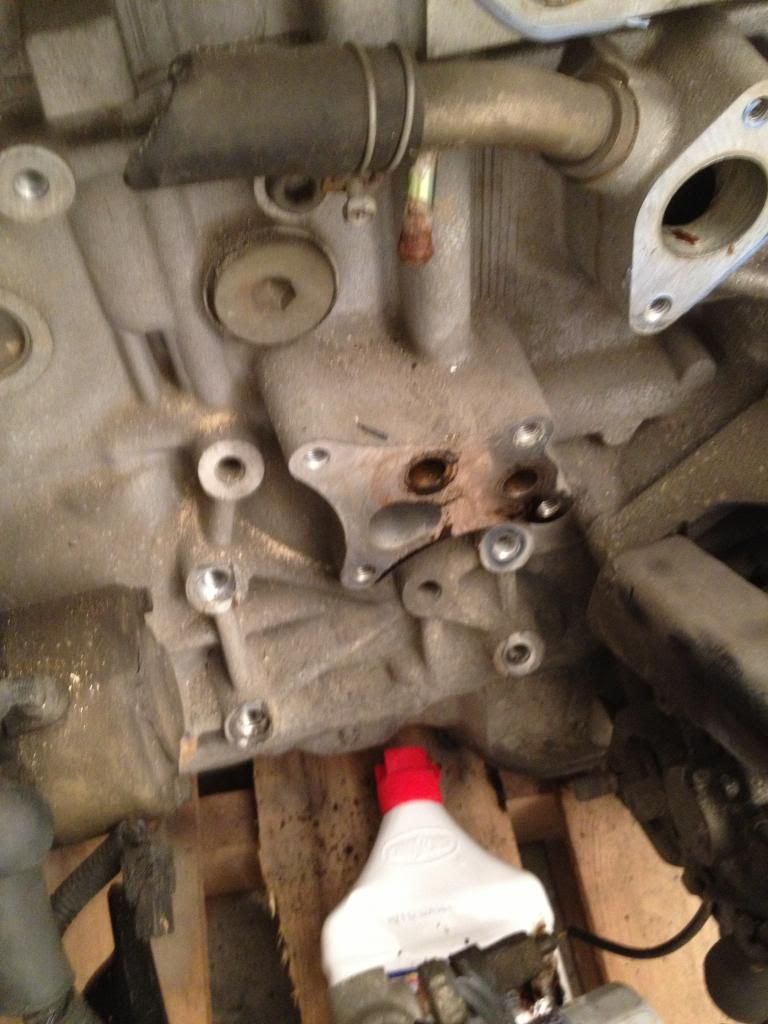
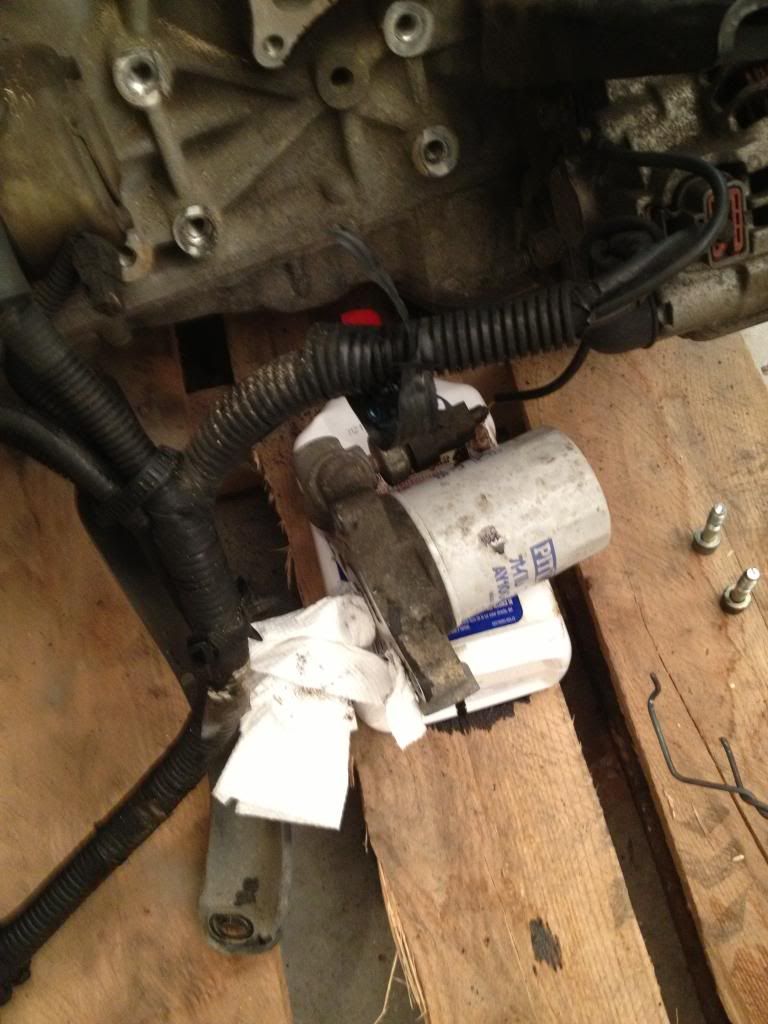
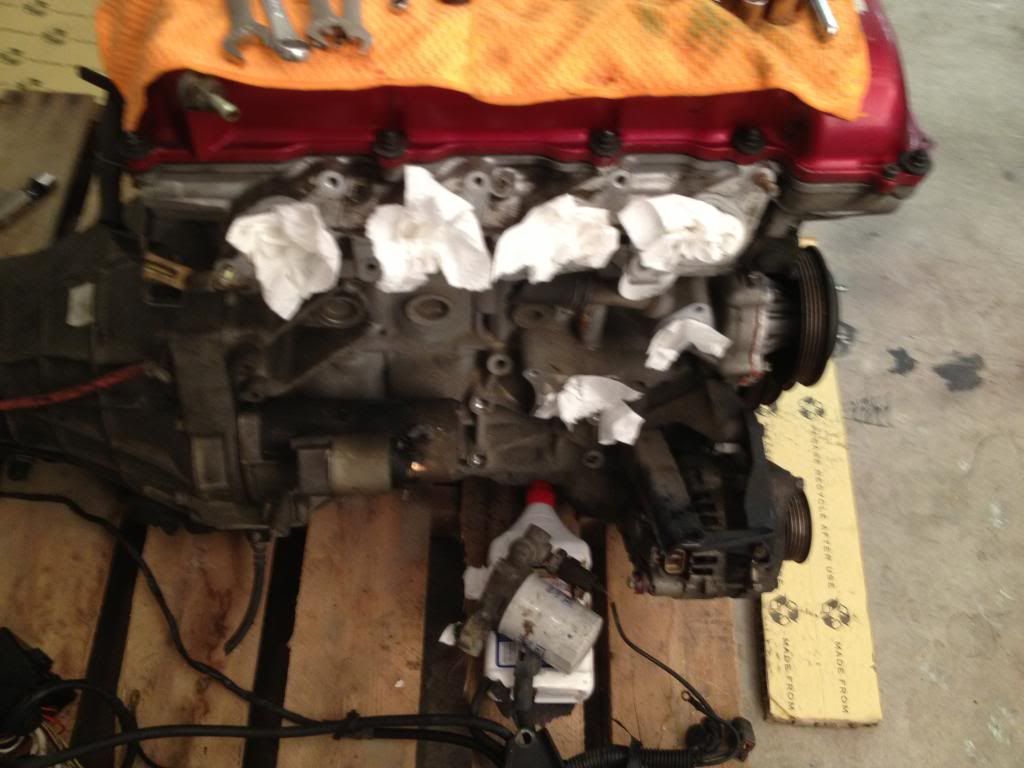
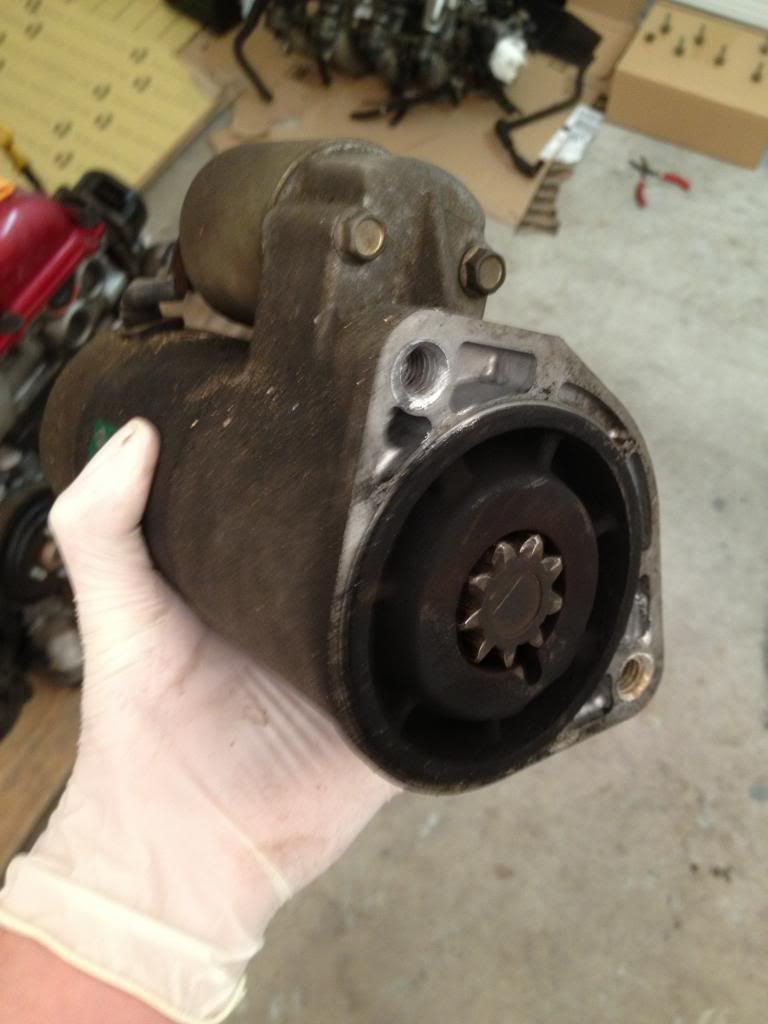
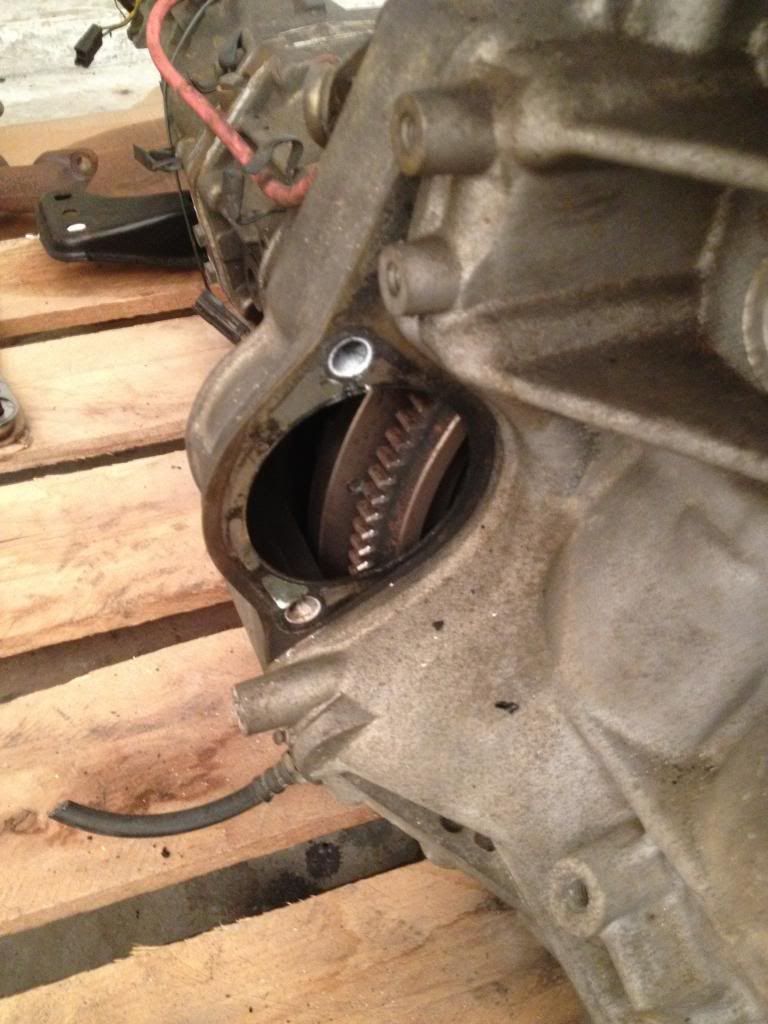
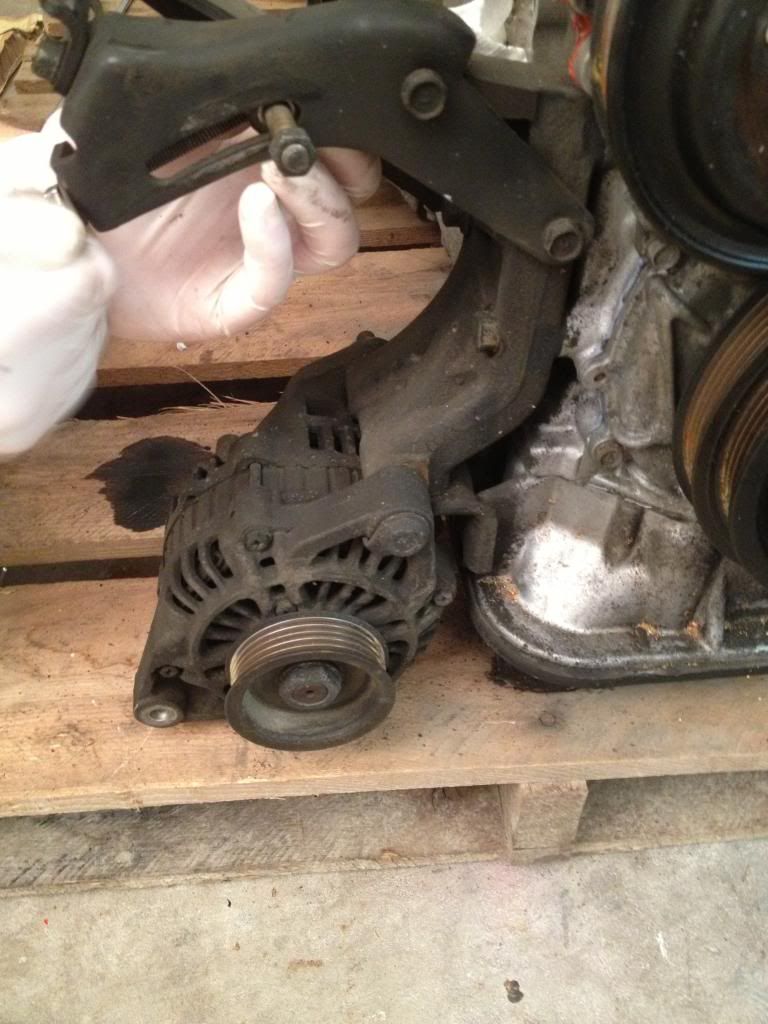
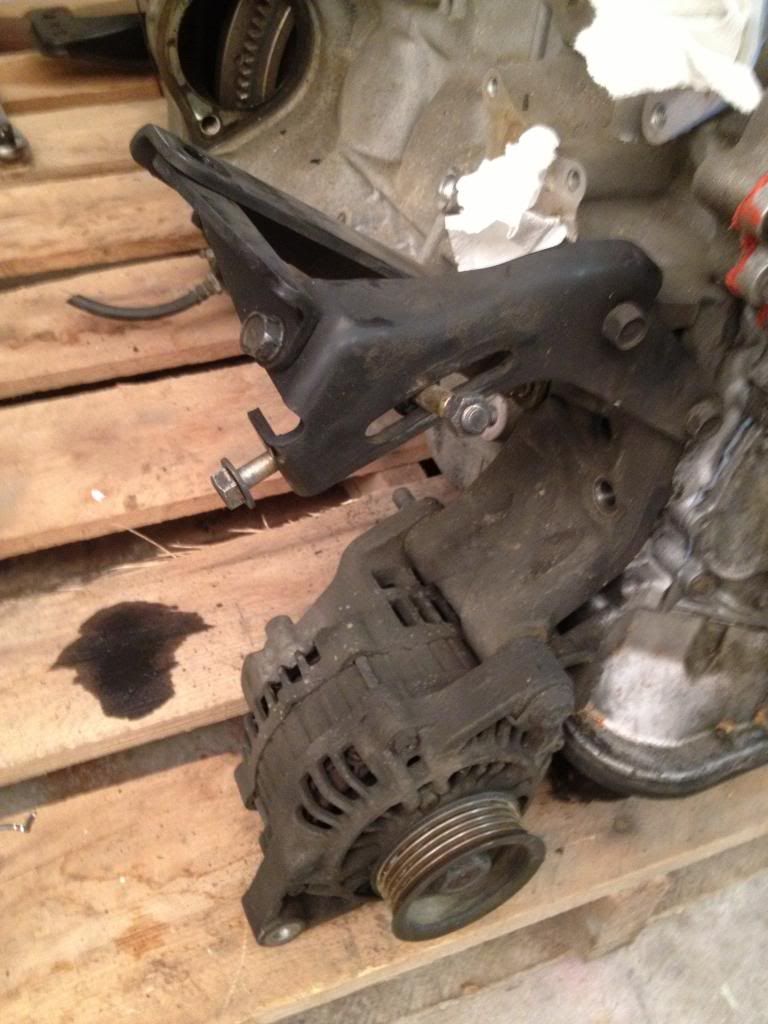
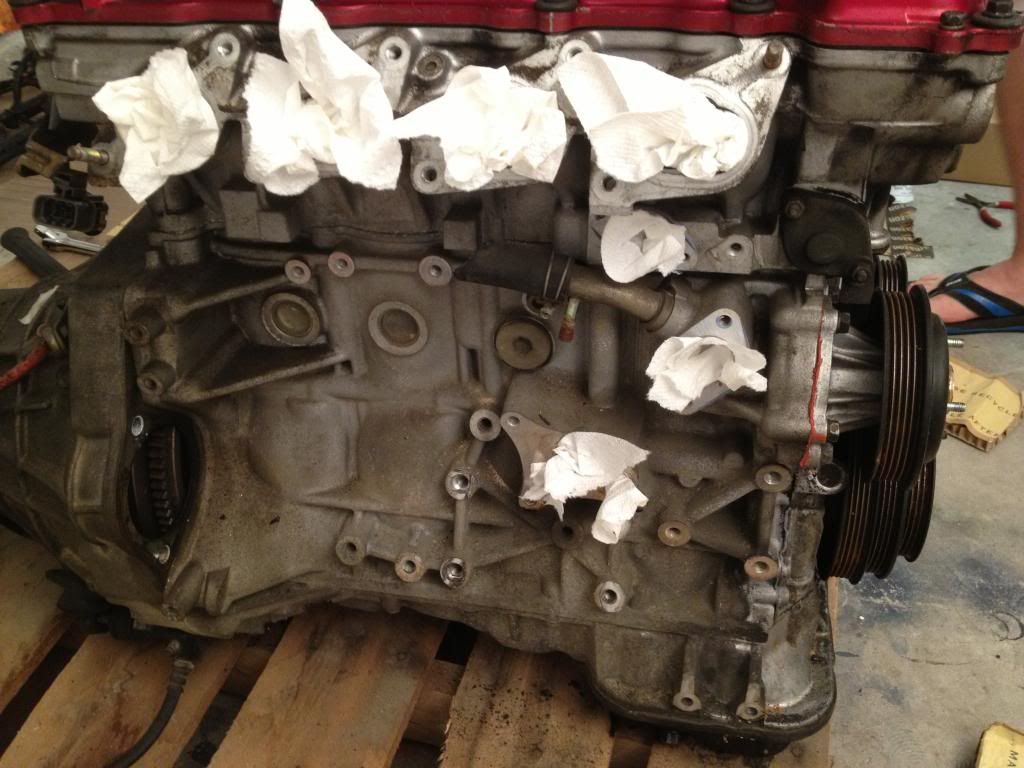
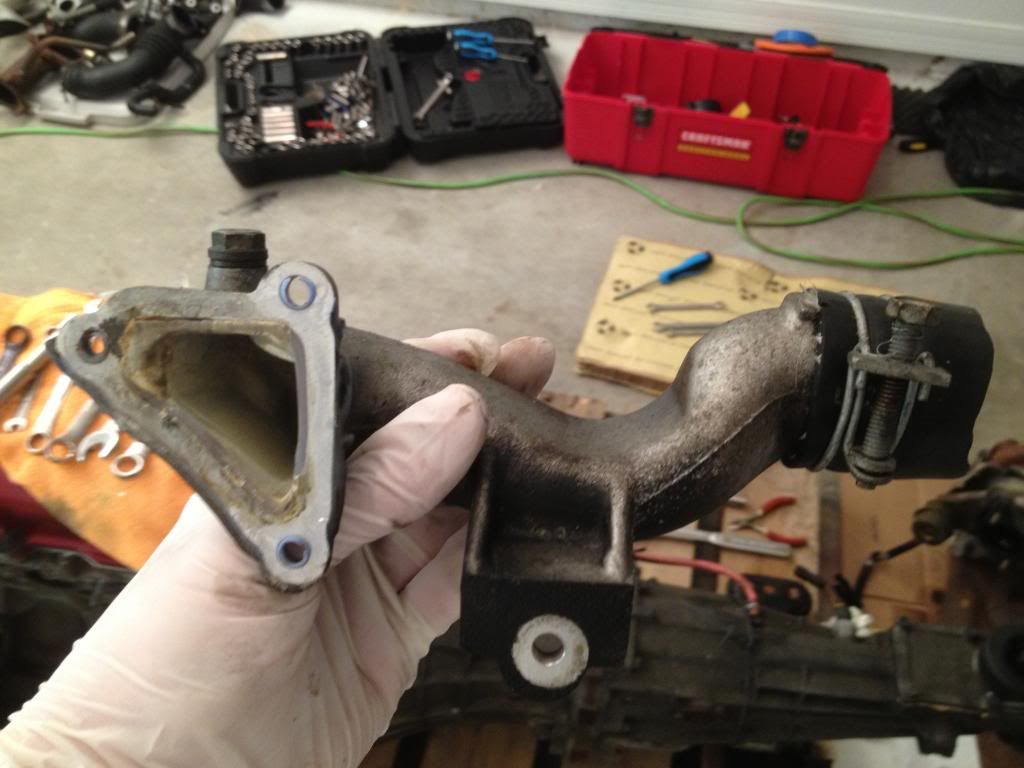
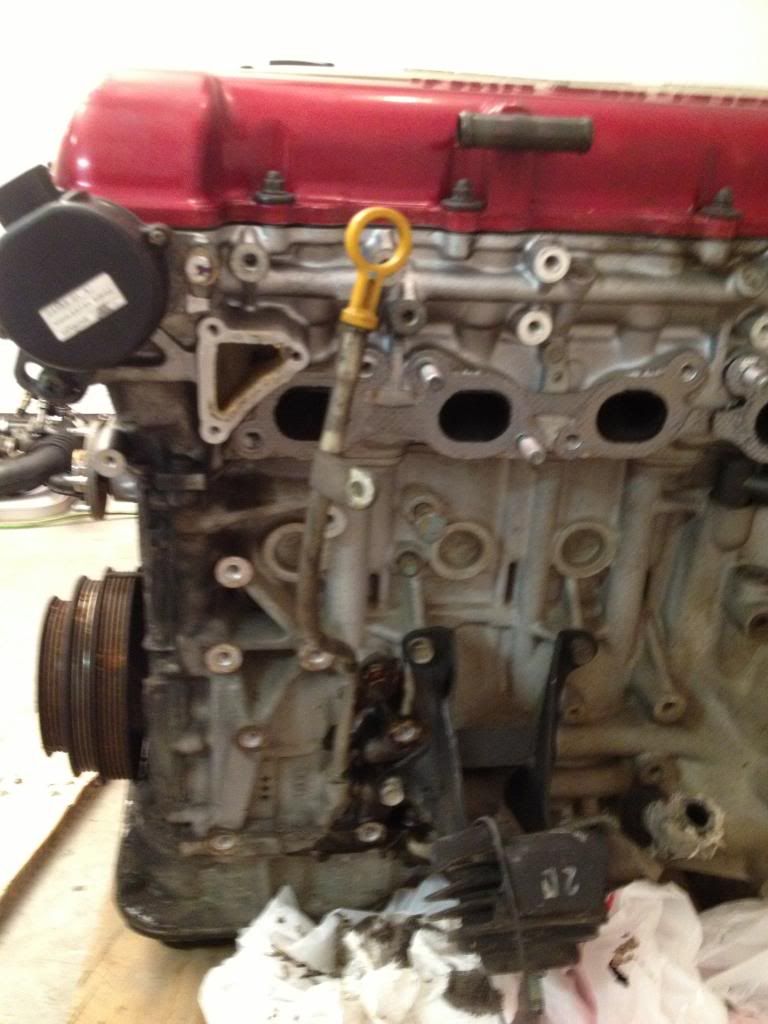
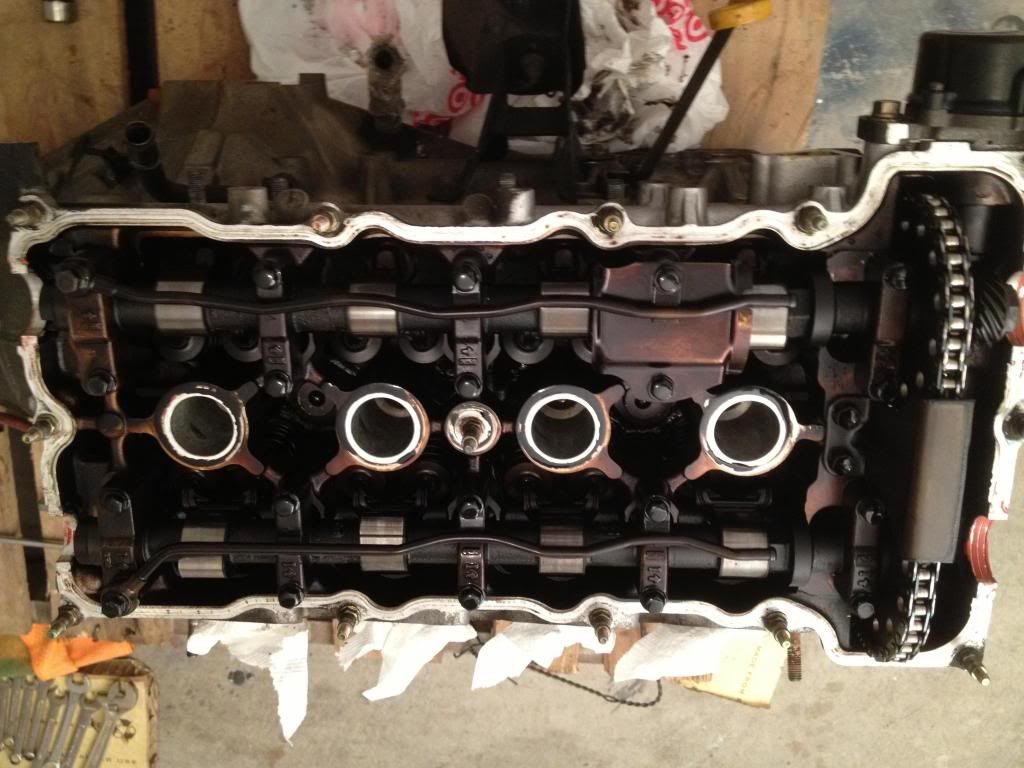
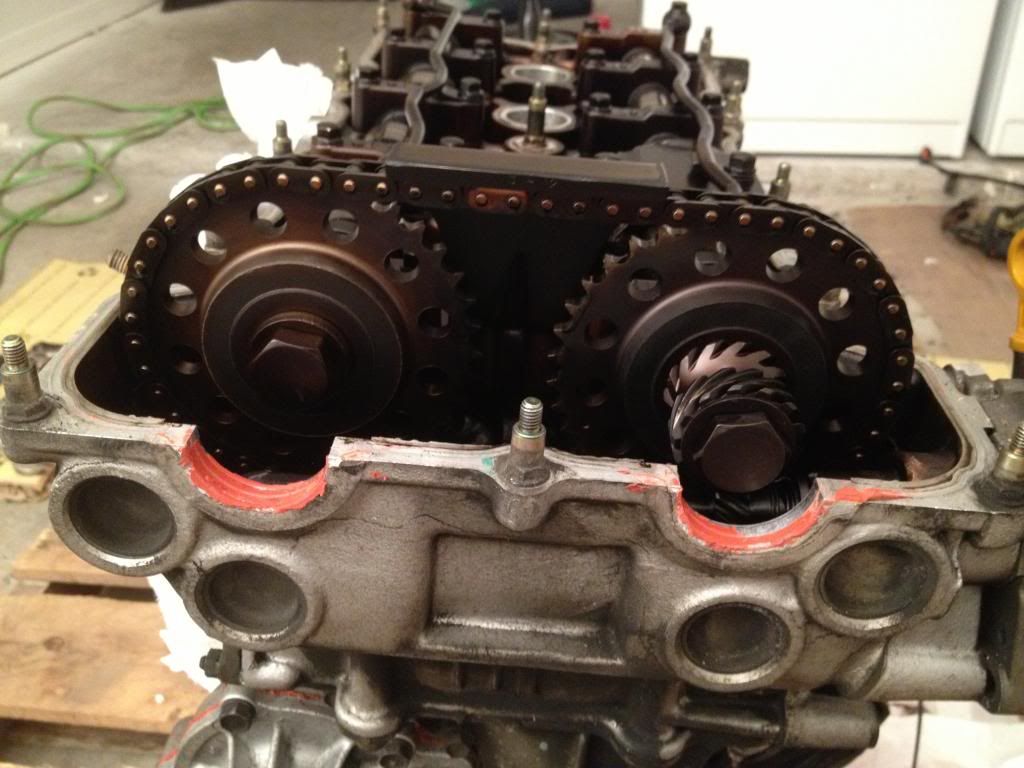
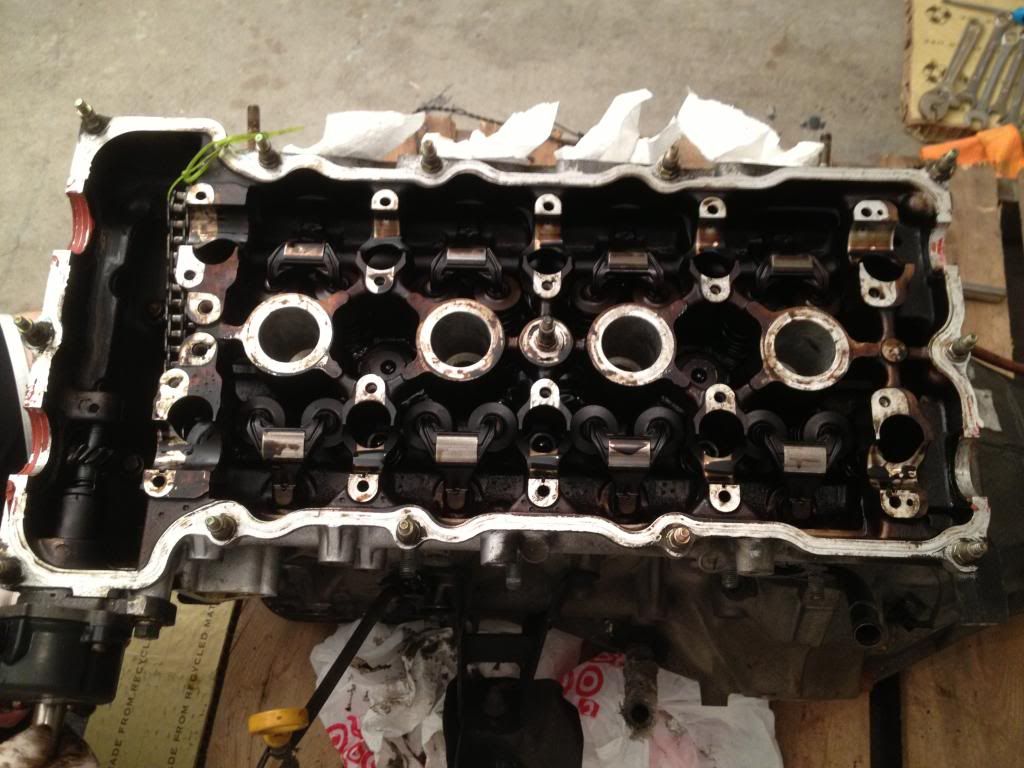
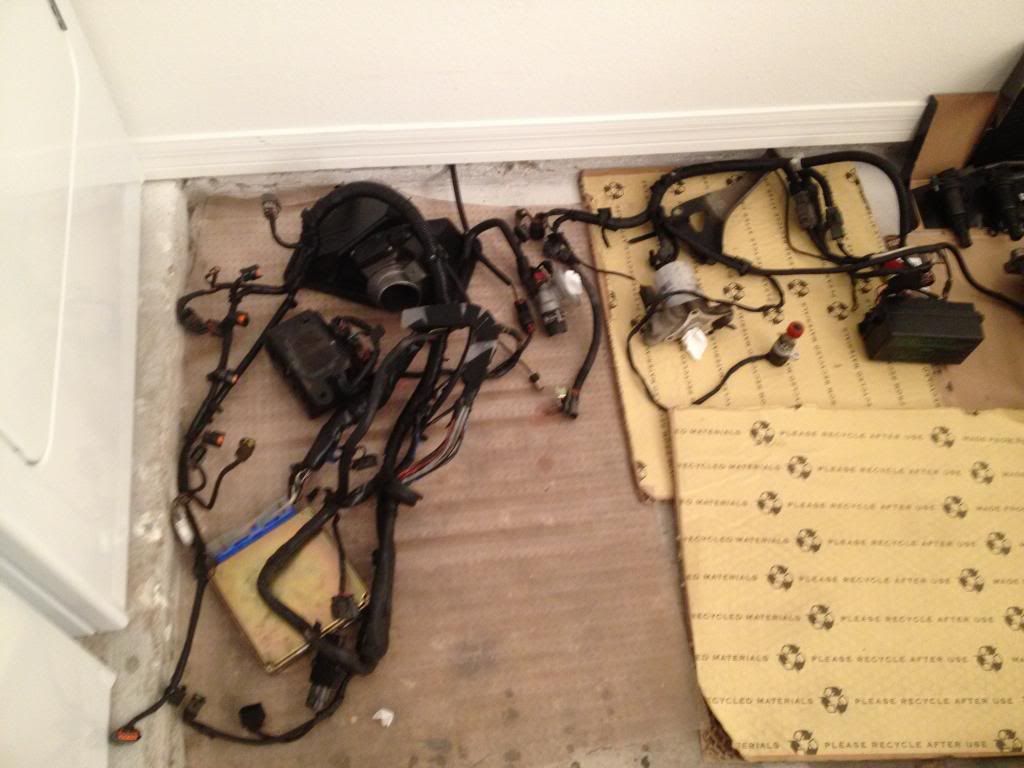
Ok, engine tear down pictures-- GO!!:
![Image]()
![Image]()
![Image]()
![Image]()
![Image]()
![Image]()
![Image]()
![Image]()
![Image]()
![Image]()
![Image]()
![Image]()
![Image]()
![Image]()
![Image]()
![Image]()
![Image]()
![Image]()
![Image]()
![Image]()
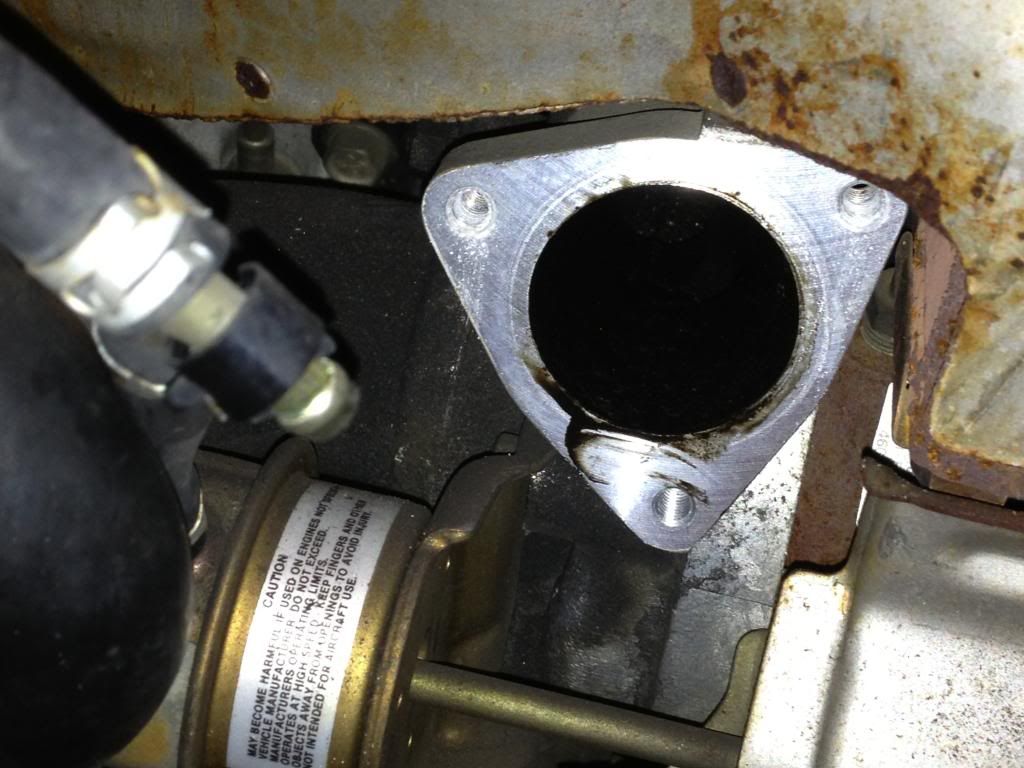
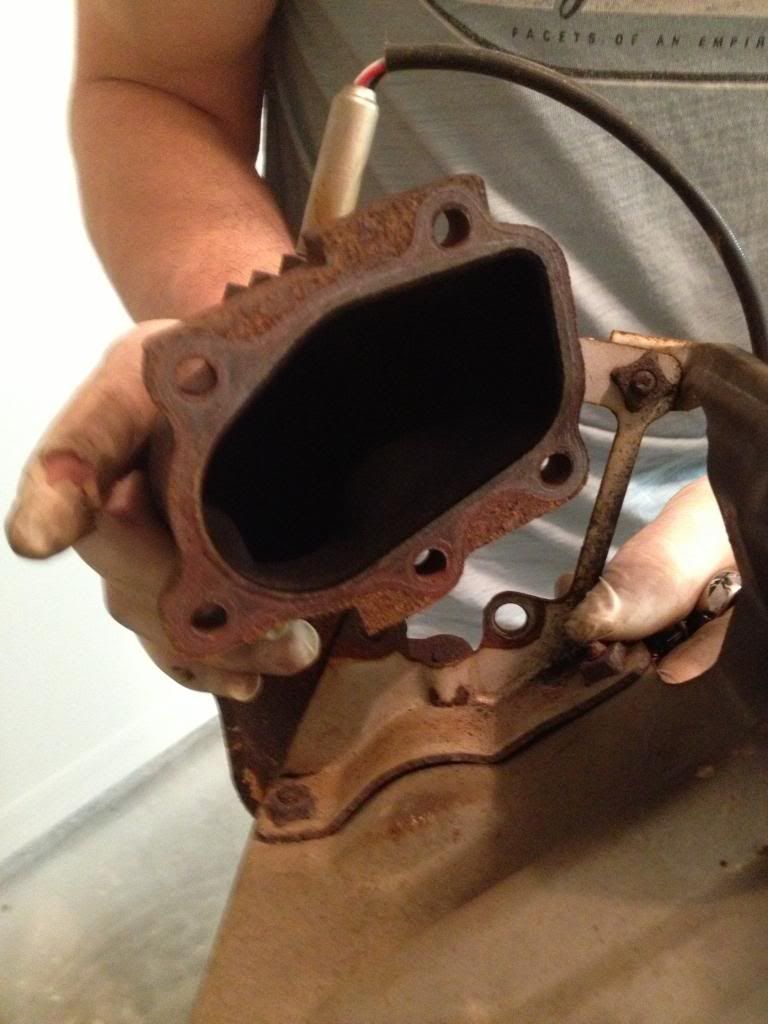
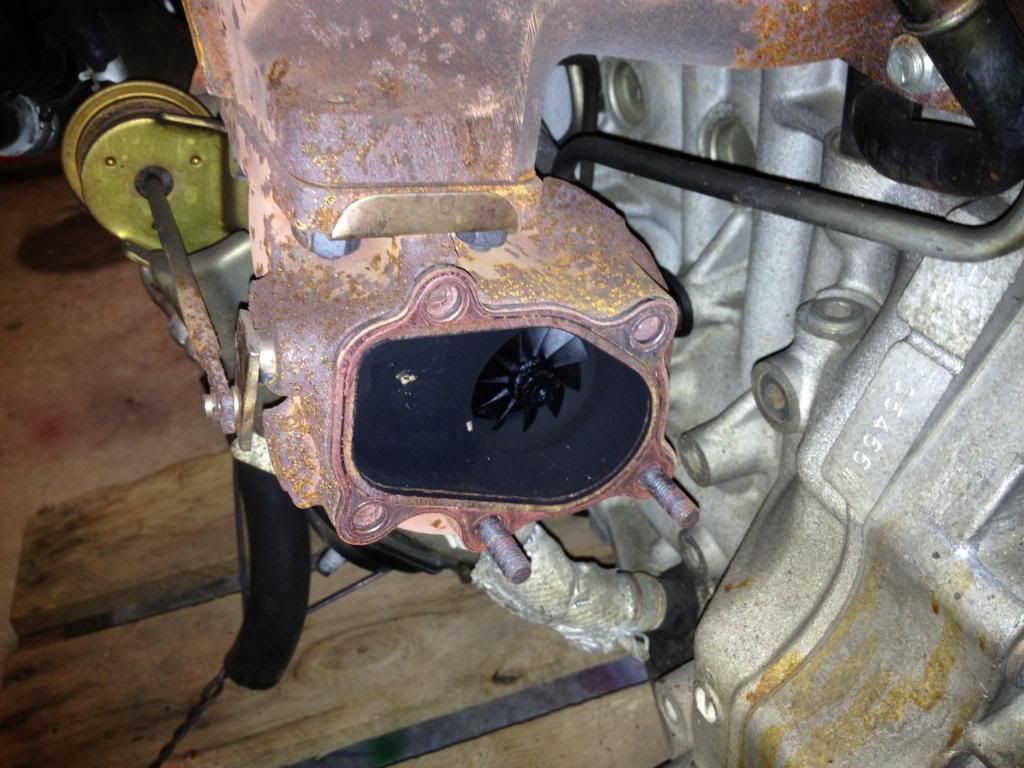
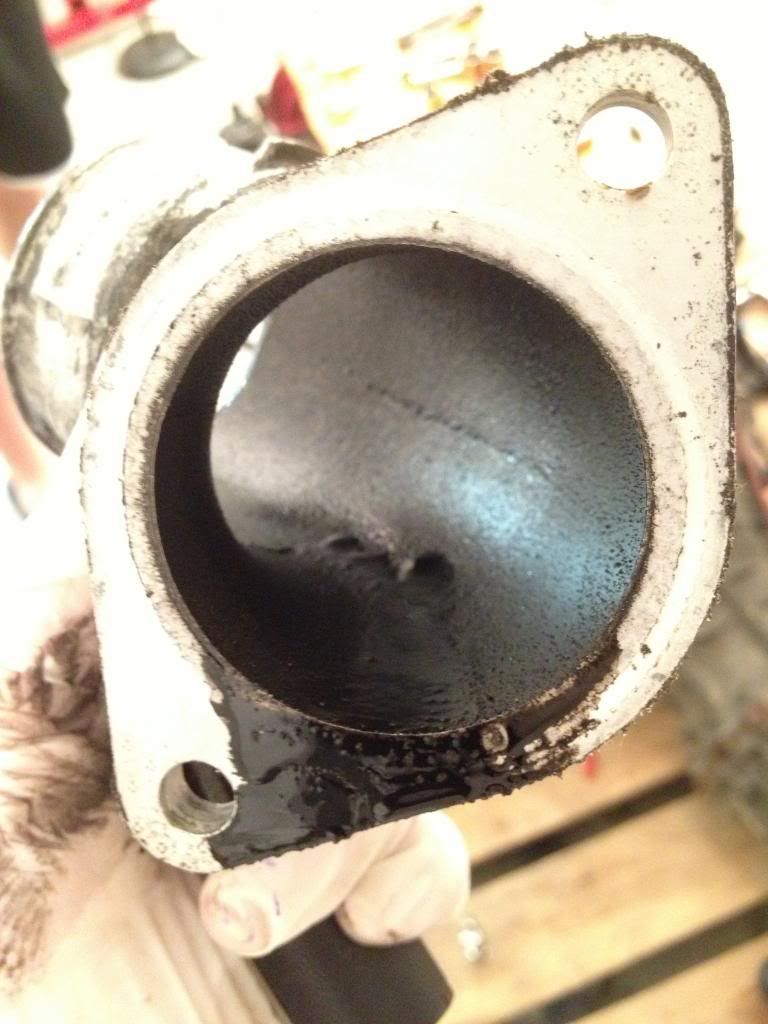
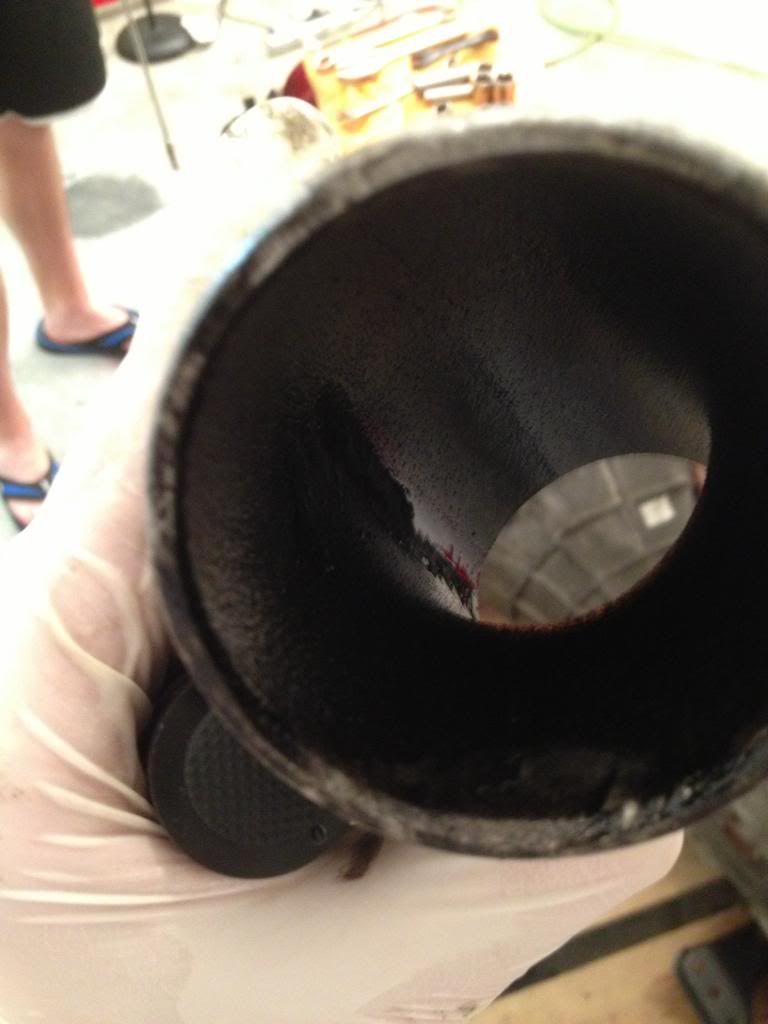
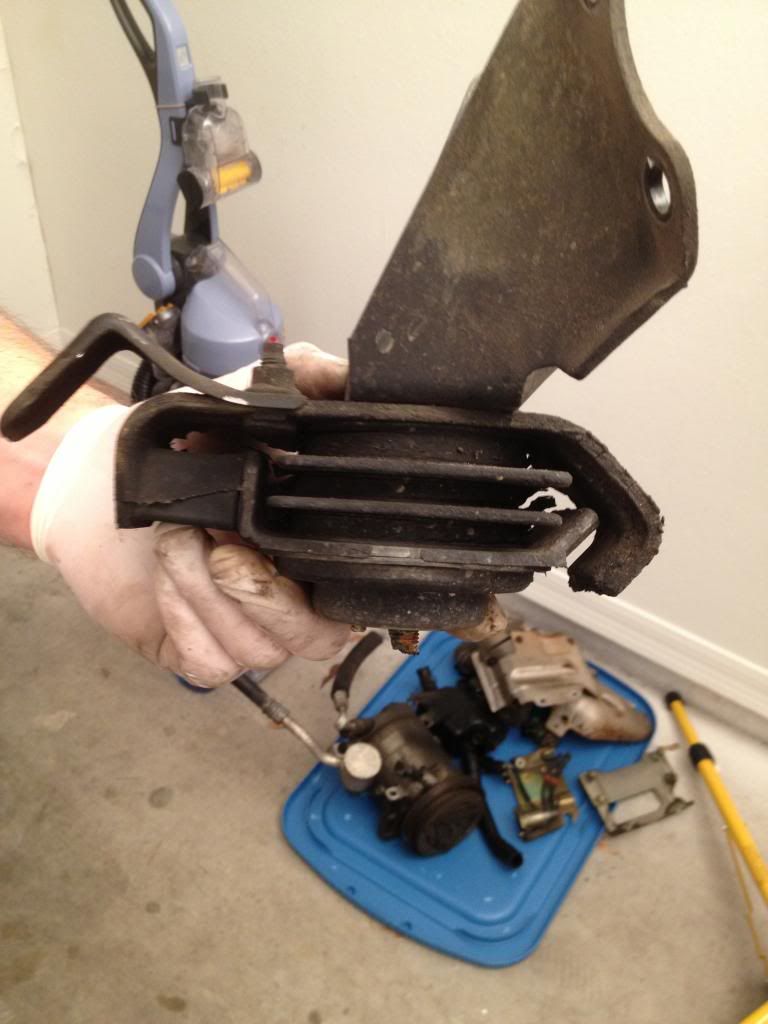
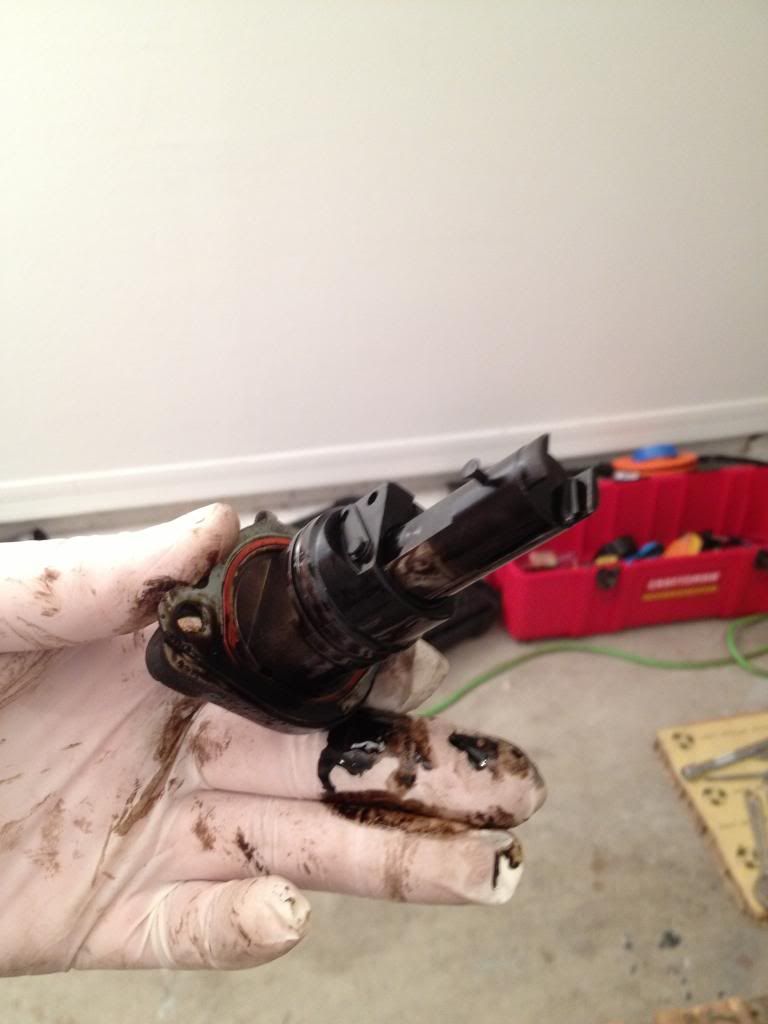
the next pictures are a little disturbing. the turbine had basically no shaft play, but Im a little upset at the oil we found..
![Image]()
![Image]()
![Image]()
![Image]()
![Image]()
![Image]()
![Image]()
![Image]()
![Image]()
![Image]()
![Image]()
![Image]()
![Image]()
![Image]()
![Image]()
![Image]()
![Image]()
![Image]()
![Image]()
![Image]()
![Image]()
![Image]()
![Image]()
![Image]()
![Image]()
![Image]()
![Image]()
![Image]()
![Image]()
![Image]()
![Image]()
![Image]()
![Image]()
![Image]()
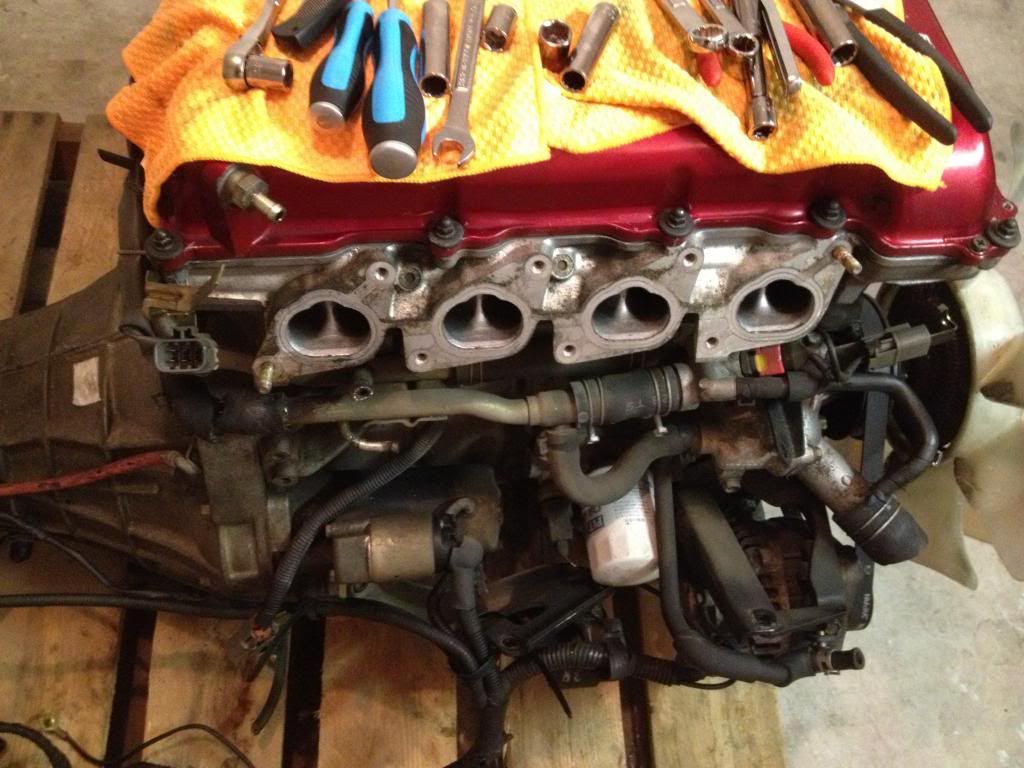
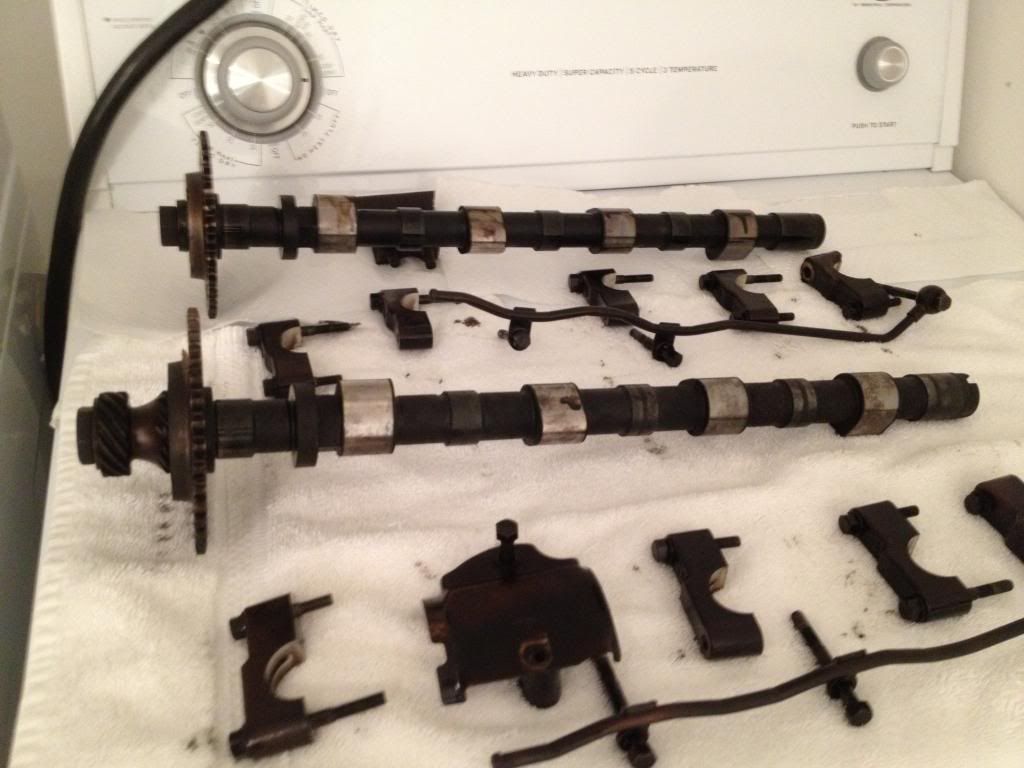
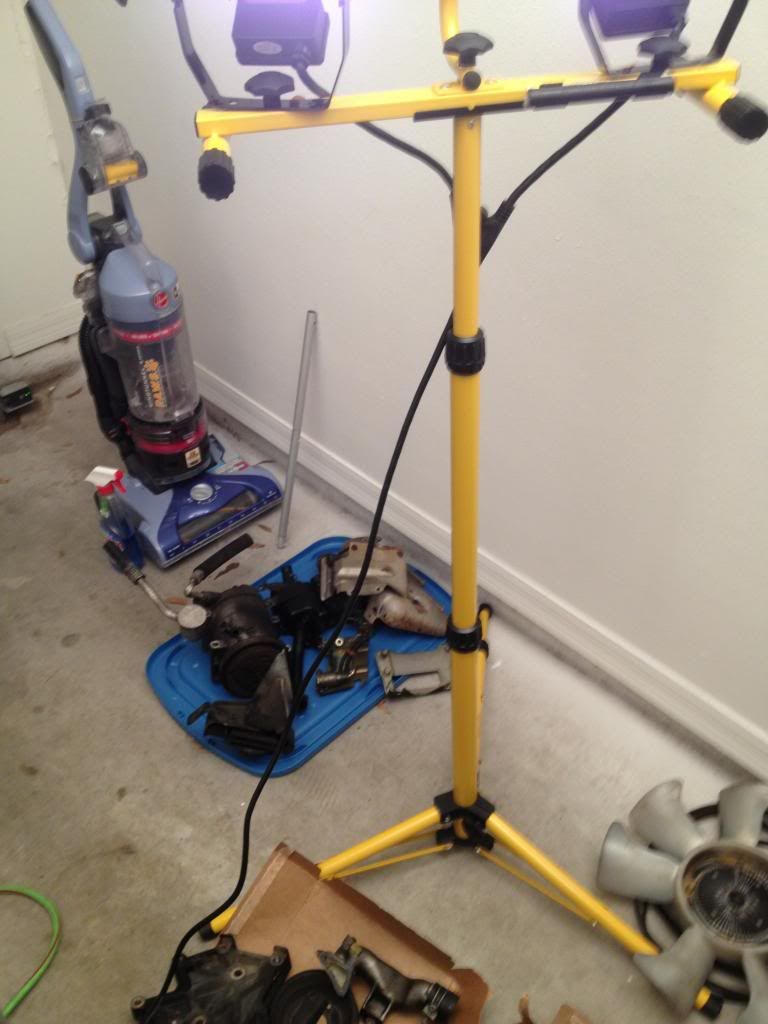
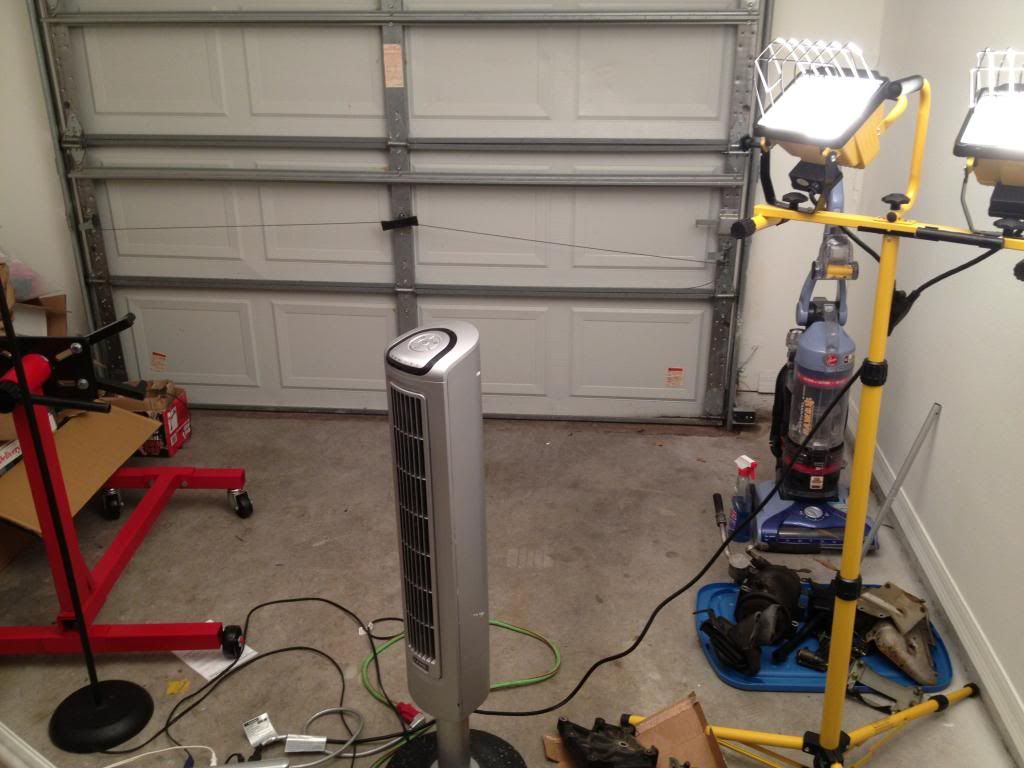
So heres a few of my workspace..its just a 1 car garage attached to my apartment. You may have noticed that I unfortunately have a spare washer and dryer taking up a lot of space in there right now, but I guess with a towel ontop they make a suitable spot to keep my cams.. The lights I just bought at wal-mart actually, for only $35. they have 2 500 watt halogen bulbs that light up the entire garage, they do kick out some heat though. not pictured is about 100 ziploc baggies with individually labeled bolts. you may have also noticed my rather large pile of boxes and trash, I just broke those down and got them out of there so now theres a lot more free space. Yes, we have been working on the motor where it sits on the pallet, I dont have a hoist yet to get it up onto my engine stand. I bought the stand and my friend is going to buy a hoist and we'll share with eachother (he has a turbo integra that he's about to do some work on).
![Image]()
![Image]()
![Image]()
![Image]()
![Image]()
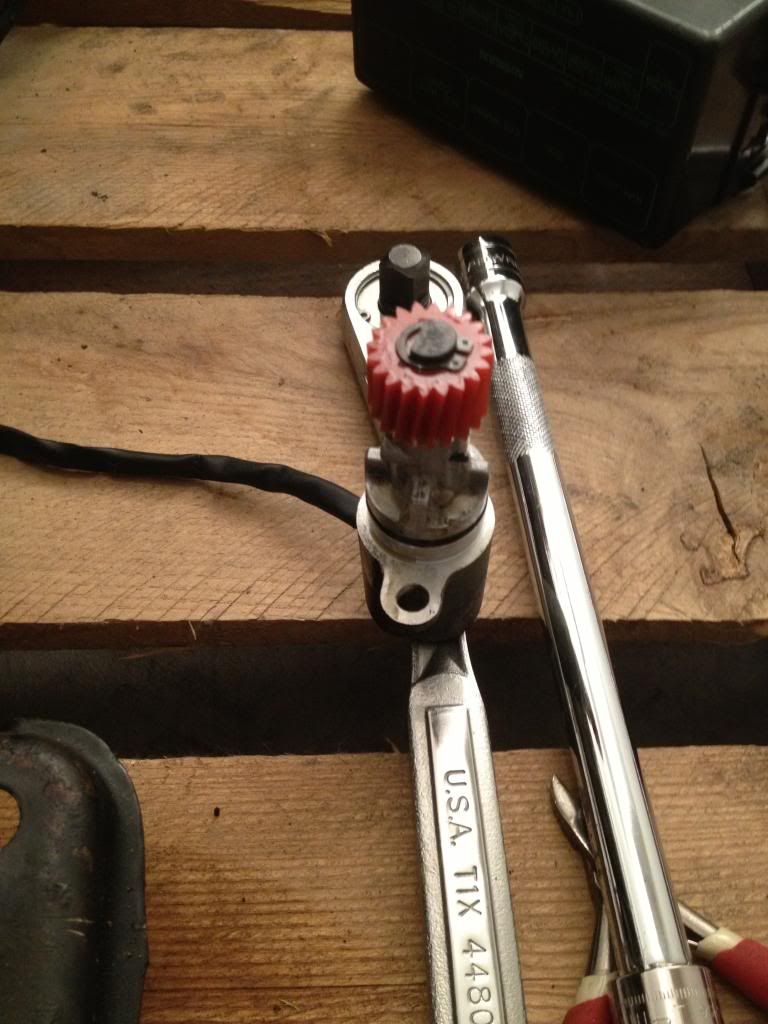
So thats where I stand as of today. I just got in a 10mm allen 1/2 socket bit that I needed to get the rest of the cylinder head off. My plan is to get that off, clean everything, hit the head and block with some high heat aluminum (seems to be a pretty common choice), and reassemble with all of my new parts. My friend is trying to convince me to get that Isis t25/t28 replacement turbo and isis turbo manifold for right now, and then I can sell it off later. I want to eventually pick up AEM EMS 2, some 740cc injectors, and either a GT2871r or maybe step it up to a GT30 with some HKS stage 1 cams. Im limited by how much time I have to actually work on the car because my work and school schedule keep me pretty busy. I will be on vacation all next week, so Im hoping to get some work done the following week since Ill have a long weekend for Thanksgiving.
More future plans include:
step 1:
further engine mods listed above that included engine management
step 2:
probably get flamed for this, but rota p45r's in hyper black, 17x9 front 17x9.5 rear with tires
upgrade brakes
either tein or megan suspension
step 3:
new carpet
bride seats
nardi steering wheel w/ quick release hub
relocate gauges to glove box (my friend works with carbon fiber and could make a cool plate for me)
possibly get the dash and headliner wrapped in leather..
step 4:
kouki front..
step 5:
paint. Im thinking house of kolor galaxy grey will be pretty sick, probably going to do my valve cover that color as well.
huge shout out to my friend Harold who is helping me with pretty much every step of this build
thats it for now! all comments and suggestions are welcomed and appreciated, negative and positive.
Thanks,
JB
So I've been a long time lurker of this site and several other 240sx related websites; Ive always wanted to do an sr20det swap but never really had the money to do it.
I originally picked up an s13 coupe when I was first introduced to the import scene; I was about 19 years old and I thought "Oh, Ill just get a 240 and then save up 2 grand and drop an SR in there!", haha wow, I was misinformed. I ended up having to get rid of the s13. Now, 5 years later, I realize that it was probably for the better, because I always wanted an s14 anyways.
So I picked up this stock s14 around December of 2011. Its a 95, 5-speed, no sunroof but still had the power windows and locks. Unfortunately, I dont really have a lot of pictures of it at the moment. The clear coat is wearing off on the hood and the paint overall isnt the greatest, but that's the final step right?? The car was pretty clean in every area, it had about 140k miles on it. The only negatives: there's a tiny chip in the dash (not really a crack like you usually see) and some minor 'cut' marks on the door panels, the inside smells a little bit like a dog, and a small rust spot on the trunk-- all easily fixable.
Fast forward to almost a year later, I decided that I had enough cash in the bank to start my project. So, around October I started ordering parts and keeping a little pile in my second bedroom. I was ready to order my SR20DET, I was thinking about going with osakajdmmotors.com, which is where I had been planning on ordering from for the past 6 years. I decided to see if I could find any info on them since it had been a while since looking into their company. I read to stay away from them right now as most of their inventory was tsunami flood damaged motors, and with them being located in Canada it would be real easy for them to fuck over an American buyer. Whew, dodged a potential bullet there! So Im looking around all over the place to find 'the one', and I came across an s13 redtop on :O eBay. I would normally never consider buying something like a motor from ebay, however!, it was being sold by a performance shop (jspecauto.com), it looked super clean, it was located in Virginia, they claimed it only had 54,000 miles on it (no proof to back it up), but the main selling point was the fact that it was the only engine I could find that actually had a compression test video for it. 174, 173, 170, 174......I thought "wow I should probably buy this", so I did. It came out to $2,299 with free shipping, I bought it on a Sunday and it was at my doorstep by that Thursday! It was a little more expensive than the $1750 at Osaka, with $350 residential shipping, but I had peace of mind that if I got a bogus motor I could hop in the 240 with my AK and drive to the shop in a day
.I didnt take any pictures of the motor wrapped up, but I quickly cut off the packaging and snapped these 2 photos:
My buddy was over and we decided to just give it a look-over that night. As we started inspecting things, we noticed that there were a lot of parts that looked pretty much brand new. After further inspection, it turns out that just about everything that looked brand new actually had a little dab of green paint...we thought maybe this is how they had marked parts that they had replaced? Who knows...anyways, the parts that had the paint were: injectors, throttle body and cable assembly, idle air control valve, and the throttle positioning sensor. Some other parts looked brand new: water pump, the belts, and the power steering pump. I might be forgetting one or two things, this was almost a month ago now.
One thing that caught our eye, that Im still a little concerned about today, was the ECU. It had 2 stickers on the top, "TBO Racing Parts For Racing Purposes Use Only", and "FAST Made in Japan". There were also "fast" stickers along the sides, so that if the ECU was opened up you would have to break the stickers. I attempted looking these companies up, but I found very little information. All I could find about TBO was that they made aero parts, which wouldnt make any sense why there would be a TBO sticker on the ECU. Secondly, the information for FAST was alaso very limited -- I found that it stands for "Fuel Air Spark Timing" and apparently was a tuning company in Japan? Im guessing that this ECU is chipped, and Im really hoping that the tune on here isnt funky...and that it actually runs for now
Anyways, this thread is going to be pretty picture intensive. I took all of the pictures with my phone, its an iphone 4s, so they might not be the best of quality but I dont have a digital camera. I might not list a description for every picture, so if you have any questions just ask.
Ill start with the parts that Ive been ordering:
My first order came in: (enjukuracing)
Isis m-spec FMIC with piping pre-flanged for a Greddy BOV. I heard that this front mount is identical to the Greddy M-spec.
Mishimoto aluminum radiator
Circuit sports metal coolant overflow tank (my plastic one is all broken and the plastic was flaking into the coolant)
2nd thing to come in was my walbro 255 high pressure fuel pump
3rd order came with some exciting parts: (phase2motortrend)
OEM water pump (didnt snap a picture)
ARP head studs (also didnt take a picture)
Circuit Sports 3" downpipe with a flex section
Exedy stage 1 organic clutch
ACT streetlite flywheel
Greddy type RZ BOV

Then I received order 4 and 5 on the same day so Ill lump them all together: (amazon and FRsport)
AEM Uego A/F gauge
AEM Truboost b00st controller/gauge
Optima redtop battery
ARP rod bolts
Summit racing battery relocation kit (I guess I only took a picture of the power cable..)
I had another order from Enjuku, however Ive only received 1 part so far:
Circuit sports 3" turbo elbow/up-pipe
Not yet shipped from this order:
steering wheel gauge pod
s14 to s13 A/C conversion bracket
OEM timing chain
NGK iridiums
belts

order 7 was actually the very first order I placed...and one of the last to be delivered (z1motorsports)
Nismo motor/tranny mounts
z1 silicone radiator hoses
OEM oil pump assembly
s13 redtop SR20 gasket kit

Also from order 7, but directly from GReddy:
Greddy type RS 3" exhaust (I really really really wanted the TI-C, however, it was discontinued a year ago. I called just about every performance shop I could find and NO ONE had one left. I was told that the RS is the exact same exhaust, just minus the titanium / burnt tip.)
Greddy oversized oil pan (I guess I didnt take a picture of this..)

Order 8 was from FRsport again,
Circuitsports 480cc oil catch can
Circuitsports 250cc oil catch can
You can just call me TwoCan Sam!! My buddy has a pretty good idea for running these dual catch cans, more on this later
Here's the pile of parts that has been slowly growing in my 2nd bedroom. Coming home every day brings such mixed feelings, Im happy to see these and know that it will be awesome one day soon, but its also depressing looking at so much money just sitting there that I cant do anything with yet.
So thats about it for parts for now, if anyone has any comments or suggestions please let me know. As a side note, although these circuitsports items are made in china, the quality is far greater than expected. The welds on these things are absolutely sick as well, someone definitely took their time crafting this stuff.
Ok, engine tear down pictures-- GO!!:
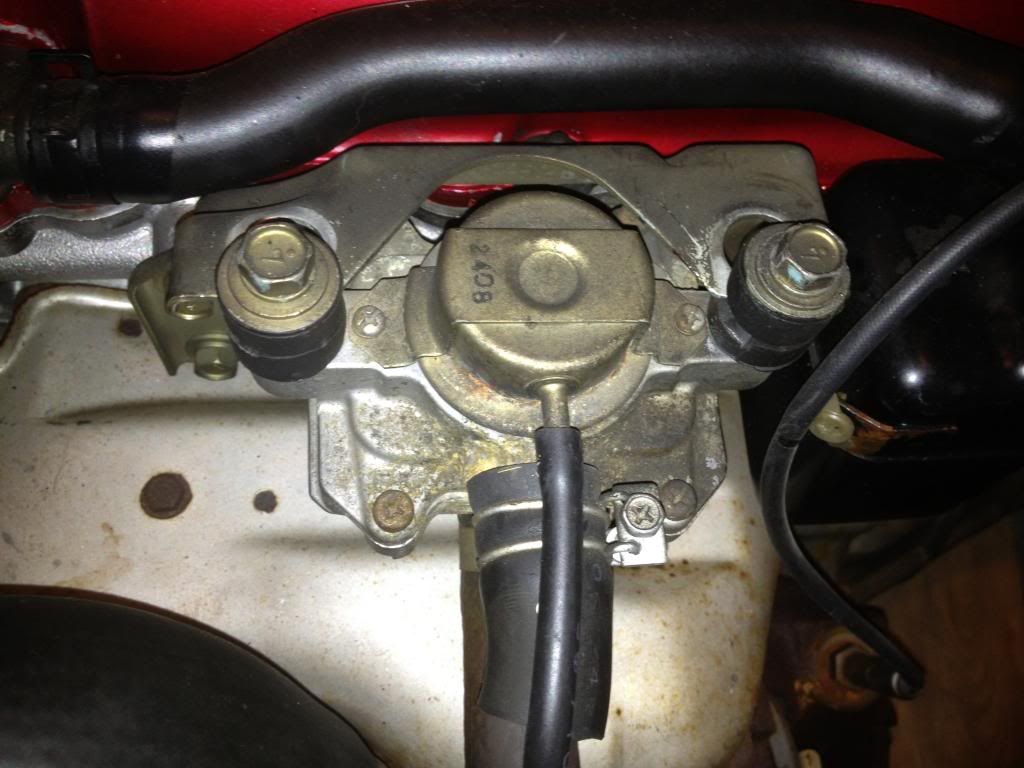

the next pictures are a little disturbing. the turbine had basically no shaft play, but Im a little upset at the oil we found..

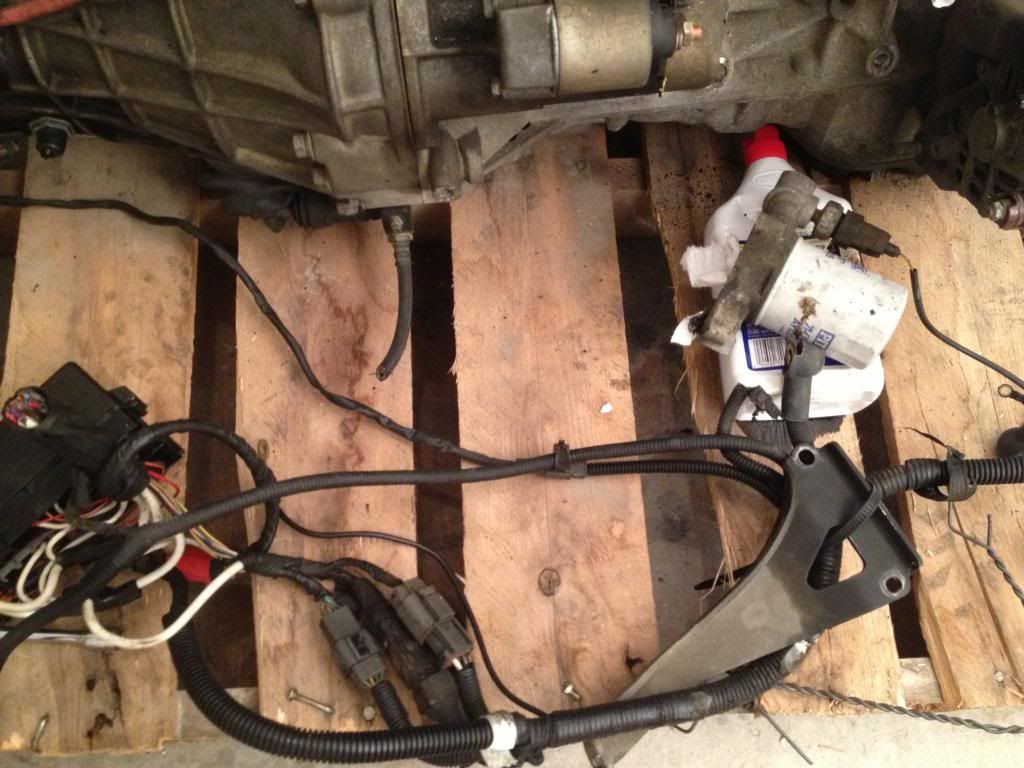

So heres a few of my workspace..its just a 1 car garage attached to my apartment. You may have noticed that I unfortunately have a spare washer and dryer taking up a lot of space in there right now, but I guess with a towel ontop they make a suitable spot to keep my cams.. The lights I just bought at wal-mart actually, for only $35. they have 2 500 watt halogen bulbs that light up the entire garage, they do kick out some heat though. not pictured is about 100 ziploc baggies with individually labeled bolts. you may have also noticed my rather large pile of boxes and trash, I just broke those down and got them out of there so now theres a lot more free space. Yes, we have been working on the motor where it sits on the pallet, I dont have a hoist yet to get it up onto my engine stand. I bought the stand and my friend is going to buy a hoist and we'll share with eachother (he has a turbo integra that he's about to do some work on).

So thats where I stand as of today. I just got in a 10mm allen 1/2 socket bit that I needed to get the rest of the cylinder head off. My plan is to get that off, clean everything, hit the head and block with some high heat aluminum (seems to be a pretty common choice), and reassemble with all of my new parts. My friend is trying to convince me to get that Isis t25/t28 replacement turbo and isis turbo manifold for right now, and then I can sell it off later. I want to eventually pick up AEM EMS 2, some 740cc injectors, and either a GT2871r or maybe step it up to a GT30 with some HKS stage 1 cams. Im limited by how much time I have to actually work on the car because my work and school schedule keep me pretty busy. I will be on vacation all next week, so Im hoping to get some work done the following week since Ill have a long weekend for Thanksgiving.
More future plans include:
step 1:
further engine mods listed above that included engine management
step 2:
probably get flamed for this, but rota p45r's in hyper black, 17x9 front 17x9.5 rear with tires
upgrade brakes
either tein or megan suspension
step 3:
new carpet
bride seats
nardi steering wheel w/ quick release hub
relocate gauges to glove box (my friend works with carbon fiber and could make a cool plate for me)
possibly get the dash and headliner wrapped in leather..
step 4:
kouki front..
step 5:
paint. Im thinking house of kolor galaxy grey will be pretty sick, probably going to do my valve cover that color as well.
huge shout out to my friend Harold who is helping me with pretty much every step of this build
thats it for now! all comments and suggestions are welcomed and appreciated, negative and positive.
Thanks,
JB


