UPDATED(9/5/05) My RB20 Swap Has Begun: Pics from Start to Finish (no 56k)
I figured I'd post pics of the swap progress so far. I plan on doing a full pictorial writeup from start to finish on swapping the RB20.
I bought the swap car this weekend on Saturday from a really nice couple in Brandon, FL. Its a non-wrecked, clean title, 2 owner 1990 5spd beauty that I picked up for $450 because the KA needed over $1000 in repairs and wasn't justifiable for repair.
On Sunday, I woke up at 9am and began removing the motor and trans. It took me till about 7:00pm to finally have it removed. But I had 3 meal breaks, a break to go borrow the hoist, and drink breaks. So subtract about 1-1.5 hours for that and this being the 2nd KA pull, and 4th motor pull for me made it quicker. NO POWER TOOLS USED, so time could be saved with those.
I finished up the day by pressure washing the engine bay, wheel wells, and complete underside of the car.
Next step for me is to acquire the RB20 motorset and prep the car for install. Prepping will include installing the walbro pump, rb20 crossmember (or mounts, havent decided), and removing the rest of the power steering lines and a/c equipment.
I will update accordingly and provide as many pics as possible of the process.
_________________________________________________________________
Day 1 and 2: Purchase and pickup of 240sx, Engine Removal, Cleaning
-------------------------------------------------------------------
![Image]()
![Image]()
![Image]()
![Image]()
Before any removal:
![Image]()
Airbox, Intake, Battery, Spark wires, and componets bolted to shock tower, removed:
![Image]()
Fan shroud, radiator, removed and fuel lines disconnected (depressurize before by opening fuel cap):
![Image]()
Mechanical fan, fan clutch, exhaust manifold, branch wiring, harness, power steering resevoir, A/C lines, throttle cable, cruise cable, brake booster hose, and rear ground removed:
![Image]()
![Image]()
![Image]()
![Image]()
![Image]()
Chain was hooked to each mount and hooked to the host in the middle, angle is steep but it has worked this great this way, every time with a 240. Use a jack to support the tranny while the whole unit is being hoisted upwards. CAREFUL, watch to see that you are not hitting power steering lines and that wires are clear and not getting pinched off:
![Image]()
You will have to lift the tranny up and over the front of the car while a buddy helps move the hoist back:
![Image]()
Engine bay before cleaning:
![Image]()
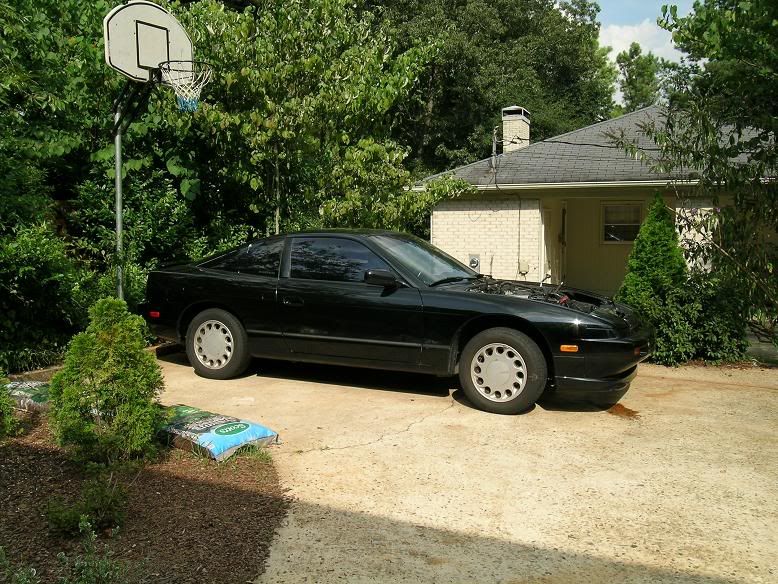
New 240 of left, old on right. The red one was my failed Rb25 project. I swapped a SR20 into it for a friend:
![Image]()
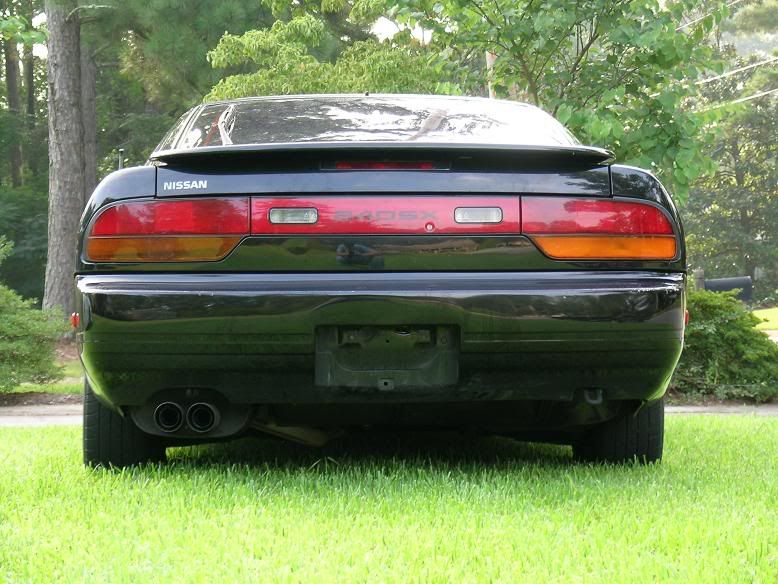
Another pic of the old 240, quite a clean example as well:
![Image]()
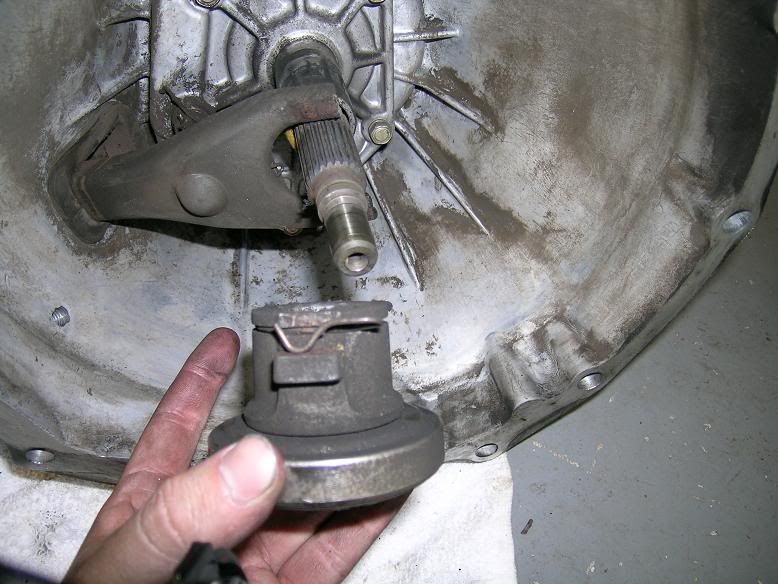
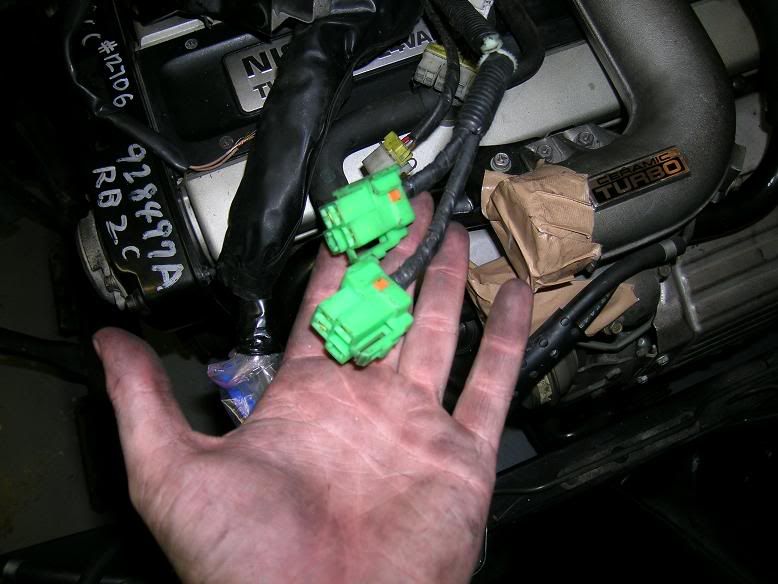
Drivetrain contents stowed away until I trash the engine, make sure to keep the wiring harness to use for extra wire and the lower tranny harness needs to be kept for the Rb20 swap:
![Image]()
Engine bay after cleaning. I coverered the fuel lines, a/c firewall sockets, heater firewall sockers and electrical connectors with zip lock bags and duck taped closed to protect from water. I used Simple Green degreaser and let it settle for a minute before pressure washing the bay. I used a spread spray on teh pressure washer and kept a 12-24 inch distance from the paint so that I wouldnt damamge it. You can hit the crossemember and frame rails hard to get the gunk off:
![Image]()
I figured I'd post pics of the swap progress so far. I plan on doing a full pictorial writeup from start to finish on swapping the RB20.
I bought the swap car this weekend on Saturday from a really nice couple in Brandon, FL. Its a non-wrecked, clean title, 2 owner 1990 5spd beauty that I picked up for $450 because the KA needed over $1000 in repairs and wasn't justifiable for repair.
On Sunday, I woke up at 9am and began removing the motor and trans. It took me till about 7:00pm to finally have it removed. But I had 3 meal breaks, a break to go borrow the hoist, and drink breaks. So subtract about 1-1.5 hours for that and this being the 2nd KA pull, and 4th motor pull for me made it quicker. NO POWER TOOLS USED, so time could be saved with those.
I finished up the day by pressure washing the engine bay, wheel wells, and complete underside of the car.
Next step for me is to acquire the RB20 motorset and prep the car for install. Prepping will include installing the walbro pump, rb20 crossmember (or mounts, havent decided), and removing the rest of the power steering lines and a/c equipment.
I will update accordingly and provide as many pics as possible of the process.
_________________________________________________________________
Day 1 and 2: Purchase and pickup of 240sx, Engine Removal, Cleaning
-------------------------------------------------------------------


Before any removal:

Airbox, Intake, Battery, Spark wires, and componets bolted to shock tower, removed:

Fan shroud, radiator, removed and fuel lines disconnected (depressurize before by opening fuel cap):

Mechanical fan, fan clutch, exhaust manifold, branch wiring, harness, power steering resevoir, A/C lines, throttle cable, cruise cable, brake booster hose, and rear ground removed:


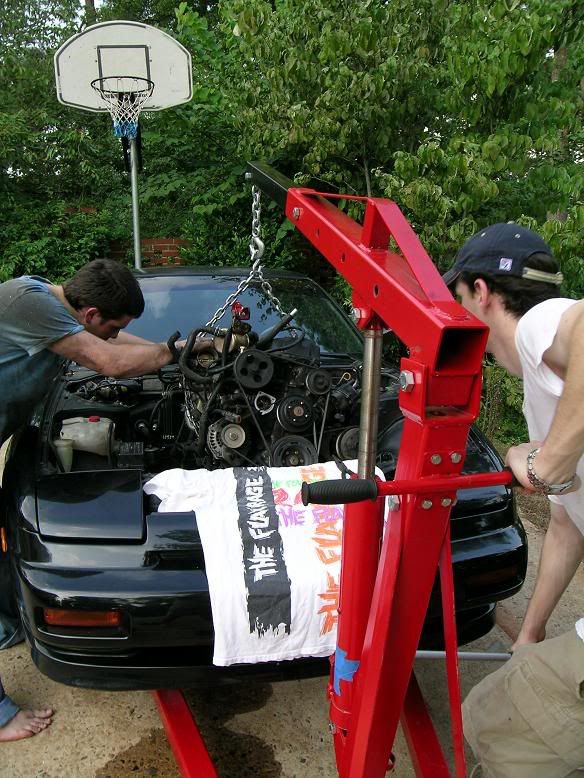

Chain was hooked to each mount and hooked to the host in the middle, angle is steep but it has worked this great this way, every time with a 240. Use a jack to support the tranny while the whole unit is being hoisted upwards. CAREFUL, watch to see that you are not hitting power steering lines and that wires are clear and not getting pinched off:

You will have to lift the tranny up and over the front of the car while a buddy helps move the hoist back:

Engine bay before cleaning:

New 240 of left, old on right. The red one was my failed Rb25 project. I swapped a SR20 into it for a friend:

Another pic of the old 240, quite a clean example as well:

Drivetrain contents stowed away until I trash the engine, make sure to keep the wiring harness to use for extra wire and the lower tranny harness needs to be kept for the Rb20 swap:

Engine bay after cleaning. I coverered the fuel lines, a/c firewall sockets, heater firewall sockers and electrical connectors with zip lock bags and duck taped closed to protect from water. I used Simple Green degreaser and let it settle for a minute before pressure washing the bay. I used a spread spray on teh pressure washer and kept a 12-24 inch distance from the paint so that I wouldnt damamge it. You can hit the crossemember and frame rails hard to get the gunk off: