Hi, my name is stan. And this is my 2nd s13. The first I bought from a friend down south. It was a 89 5speed with a blown head gasket. I was saving up for a motor, but a drunk lady plowed into the rear of my car as it was parked on the street cuz it was raining and she couldn’t see the road L. I could of fixed it. But I would of needed a front sub frame & a rear quarter panel as well as a motor. Luckily I ended up getting my money back
![Image]()
![Image]()
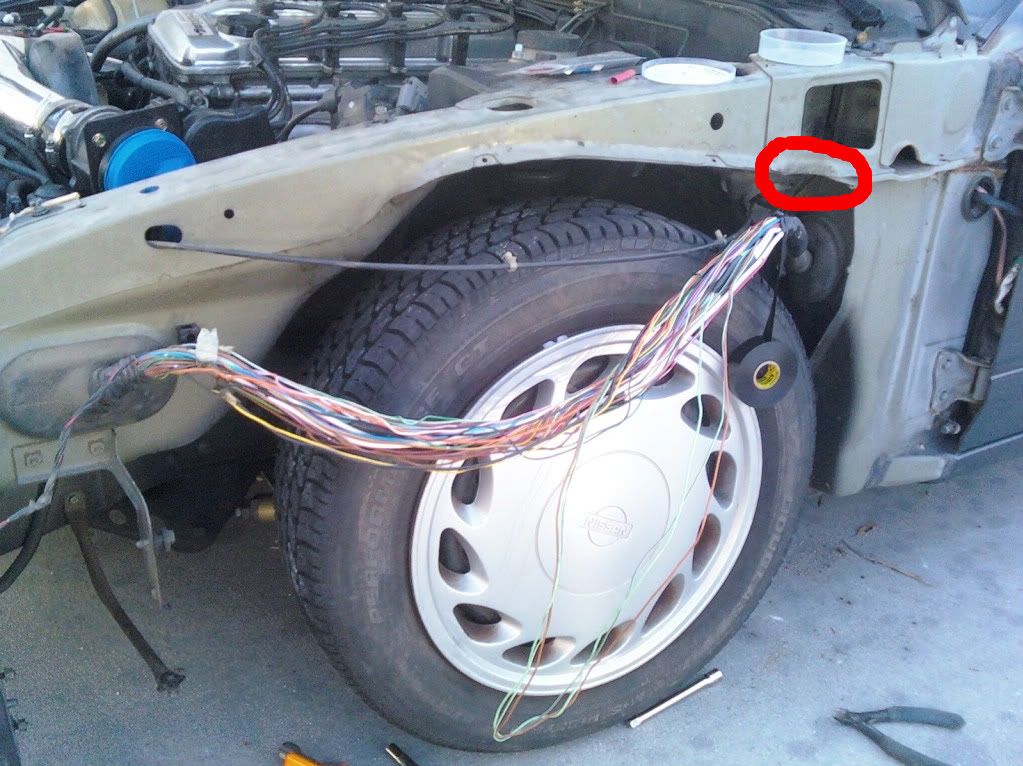
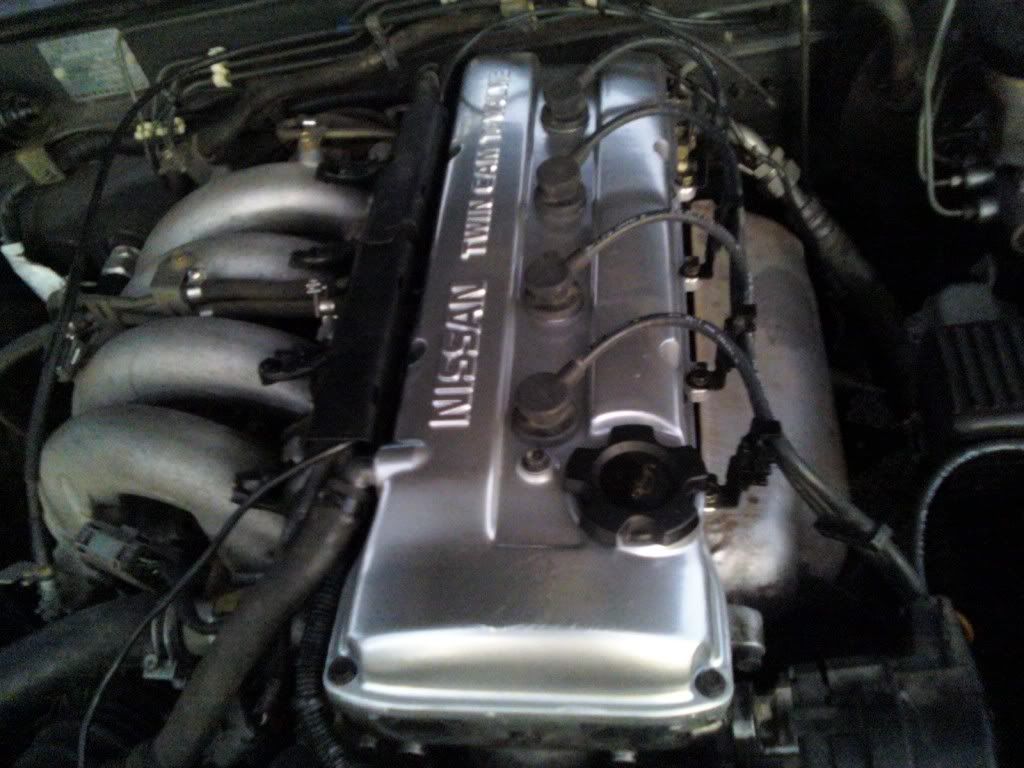
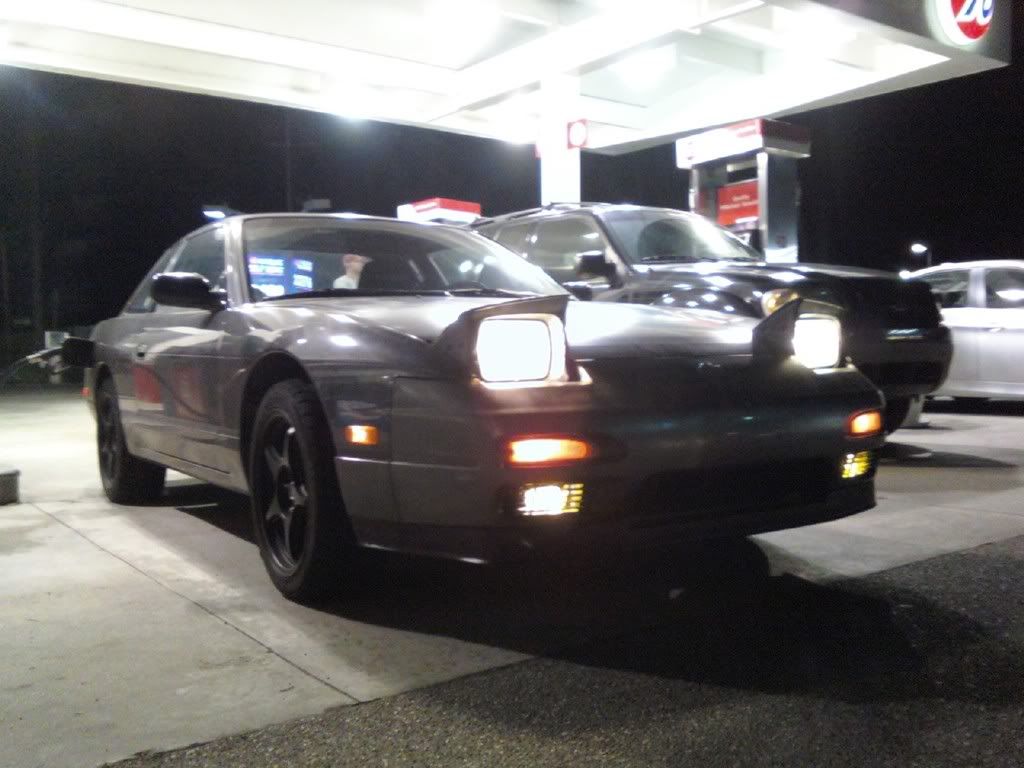
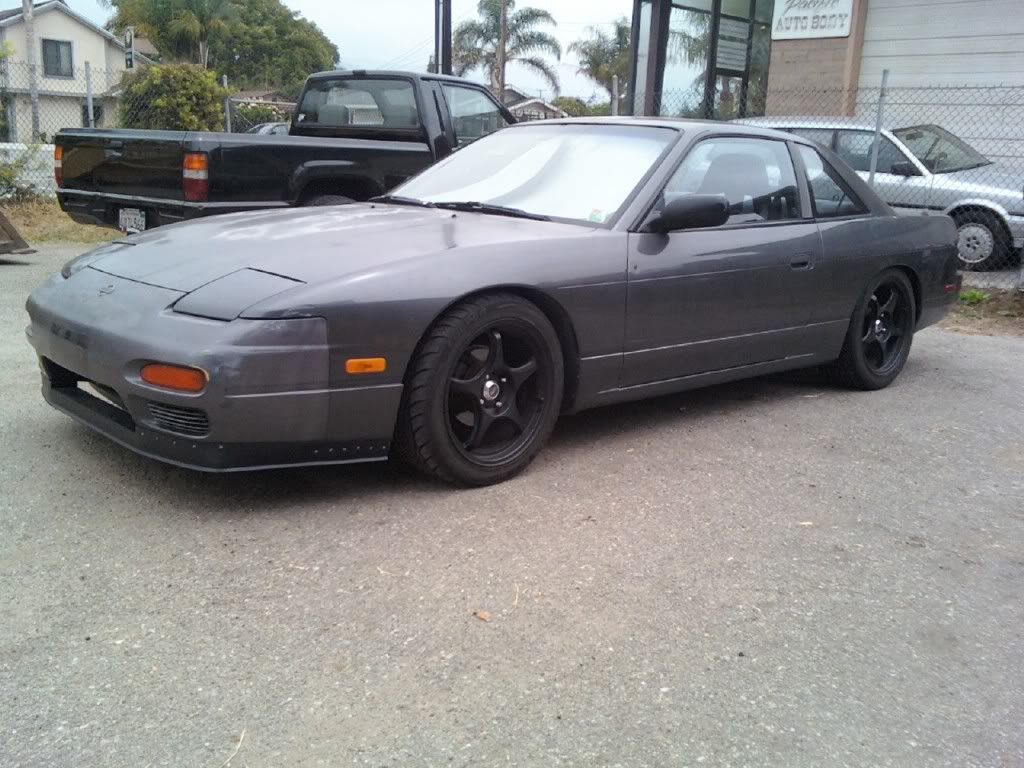
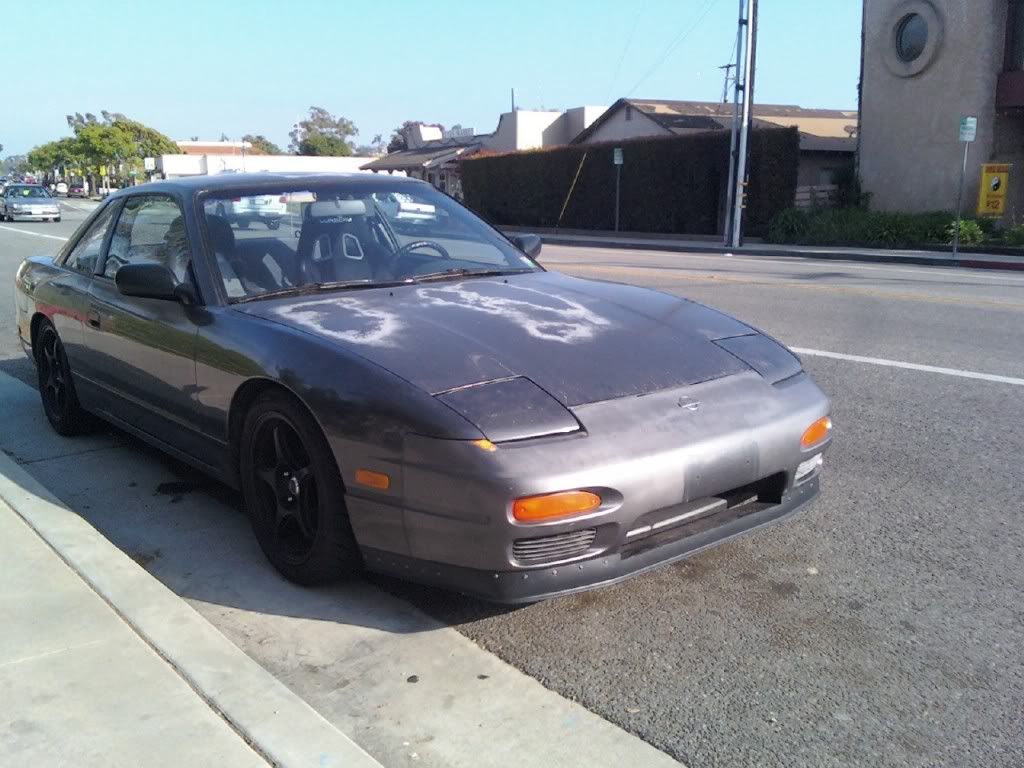
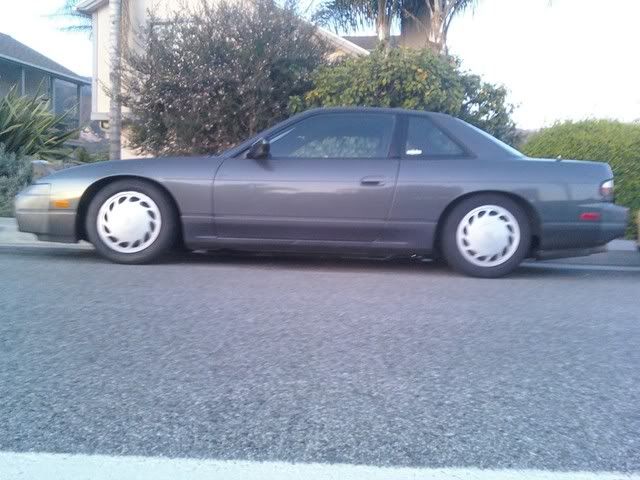
I was on the hunt for another s13. And it took me a while searching. But I found this grey s13 coupe up north, I had to have it. It was very stock with a rotted exhaust & 4x4 stance. But it was a cherry one owner grandpa car. And minus the little bend front left LCA, in very good condition. This was the summer of 08. Once I got her home I started tearing into it. I did all the maintenance things first (new vaccum hoses, intake, spark plugs, fuel lines & filter, valve cover gasket ect.) oh and I painted my valve cover a sweet aluminum color. It looked bling gold with the reflection of the flood light I was using to dry it faster
![Image]()
![Image]()
I bought a weapon r intake (because it was the cheapest C.A.R.B. legal intake I could find) I didn’t trust their filter so I put a cotton SPECTRE on their for good measure
![Image]()
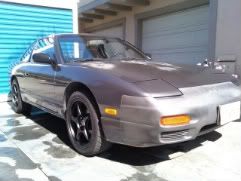
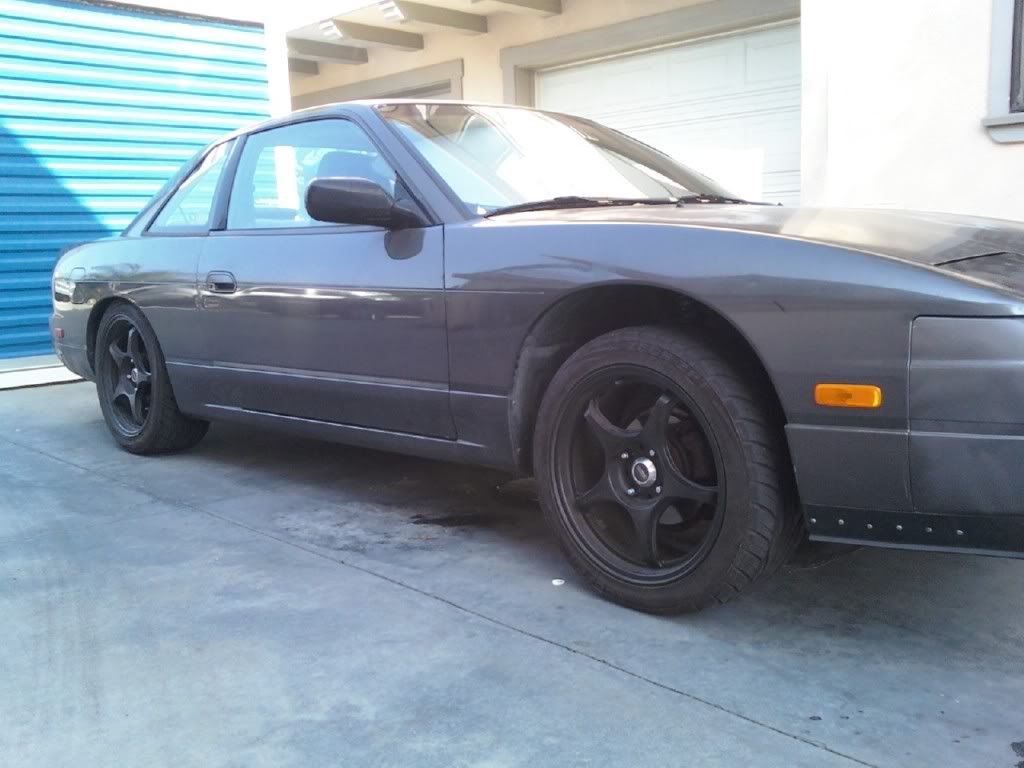
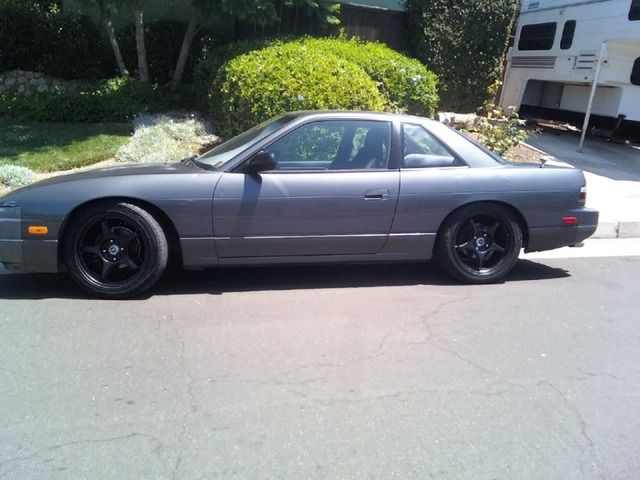
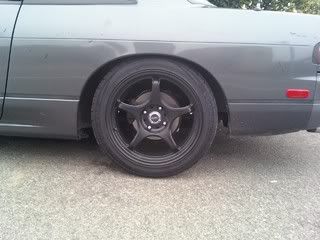
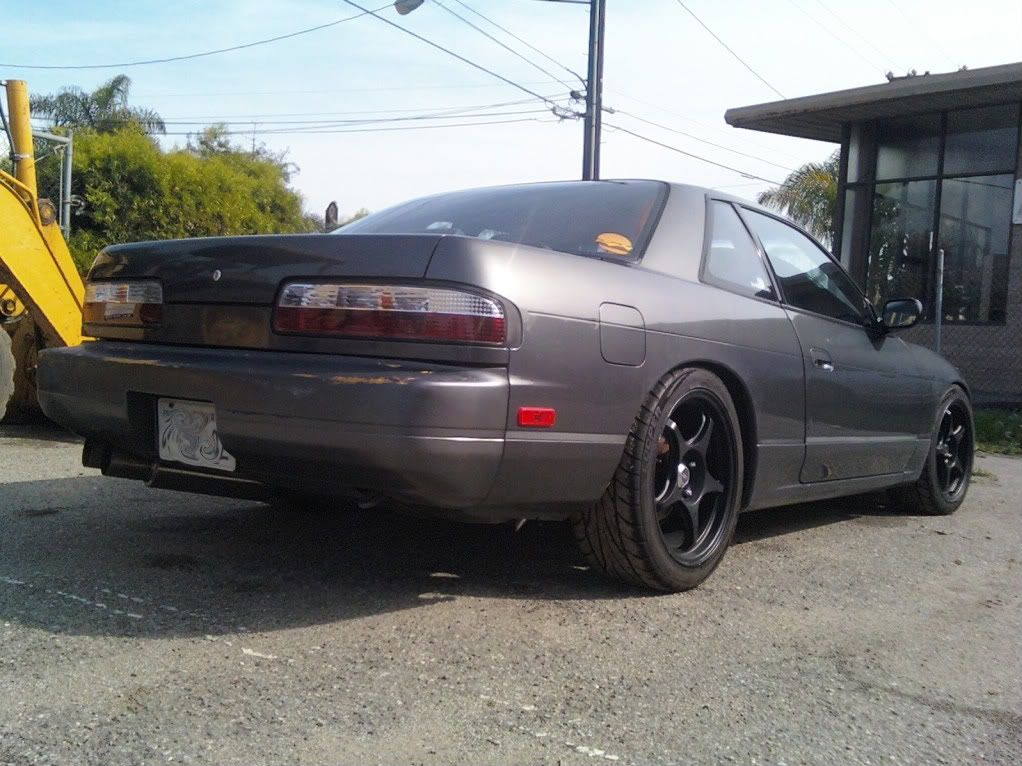
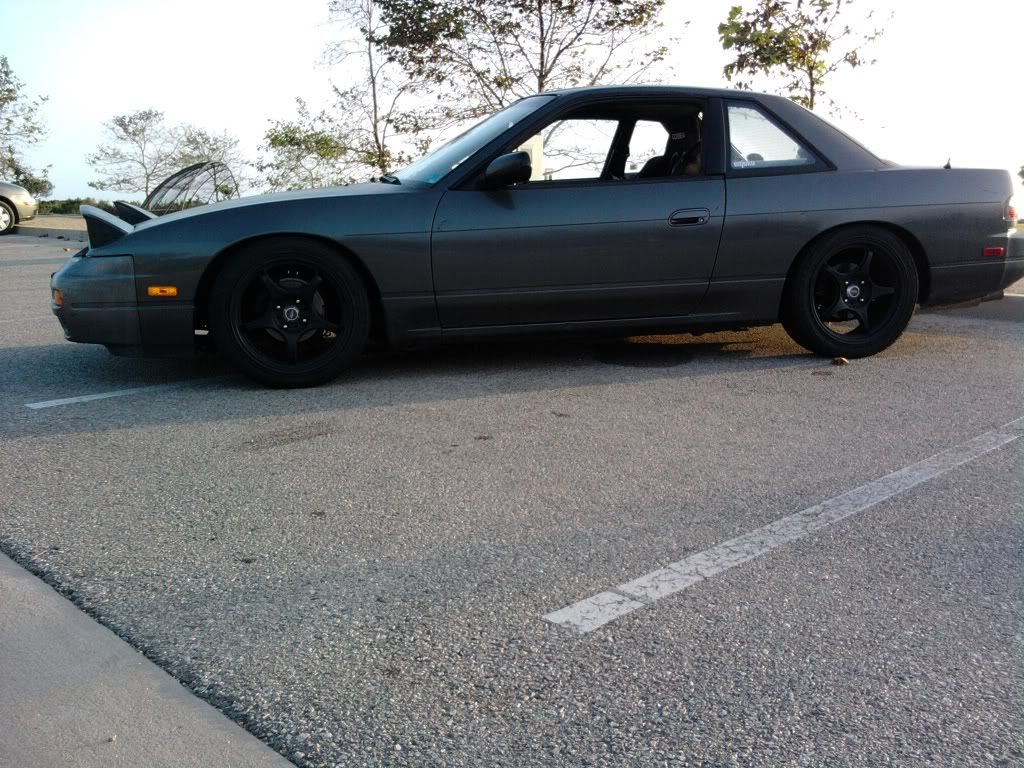
Then I bought some rims. 5zigen fno1r-c in 17x8 +35. I loved how it looked all 4x4 w/nicer rims :3
![Image]()
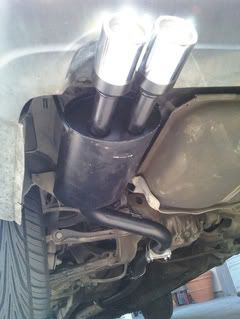
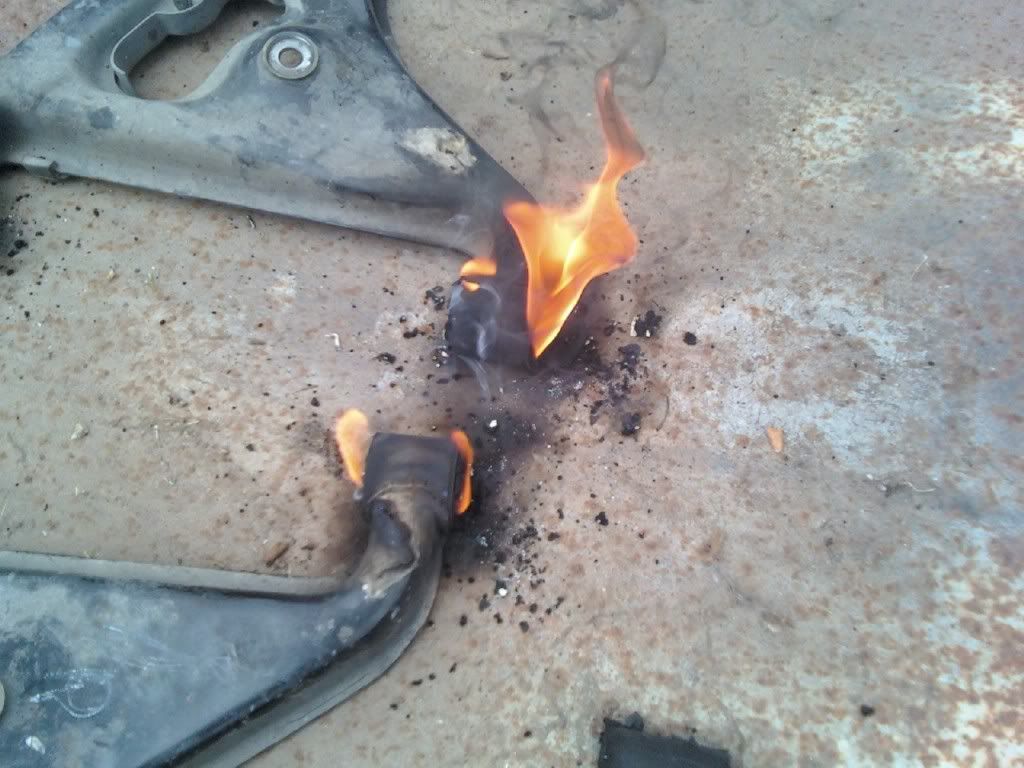
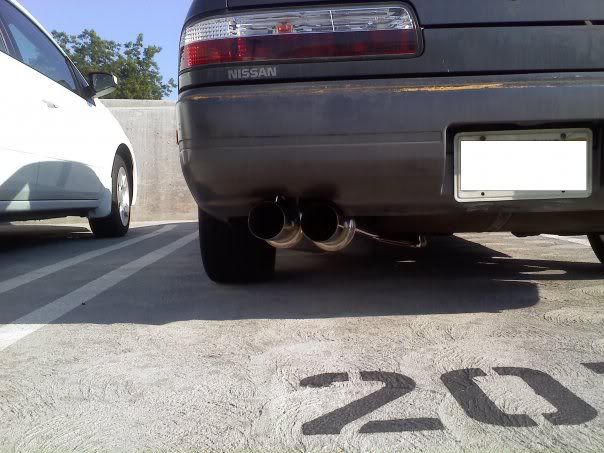
And I ordered a cat back exhaust from pacesetter (bad Idea) it sounded better than my rotted stock exhaust, but not by much
![Image]()
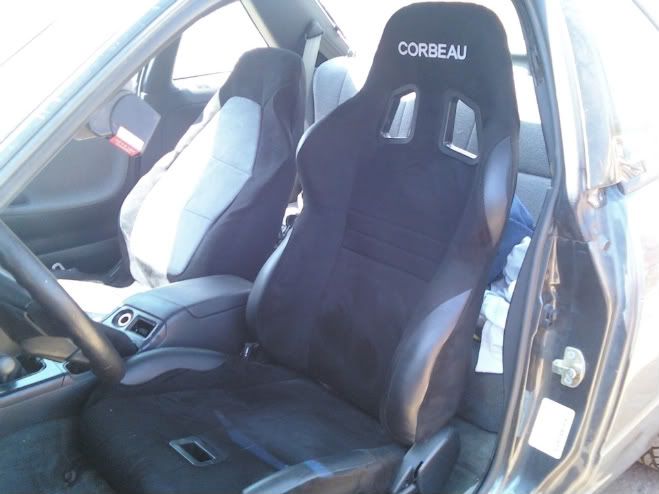
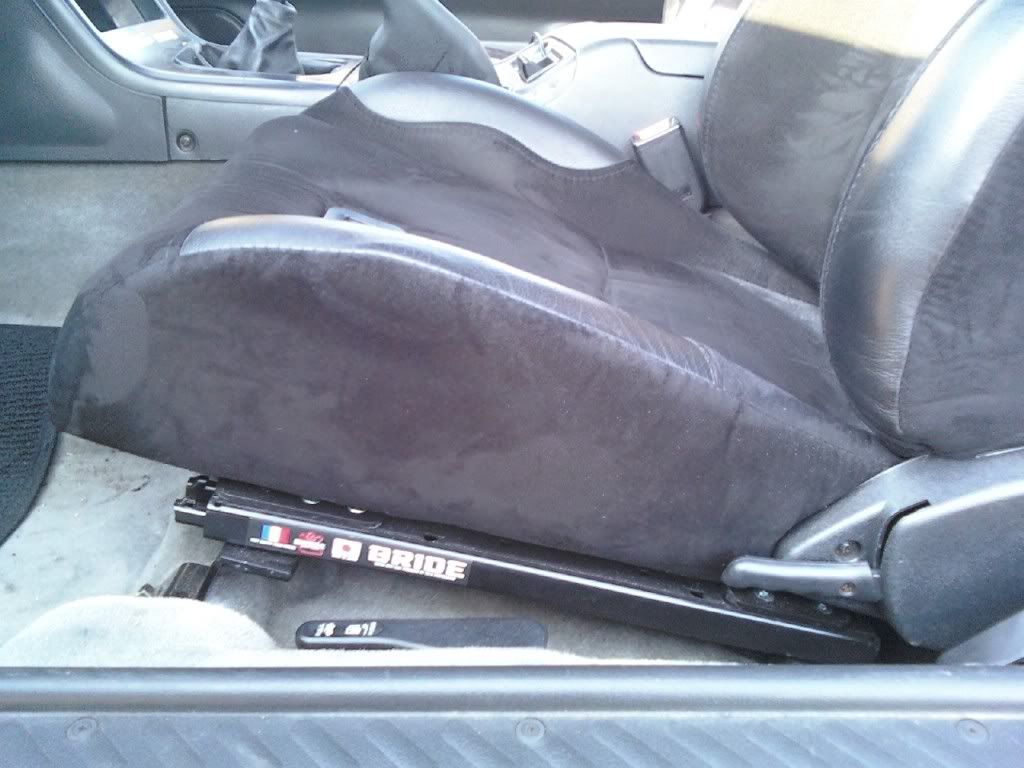
My seat was ripped soo much that the metal frame was exposed on the lumbar support & would burn me on hot days. So I snagged this seat off eBay for 4bills. And I got a bride super low seat bracket so I’d fit right
![Image]()
![Image]()
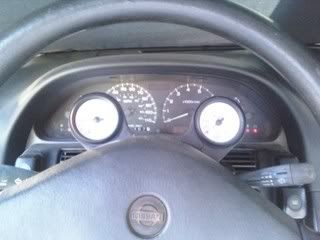
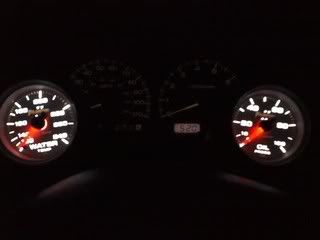
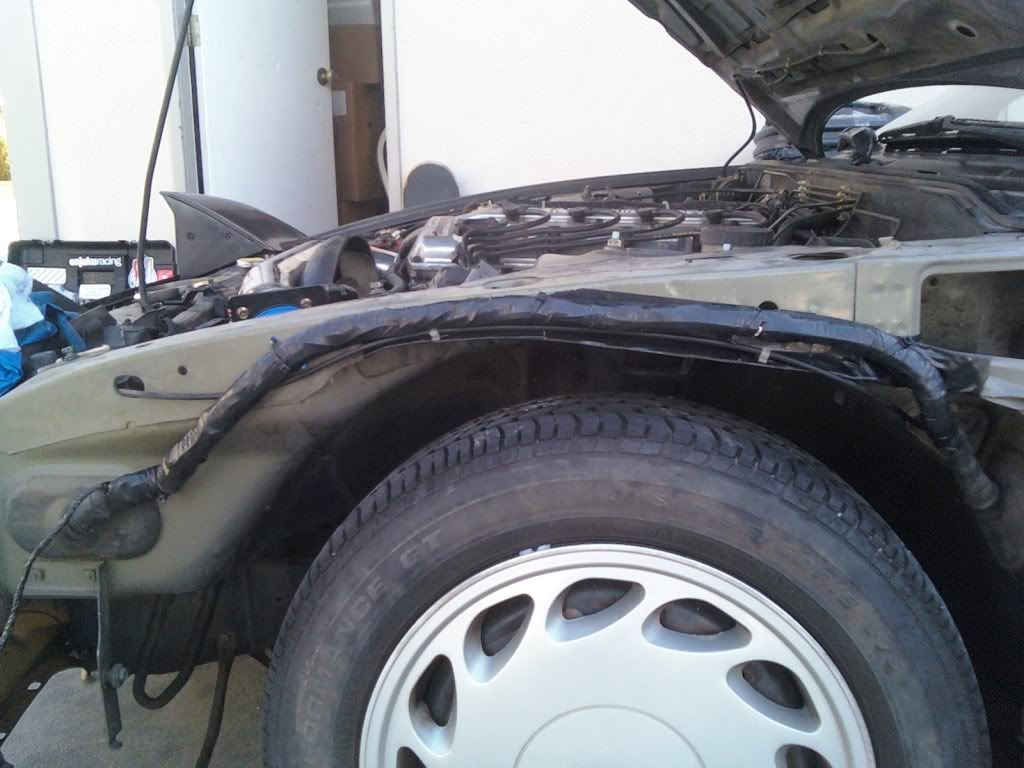
And I decided that gauges would be good because my motor had 180k @ the time, so I ordered some oil press & water temp gauges in auto meter phantom 2 cuz they were led lit. I put them In a ricetastic column pod for easy viewing
![Image]()
![Image]()
![Image]()
I wanted to get jdm tzyte, so I ordered a set of fog lights. I used a right angle drill and cut a drill bit down so that I could fit it inbetween the back front bumper and the bumper support. I mounted them so they fit behind the bumper grilles
![Image]()
There had been no real progress for a while, because I was trying to sell my 3000gt so that I could afford suspension. But that big bitch of a car was hard to sell. But a older black gentlemen loved the car & color. He just had to have it (for the price of 6000$ yeah!!!)
![Image]()
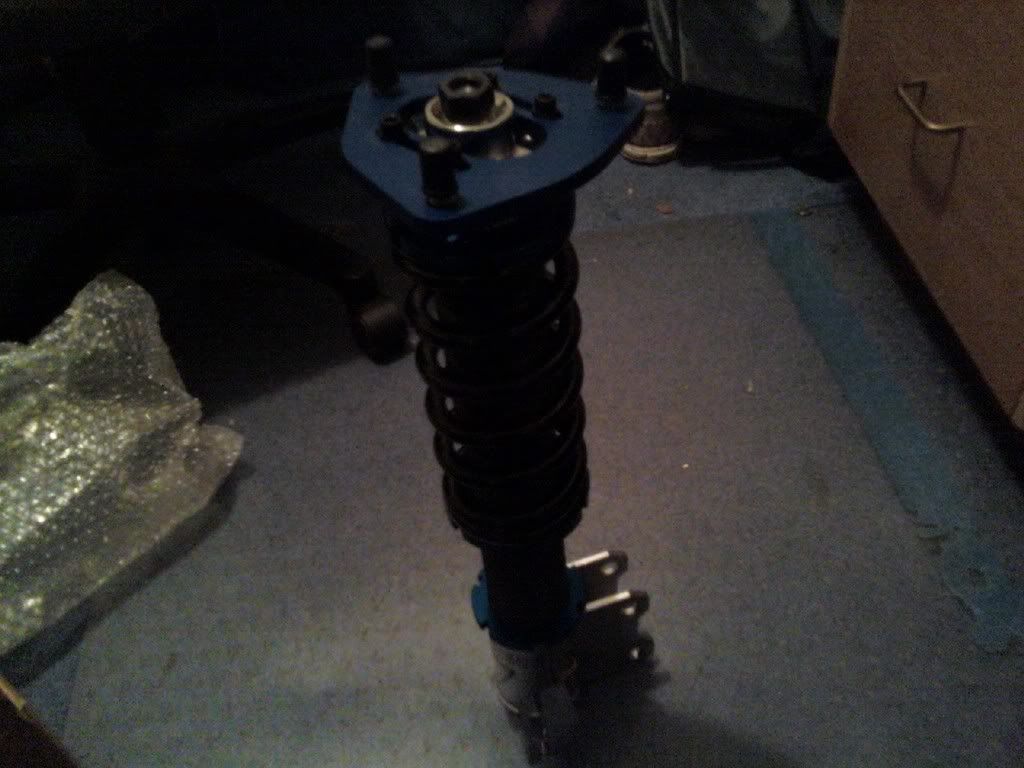
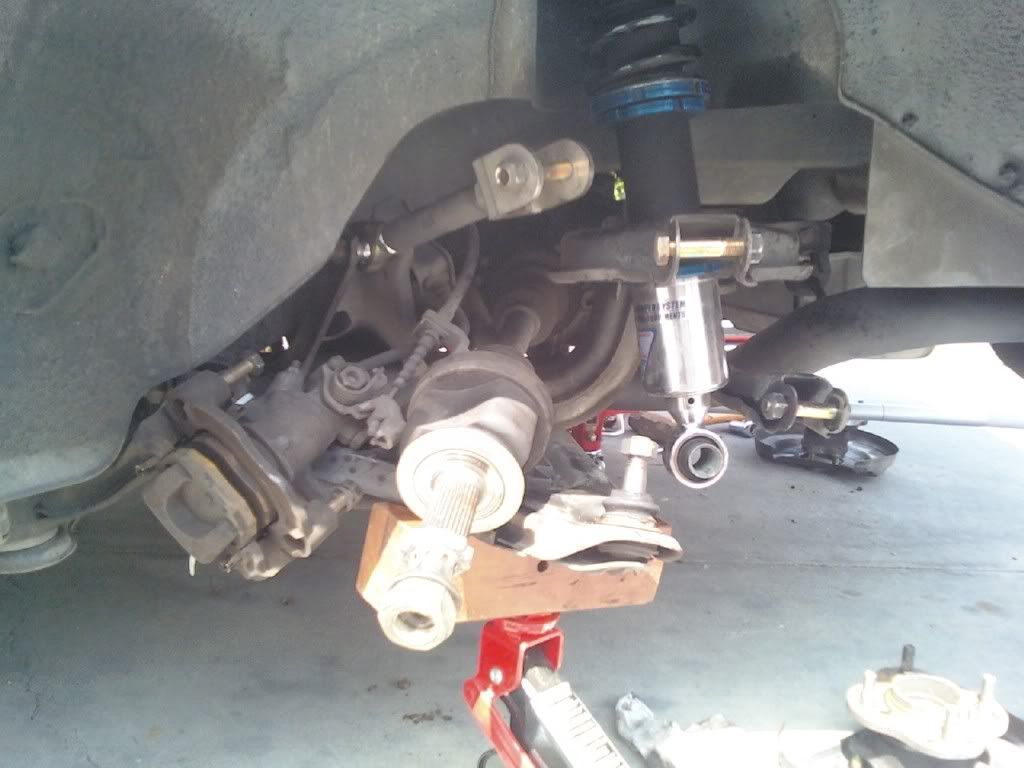
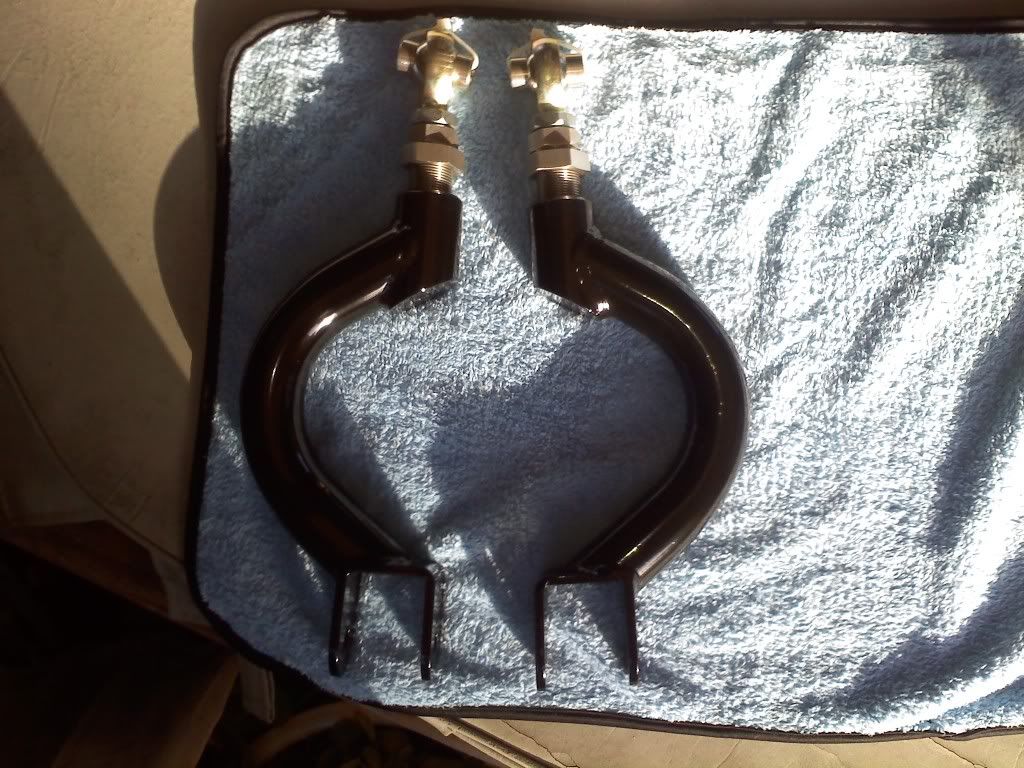
So I immediately purchased KTS coils from splparts.com
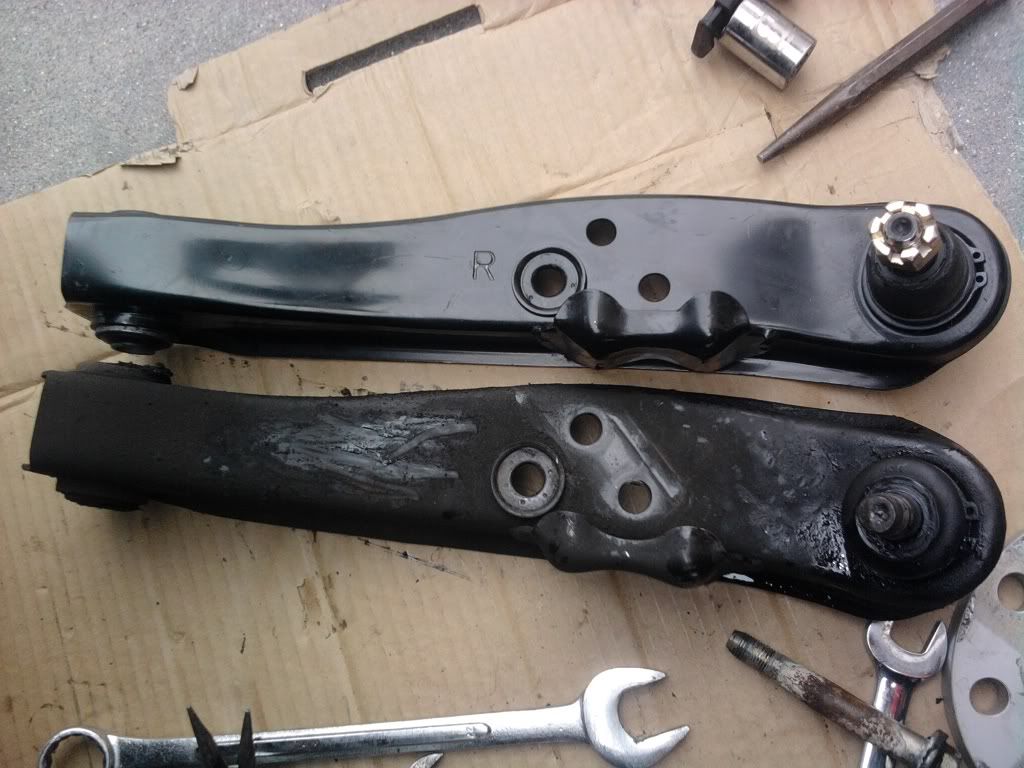
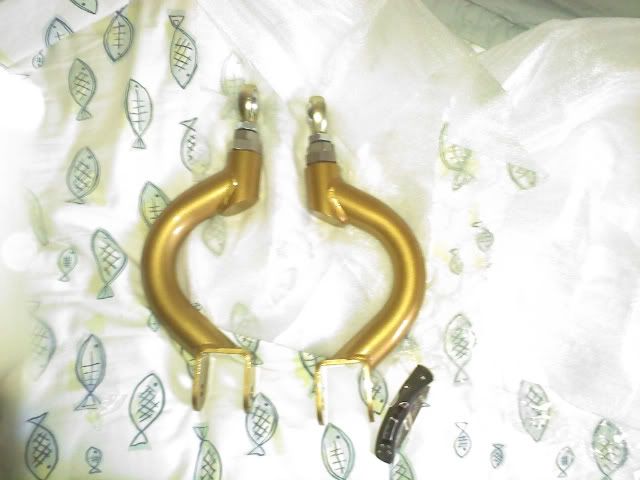
I also ordered a four arm set of PEAK PERFORMANCE adjustable arms. The coils and front tension rods and traction rods came first. The toe & ruca’s were on backorder for a couple months.
Shineys!
(when I first installed the susp. It was set up like this out of the box & had no time to change it the first day cuz it started getting dark & my help was getting beer hungry. So I left it on the street for a day in this form)
![Image]()
![Image]()
![Image]()
![Image]()
![Image]()
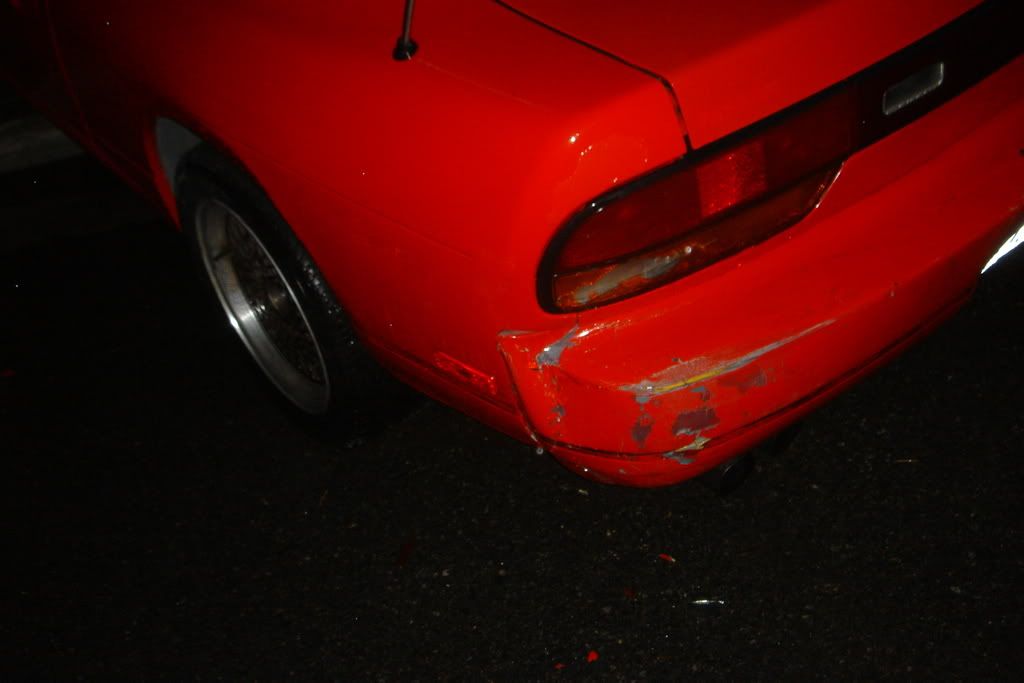
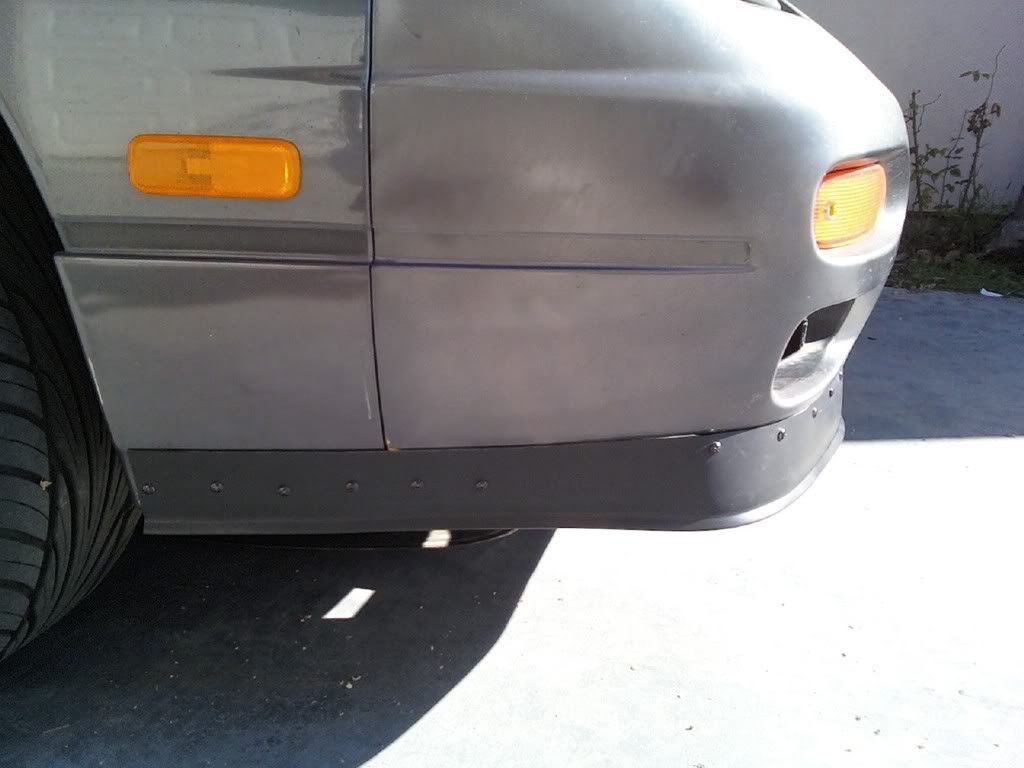
Then somewhere along the lines I got dmax tailights & I took a whack at making the ever famous home depot lip. In case your wondering, I left the front suspension higher at the time because I still needed to remove the fenders to do a wire tuck. & also pound the fender well in/roll the fenders to fit the 17’s so I could slam it some more. The rear was maxed out & the front still had an inch and a half
![Image]()
![Image]()
![Image]()
I ordered a energy suspenion urethane kit & on my summer break (09) installed all the rear bushings (PITA but sooo worth it)
![Image]()
![Image]()
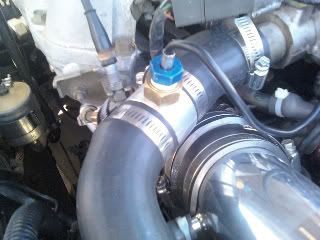
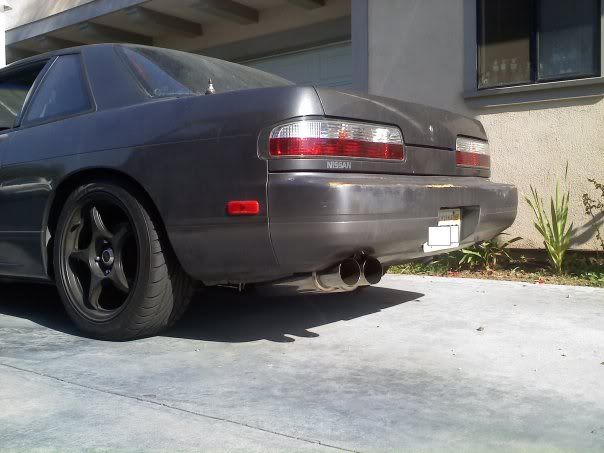
I started getting tired of my pacesetter exhaust, & Julia @ enjukuracing.com hooked me up w/a isis dual n1 exhaust for a crazy deal because one of the tips was slightly bent (who cares). Quality & sound is way better than the pacesetter.
![Image]()
![Image]()
So I had to wait like four months from initial purchase date for my ruca’s. but they finally came, and in bling gold none the less
![Image]()
I immediately painted them gloss black, because im not a fan of bling/brightly colored suspension components
![Image]()
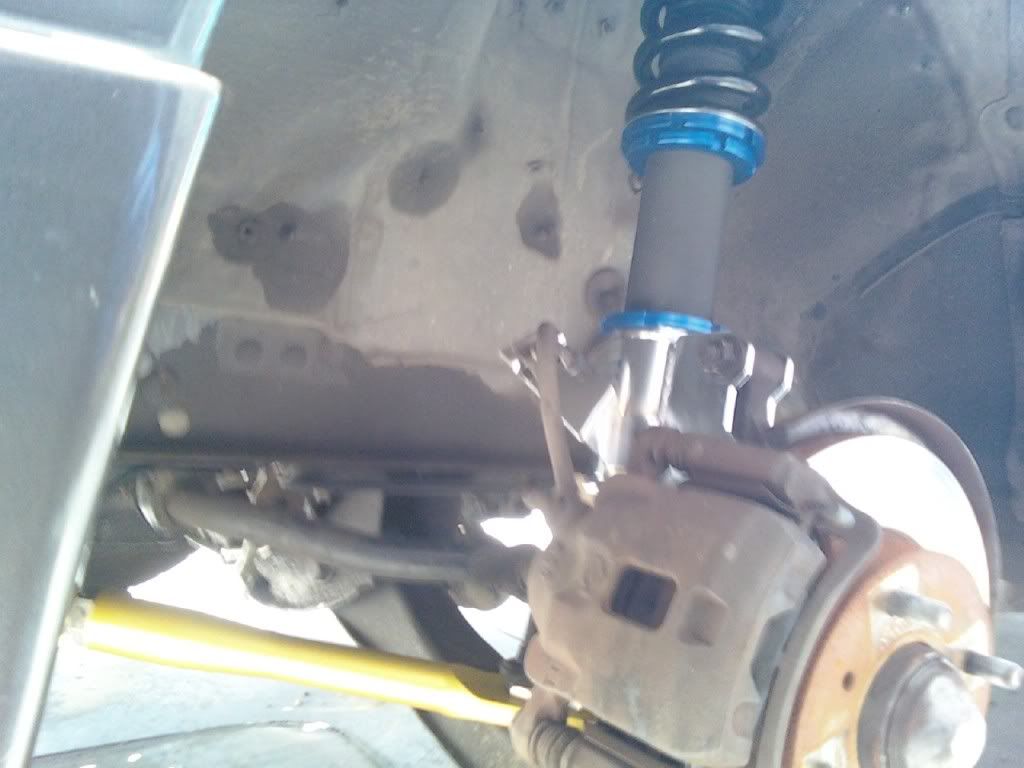
Then I did my wire tuck (finally) because I had to get my car ready for this meat (LEFT COAST LOW) that the slam burglars and stance works put together. So I pounded the pinch weld that is directly ontop of the tire. Rolled the fender, and did a wire tuck (no pics sorry). I ended up removing once collar up front and drooping the springs all the way around. I was as low as my suspension would allow. I didn’t make it in the limelight, but I was near the limelight because my friends cars are soo crazy low.
Here you can see how I only had about 3 inches of front bumper clearance
![Image]()
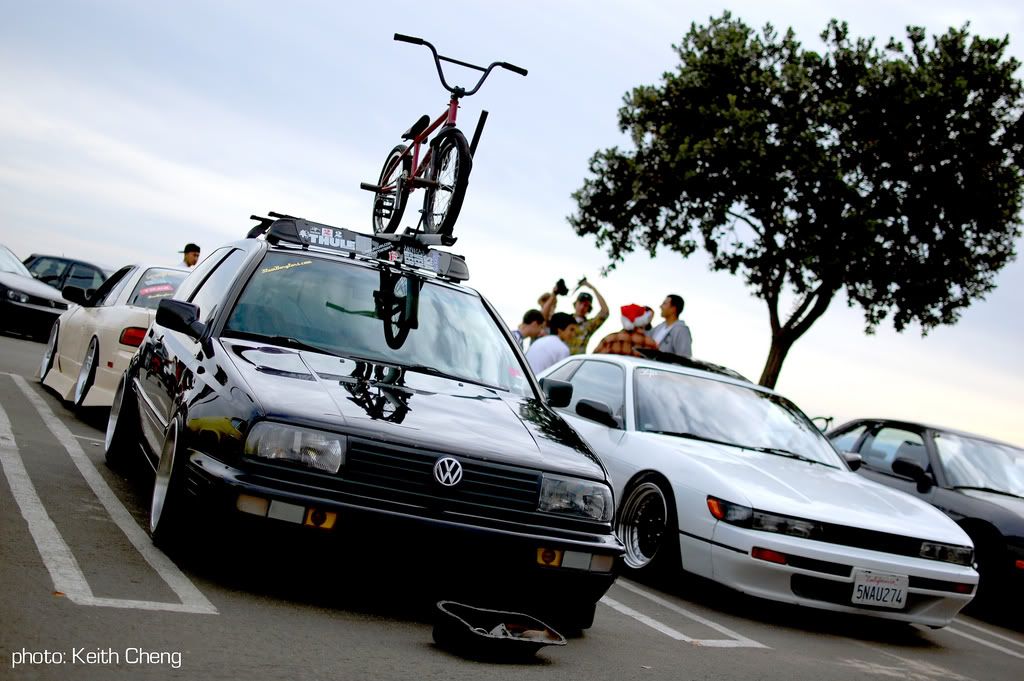
There my car is next to my friend zachs coupe & Kevin’s mk3
![Image]()
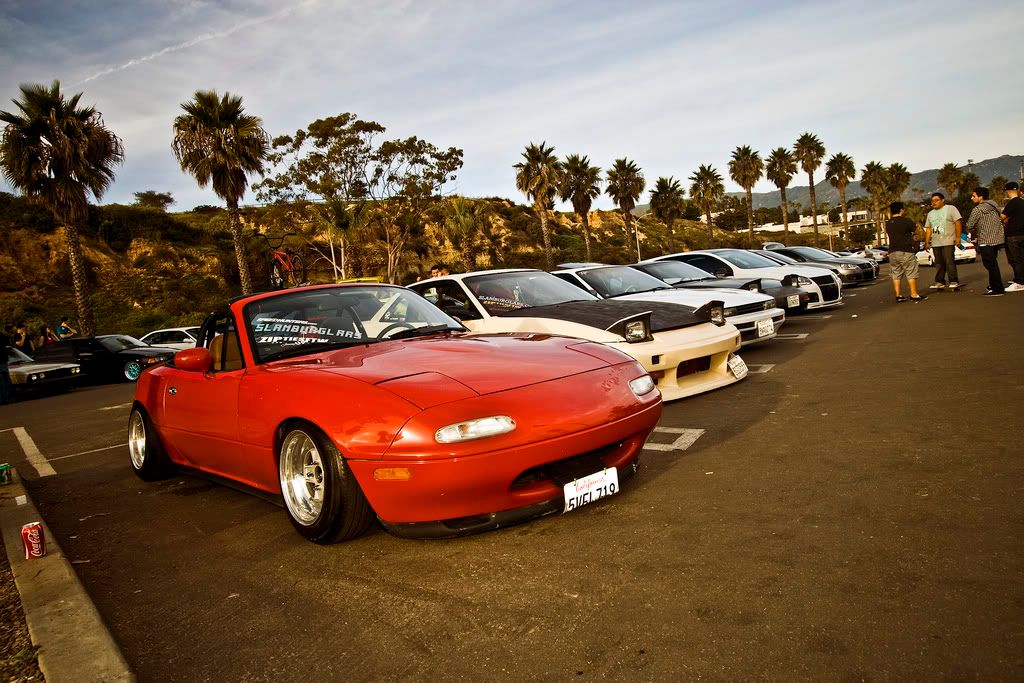
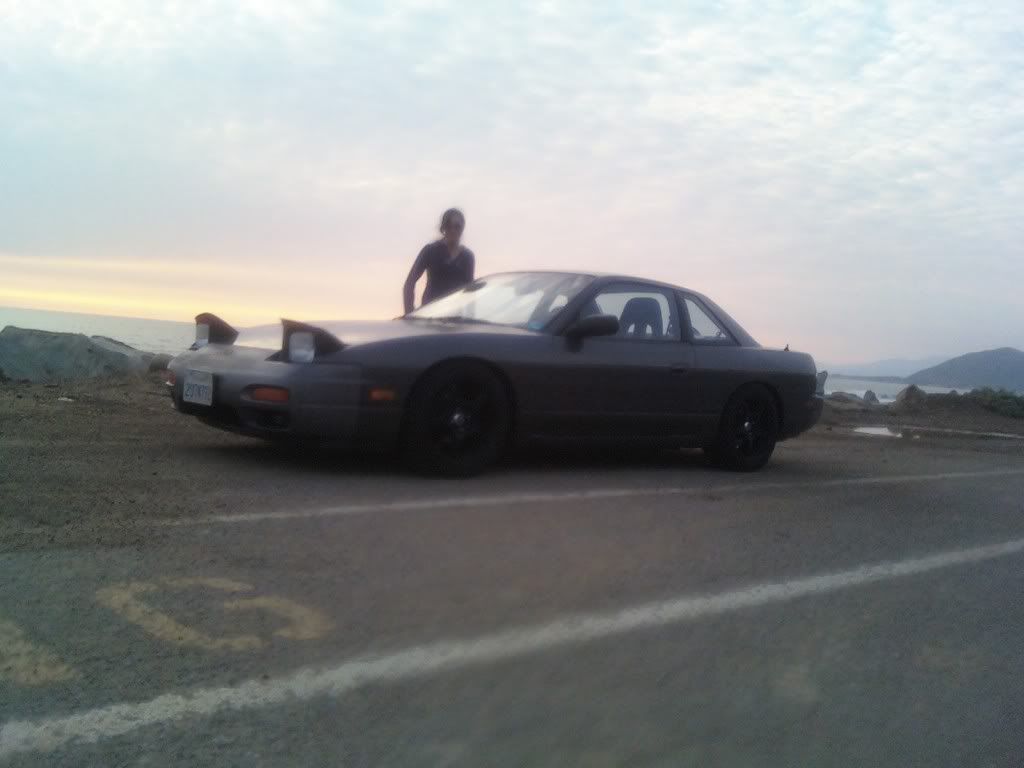
And the lineup, harrisons miata, ivans s13 coupe, zachs coupe, and mine
![Image]()
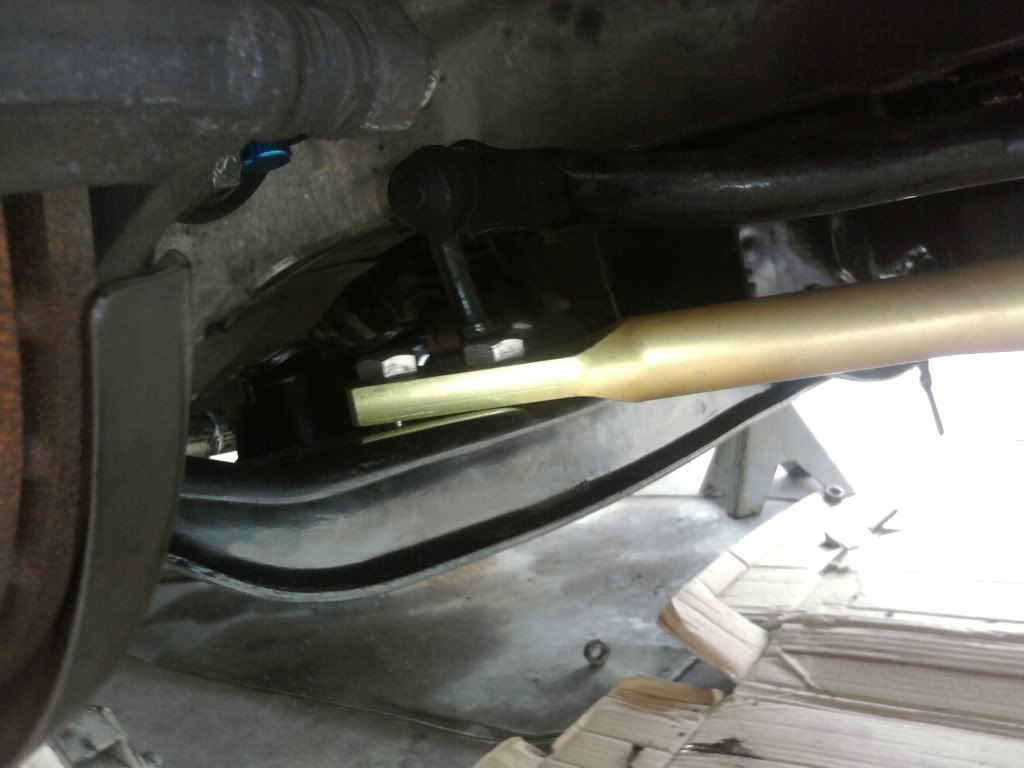
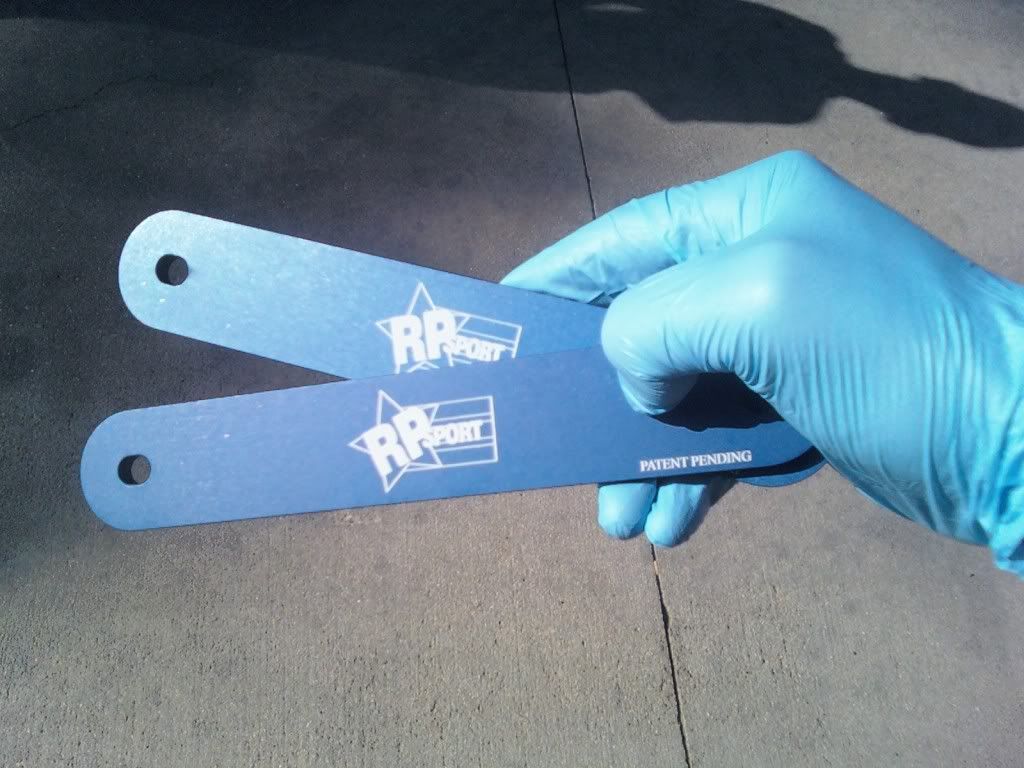
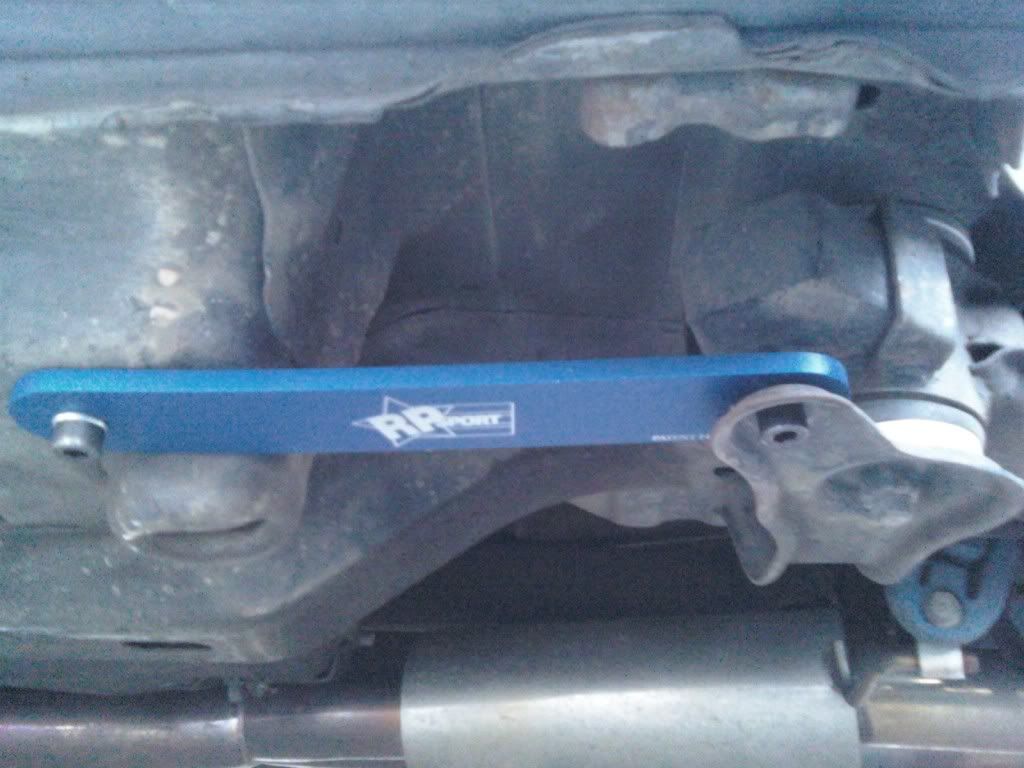
Then I got my rpsport braces that had also been on backorder. It was a easy install and makes a huge difference in rear stability. I highly recommend
![Image]()
![Image]()
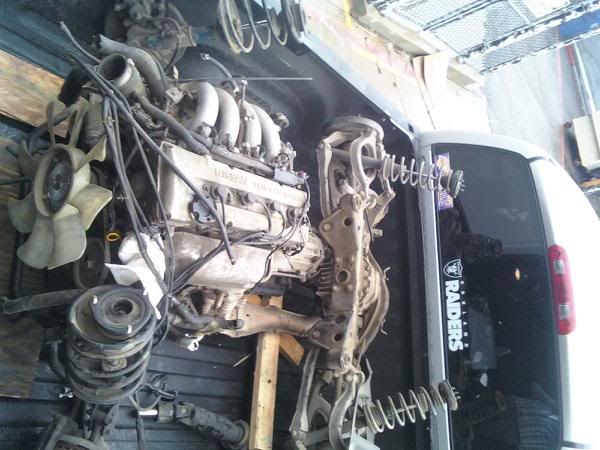
Currently: I got a steal of a deal from my friend who works @ a crash test engineer place. They took the body off a s13 hatch to test, & left the drive train up for grabs. So my friend ivan & I split it @ 75 each. I got the motor, auto tragic trans, front spindles, rear axles, differential, and all four brakes
(I am selling the brakes if anyone is interested)
I love this pic
![Image]()
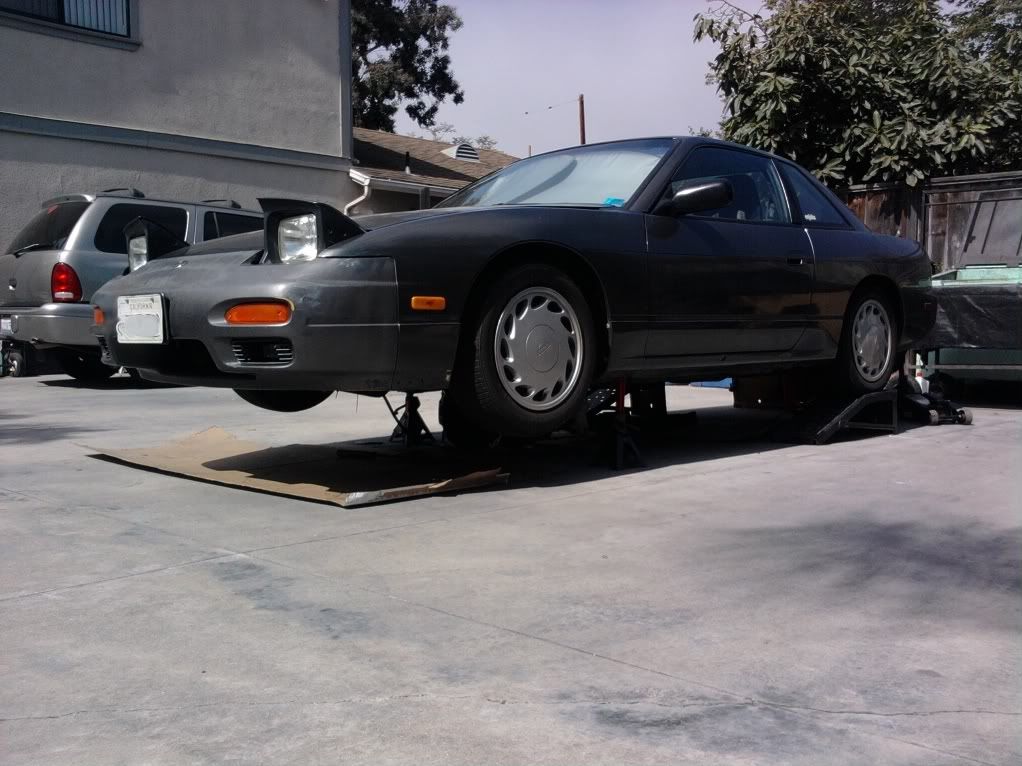
This is how she sits as of now. I have the stock steelies on there because I am in the process of painting my rims. Future plans include installing my z32 diff that has been sitting in my garage. Saving up enough money so I can rebuild my 30mm z32 calipers and buy rotors & conversion lines.
![Image]()
![Image]()
![Image]()
Not too bad for only owning this car for under 2 years & going through the radiology program at the same time. Thanks for looking :beer2:
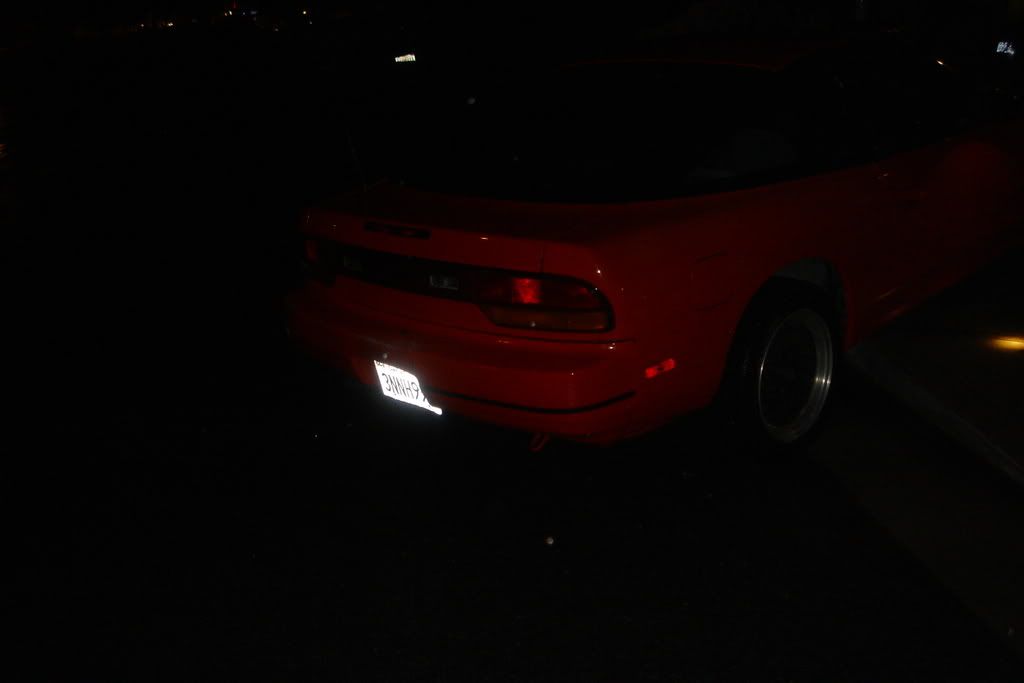
welll, this is the new current status... rubs a lil bit up front, but oh well. it will roll out like this for now
![Image]()
**well now i have graduated and have to make something with myself only for the purpose of attaining more money that i can dump into my car. i just ordered arp stud & gorrilla lug nuts so my wheels actually stay on the car. after that im gonna cheap out & rattle can the wheels BRG color. but the prized items on my list are a isis aluminum radiator, and gettin all the parts together to install my z32 brakes. ntm hopefully fixing my mushroomed end half shaft so that i can ge a nut to seat on the threads without fucking them up.
I was on the hunt for another s13. And it took me a while searching. But I found this grey s13 coupe up north, I had to have it. It was very stock with a rotted exhaust & 4x4 stance. But it was a cherry one owner grandpa car. And minus the little bend front left LCA, in very good condition. This was the summer of 08. Once I got her home I started tearing into it. I did all the maintenance things first (new vaccum hoses, intake, spark plugs, fuel lines & filter, valve cover gasket ect.) oh and I painted my valve cover a sweet aluminum color. It looked bling gold with the reflection of the flood light I was using to dry it faster
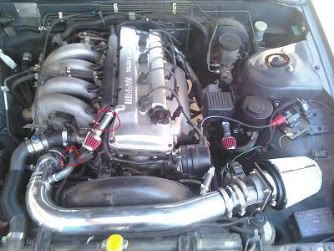
I bought a weapon r intake (because it was the cheapest C.A.R.B. legal intake I could find) I didn’t trust their filter so I put a cotton SPECTRE on their for good measure
Then I bought some rims. 5zigen fno1r-c in 17x8 +35. I loved how it looked all 4x4 w/nicer rims :3
And I ordered a cat back exhaust from pacesetter (bad Idea) it sounded better than my rotted stock exhaust, but not by much
My seat was ripped soo much that the metal frame was exposed on the lumbar support & would burn me on hot days. So I snagged this seat off eBay for 4bills. And I got a bride super low seat bracket so I’d fit right
And I decided that gauges would be good because my motor had 180k @ the time, so I ordered some oil press & water temp gauges in auto meter phantom 2 cuz they were led lit. I put them In a ricetastic column pod for easy viewing
I wanted to get jdm tzyte, so I ordered a set of fog lights. I used a right angle drill and cut a drill bit down so that I could fit it inbetween the back front bumper and the bumper support. I mounted them so they fit behind the bumper grilles
There had been no real progress for a while, because I was trying to sell my 3000gt so that I could afford suspension. But that big bitch of a car was hard to sell. But a older black gentlemen loved the car & color. He just had to have it (for the price of 6000$ yeah!!!)
So I immediately purchased KTS coils from splparts.com
I also ordered a four arm set of PEAK PERFORMANCE adjustable arms. The coils and front tension rods and traction rods came first. The toe & ruca’s were on backorder for a couple months.
Shineys!
(when I first installed the susp. It was set up like this out of the box & had no time to change it the first day cuz it started getting dark & my help was getting beer hungry. So I left it on the street for a day in this form)
Then somewhere along the lines I got dmax tailights & I took a whack at making the ever famous home depot lip. In case your wondering, I left the front suspension higher at the time because I still needed to remove the fenders to do a wire tuck. & also pound the fender well in/roll the fenders to fit the 17’s so I could slam it some more. The rear was maxed out & the front still had an inch and a half
I ordered a energy suspenion urethane kit & on my summer break (09) installed all the rear bushings (PITA but sooo worth it)
I started getting tired of my pacesetter exhaust, & Julia @ enjukuracing.com hooked me up w/a isis dual n1 exhaust for a crazy deal because one of the tips was slightly bent (who cares). Quality & sound is way better than the pacesetter.
So I had to wait like four months from initial purchase date for my ruca’s. but they finally came, and in bling gold none the less
I immediately painted them gloss black, because im not a fan of bling/brightly colored suspension components
Then I did my wire tuck (finally) because I had to get my car ready for this meat (LEFT COAST LOW) that the slam burglars and stance works put together. So I pounded the pinch weld that is directly ontop of the tire. Rolled the fender, and did a wire tuck (no pics sorry). I ended up removing once collar up front and drooping the springs all the way around. I was as low as my suspension would allow. I didn’t make it in the limelight, but I was near the limelight because my friends cars are soo crazy low.
Here you can see how I only had about 3 inches of front bumper clearance
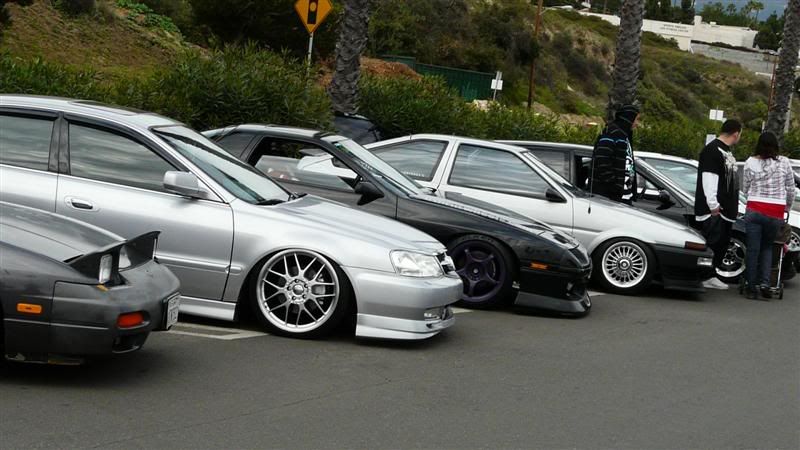
There my car is next to my friend zachs coupe & Kevin’s mk3
And the lineup, harrisons miata, ivans s13 coupe, zachs coupe, and mine
Then I got my rpsport braces that had also been on backorder. It was a easy install and makes a huge difference in rear stability. I highly recommend
Currently: I got a steal of a deal from my friend who works @ a crash test engineer place. They took the body off a s13 hatch to test, & left the drive train up for grabs. So my friend ivan & I split it @ 75 each. I got the motor, auto tragic trans, front spindles, rear axles, differential, and all four brakes
(I am selling the brakes if anyone is interested)
I love this pic
This is how she sits as of now. I have the stock steelies on there because I am in the process of painting my rims. Future plans include installing my z32 diff that has been sitting in my garage. Saving up enough money so I can rebuild my 30mm z32 calipers and buy rotors & conversion lines.
Not too bad for only owning this car for under 2 years & going through the radiology program at the same time. Thanks for looking :beer2:
welll, this is the new current status... rubs a lil bit up front, but oh well. it will roll out like this for now
**well now i have graduated and have to make something with myself only for the purpose of attaining more money that i can dump into my car. i just ordered arp stud & gorrilla lug nuts so my wheels actually stay on the car. after that im gonna cheap out & rattle can the wheels BRG color. but the prized items on my list are a isis aluminum radiator, and gettin all the parts together to install my z32 brakes. ntm hopefully fixing my mushroomed end half shaft so that i can ge a nut to seat on the threads without fucking them up.
")