What's up everyone. This thread is about my first 240SX and the restoration/building of it slowly over time. I've been into cars since I was 14 and have been working on them for the past 10 years. I used to be a Foxbody Mustang guy during most my teenage years, but then I started getting into Japanese cars and drove a 1999 Mazda Miata (no shame, that car was awesome lol) for the past 5 years. At any rate, I had to sell the Miata to buy a RHD Saturn Station Wagon (I'm a mail carrier) for work. I sold the Miata and had enough money to buy the Saturn, a new body for my girlfriends car which we are going to swap the motor from her current car into, and a 1996 Black Nissan 240SX Base model Automatic.
I've always loved the Nissan 240SX and have wanted one for YEARS. I ended up finding one in nonrunning condition about 2 hours away from me in South Carolina. The guy had it on eBay and thought it had a blown head gasket. He bought it from someone who said it would overheat after a short while. The guy began to take it apart but never got farther than unbolting the valve cover, exhaust manifold, intakes, injectors, and a couple other miscellaneous items. The radiator was also no good because it had a massive crack on the top plastic end tank. It had been hit on the drivers side quarter panel by a deer, nothing too major, but it did look ugly. I ended up winning the car for $730 and after talking to the guy he was able to have it towed to my door for another $100. So far I had spent $830.
Since the car was not too far apart, I decided to bolt everything back up and see for myself just what it was doing. I bolted everything all back up and patched the stock radiator with JBWeld just so I could test things out. The car never smoked at all and the inside of the valve cover and oil were completely free of coolant so I had my doubts that it was in fact a head gasket. As stated, the car began to overheat after it warmed up. I read up about how difficult it was to bleed these KA24's and did just about everything I could to try and bleed it properly to no avail. However, the thing that made the LEAST bit of sense to me at the time was that the car WOULD NOT overheat if you left the radiator cap off. In other words, it would only overheat when pressurized.
Well for the heck of it, I decided to go for a quick blast down the road with the cap off just to see how she ran. She pulled HARD and was running great the majority of the time. Towards the end of the drive all of a sudden the car just lost ALL power at 4000 RPMS and would NOT rev at all past that. If I gave it anything more than 1/4 throttle it would fall flat on it's face and just getting the car to move from a stand still was next to impossible! I limped her back home and was VERY confused as to what the heck just happened. Initially I thought either the head gasket WAS going bad and it finally blew completely, or I messed up my MAF by possibly infecting coolant into the intake by some VERY odd chance.
I decided to order a new radiator and do a complete tune up. I replaced the plugs, wires, air filter, fuel filter, both radiator hoses, oil filter, Mobil 1 oil, flushed and bled the power steering system etc. I spent about $250 for the new radiator and parts. So far I was at $1050. The tune up did nothing to fix the extreme hesitation and after searching the forums for countless hours I was SURE my MAF was no good. However, even when I disconnected the plug from the MAF the car still wouldn't rev at all in neutral. I was still unable to give it more than 1/4 throttle without it stalling. I cleaned the MAF over and over and even attempted to take it apart as a last ditch effort before buying another one. Well it didn't work so I bought a MAF from an Altima after reading they were the same. That didn't fix the problem either.
I then ripped apart the exhaust thinking maybe the catalytic converter was clogged because that had happened on my Miata before and it had the exact same symptoms. Well, both the precat and main cat were in good shape and all taking the exhaust off accomplished was breaking a stud that connects the precat to the exhaust manifold off in the manifold itself and having to cut the EGR pipe. Sigh. I bolted it back up, less one precat stud and the EGR tube.
I then read that a bad knock sensor could cause the same symptoms I was experiencing so I unplugged that hoping for the best. No dice. I checked all my grounds and fuses and everything looked intact. I ripped the back seat out and checked the fuel pump and unplugged each injector one at a time and still everything seemed to function as it should. I was running out of options and beginning to think maybe the head gasket really was blown but just wasn't showing any symptoms at all. I preformed a cold compression check since the motor wouldn't idle long enough to warm up and the numbers were all within 3 PSI of each other. More reason to doubt a bad head gasket.
Well after thinking about this for quite awhile I began to suspect the motor may have skipped a tooth while I was driving it and that was causing the problems. Armed with my timing light I went out to check. Sure enough, the timing was WAY off. At least 10 degrees. I loosened the distributor and was able to get the timing back to the stock setting by moving the distributor about as far as it would allow me to adjust it. I hopped back in and.... SHE REVVED! The car instantly had all it's power back. I had finally found what had gone wrong!
As for what would cause the chain to skip a tooth, well your guess is as good as mine, but I'm betting the previous mechanic who screwed up the water pump/thermostat install might of had something to do with it at some point. Suggestions are welcome for what would cause it to skip a tooth. Either way, this gives me a VERY good excuse to do the cam upgrade using S13 (I think it was S13 cams, I'll have to double check) cams and realign the chain. However, for the time being, the car is running great with the exception of that nasty EGR pipe leak.
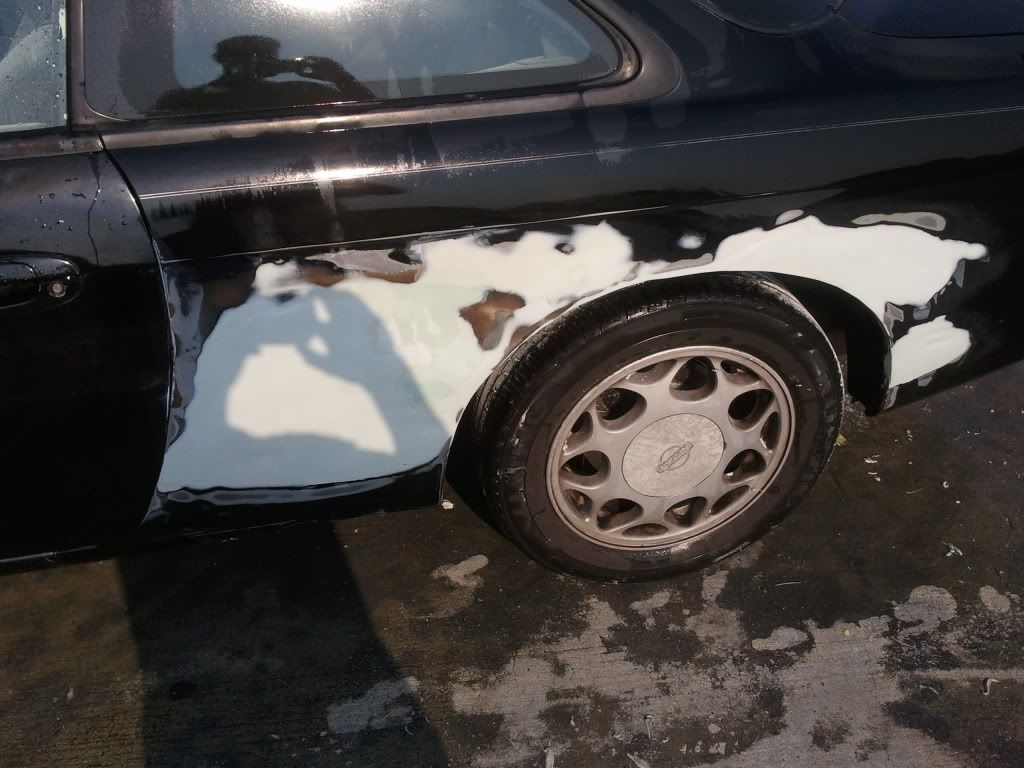
I have an OBX header, EGR block off plate, and EGR bung plug on order as we speak to take care of all that. Keep in mind I am going with a header right now because I have no plans to do a SR swap or turbo the car anytime soon. I plan to do some modest upgrades and just enjoy the car for now. One day I will go all out though. After I get the exhaust squared away it'll be time to work on fixing up the body and getting her all primed/painted. So far I'm about $1100 - $1150 into her! I'm posting some pictures below of when I first got the car off the trailer and I'll be updating this thread with every new part/body upgrade.
![Image]()
![Image]()
![Image]()
![Image]()
![Image]()
![Image]()
![Image]()
![Image]()
Thanks for looking!
PS: Here's a pic of the 99 Miata I had:
![Image]()
I've always loved the Nissan 240SX and have wanted one for YEARS. I ended up finding one in nonrunning condition about 2 hours away from me in South Carolina. The guy had it on eBay and thought it had a blown head gasket. He bought it from someone who said it would overheat after a short while. The guy began to take it apart but never got farther than unbolting the valve cover, exhaust manifold, intakes, injectors, and a couple other miscellaneous items. The radiator was also no good because it had a massive crack on the top plastic end tank. It had been hit on the drivers side quarter panel by a deer, nothing too major, but it did look ugly. I ended up winning the car for $730 and after talking to the guy he was able to have it towed to my door for another $100. So far I had spent $830.
Since the car was not too far apart, I decided to bolt everything back up and see for myself just what it was doing. I bolted everything all back up and patched the stock radiator with JBWeld just so I could test things out. The car never smoked at all and the inside of the valve cover and oil were completely free of coolant so I had my doubts that it was in fact a head gasket. As stated, the car began to overheat after it warmed up. I read up about how difficult it was to bleed these KA24's and did just about everything I could to try and bleed it properly to no avail. However, the thing that made the LEAST bit of sense to me at the time was that the car WOULD NOT overheat if you left the radiator cap off. In other words, it would only overheat when pressurized.
Well for the heck of it, I decided to go for a quick blast down the road with the cap off just to see how she ran. She pulled HARD and was running great the majority of the time. Towards the end of the drive all of a sudden the car just lost ALL power at 4000 RPMS and would NOT rev at all past that. If I gave it anything more than 1/4 throttle it would fall flat on it's face and just getting the car to move from a stand still was next to impossible! I limped her back home and was VERY confused as to what the heck just happened. Initially I thought either the head gasket WAS going bad and it finally blew completely, or I messed up my MAF by possibly infecting coolant into the intake by some VERY odd chance.
I decided to order a new radiator and do a complete tune up. I replaced the plugs, wires, air filter, fuel filter, both radiator hoses, oil filter, Mobil 1 oil, flushed and bled the power steering system etc. I spent about $250 for the new radiator and parts. So far I was at $1050. The tune up did nothing to fix the extreme hesitation and after searching the forums for countless hours I was SURE my MAF was no good. However, even when I disconnected the plug from the MAF the car still wouldn't rev at all in neutral. I was still unable to give it more than 1/4 throttle without it stalling. I cleaned the MAF over and over and even attempted to take it apart as a last ditch effort before buying another one. Well it didn't work so I bought a MAF from an Altima after reading they were the same. That didn't fix the problem either.
I then ripped apart the exhaust thinking maybe the catalytic converter was clogged because that had happened on my Miata before and it had the exact same symptoms. Well, both the precat and main cat were in good shape and all taking the exhaust off accomplished was breaking a stud that connects the precat to the exhaust manifold off in the manifold itself and having to cut the EGR pipe. Sigh. I bolted it back up, less one precat stud and the EGR tube.
I then read that a bad knock sensor could cause the same symptoms I was experiencing so I unplugged that hoping for the best. No dice. I checked all my grounds and fuses and everything looked intact. I ripped the back seat out and checked the fuel pump and unplugged each injector one at a time and still everything seemed to function as it should. I was running out of options and beginning to think maybe the head gasket really was blown but just wasn't showing any symptoms at all. I preformed a cold compression check since the motor wouldn't idle long enough to warm up and the numbers were all within 3 PSI of each other. More reason to doubt a bad head gasket.
Well after thinking about this for quite awhile I began to suspect the motor may have skipped a tooth while I was driving it and that was causing the problems. Armed with my timing light I went out to check. Sure enough, the timing was WAY off. At least 10 degrees. I loosened the distributor and was able to get the timing back to the stock setting by moving the distributor about as far as it would allow me to adjust it. I hopped back in and.... SHE REVVED! The car instantly had all it's power back. I had finally found what had gone wrong!
As for what would cause the chain to skip a tooth, well your guess is as good as mine, but I'm betting the previous mechanic who screwed up the water pump/thermostat install might of had something to do with it at some point. Suggestions are welcome for what would cause it to skip a tooth. Either way, this gives me a VERY good excuse to do the cam upgrade using S13 (I think it was S13 cams, I'll have to double check) cams and realign the chain. However, for the time being, the car is running great with the exception of that nasty EGR pipe leak.
I have an OBX header, EGR block off plate, and EGR bung plug on order as we speak to take care of all that. Keep in mind I am going with a header right now because I have no plans to do a SR swap or turbo the car anytime soon. I plan to do some modest upgrades and just enjoy the car for now. One day I will go all out though. After I get the exhaust squared away it'll be time to work on fixing up the body and getting her all primed/painted. So far I'm about $1100 - $1150 into her! I'm posting some pictures below of when I first got the car off the trailer and I'll be updating this thread with every new part/body upgrade.


Thanks for looking!
PS: Here's a pic of the 99 Miata I had: