as most of you probably have a pretty good idea on what to do, this is for the people who dont.
What you will need
about 3.5 hours
8 Cans of paint of your choice. (we used rustoleum satin black)
a Friend (can do by yourself but eaiser with 2 people)
2 Can-Gun attachments, get at pep boys or similar.
some sort of degreaser to get rid of your current wax.
medium grit sand paper, 2 sheets should do.
masking/blue painters tape
News paper or something similar.
Step one
take the degreaser and go over your car with it to get the current bit of wax thats on the car.
then wash your car to clean it.
Step two
take the sand paper, cut the sheet in half and start sanding. use a block for the large areas if you want, but just use it in your hand for smaller areas. rough the whole car up decently for the paint to stick.
Step 3
mask off the car. windshiled, mirrors, tailights, turn signals, license plate lights, wheels, sunroof (if applies) and headlights if you dont have pop-ups.
one tip - mask off the trim to outline the area you will be working on. this will make it much easier when you go to cover the windows, your taping doesnt have to be perfect.
Step 4
Paint! now this is the hardest part. make sure you get the Can-Gun, it makes the job 100 time easier to do.
Hold the can about 6-8 inches away from the body and spray in even long strokes. DO NOT just pull the trigger and hold it, or do it too sparatically. pull the trigger, count 1 mississippi and let go. keep doing that over and over until you have the car covered.
once you have the first coat on, you should have used about 4 cans, let it sit for about an hour, then go back and spray the second coat on lightly.
for the second coat hold the can about 12 inches away and go in long even strokes like on the first coat. the object of the second coat is to just cover the first, and not fill anything else in really.
heres the time frame that it should be broken into
Degrease and wash - 40 mins
Sand - 20 mins
Mask - 30 mins
First coat - 35 mins
Drying - 1 hour
Second coat - 25 mins
------------------------
3.5 hours total.
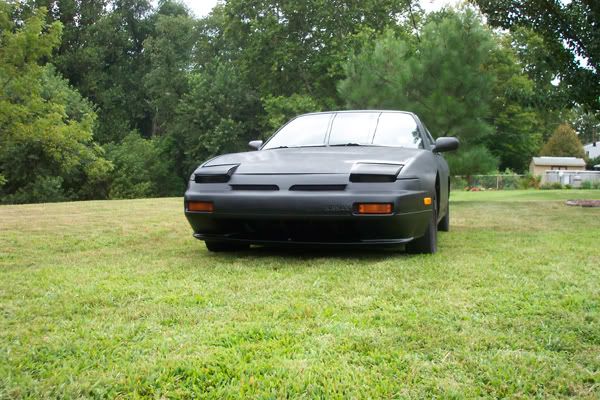
paint isnt totally dry in these pics, and the car was gold.
![Image]()
![Image]()
![Image]()
![Image]()
![Image]()
What you will need
about 3.5 hours
8 Cans of paint of your choice. (we used rustoleum satin black)
a Friend (can do by yourself but eaiser with 2 people)
2 Can-Gun attachments, get at pep boys or similar.
some sort of degreaser to get rid of your current wax.
medium grit sand paper, 2 sheets should do.
masking/blue painters tape
News paper or something similar.
Step one
take the degreaser and go over your car with it to get the current bit of wax thats on the car.
then wash your car to clean it.
Step two
take the sand paper, cut the sheet in half and start sanding. use a block for the large areas if you want, but just use it in your hand for smaller areas. rough the whole car up decently for the paint to stick.
Step 3
mask off the car. windshiled, mirrors, tailights, turn signals, license plate lights, wheels, sunroof (if applies) and headlights if you dont have pop-ups.
one tip - mask off the trim to outline the area you will be working on. this will make it much easier when you go to cover the windows, your taping doesnt have to be perfect.
Step 4
Paint! now this is the hardest part. make sure you get the Can-Gun, it makes the job 100 time easier to do.
Hold the can about 6-8 inches away from the body and spray in even long strokes. DO NOT just pull the trigger and hold it, or do it too sparatically. pull the trigger, count 1 mississippi and let go. keep doing that over and over until you have the car covered.
once you have the first coat on, you should have used about 4 cans, let it sit for about an hour, then go back and spray the second coat on lightly.
for the second coat hold the can about 12 inches away and go in long even strokes like on the first coat. the object of the second coat is to just cover the first, and not fill anything else in really.
heres the time frame that it should be broken into
Degrease and wash - 40 mins
Sand - 20 mins
Mask - 30 mins
First coat - 35 mins
Drying - 1 hour
Second coat - 25 mins
------------------------
3.5 hours total.
paint isnt totally dry in these pics, and the car was gold.