

Rexbo’s Guide to Rebuilding Brake Calipers
This is a quick guide with pictures to rebuilding a set of used R32 GTR brake calipers. While doing this, remember that these are your brakes. Your life depends on your brakes working so do not shortcut or make any shady efforts. Use only new parts to rebuild the calipers, replace the pads and bleed the fluid correctly, replacing with new brake fluid. Please note that the rebuild kit is the same one as used to rebuild s14 as well as z32 front calipers. It will NOT work on s13 calipers or any Nissan Brembo caliper. Also remember to keep track of all your little pieces and parts! They can be a pain to replace if you lose them! The calipers as shown are already off the car, I will do a separate write-up of how to do a brake caliper swap as well as 5-lug
Tools Needed:
- Compressed Air
- Nissan front and rear brake caliper rebuild kit #INF22690-64Y12
- Pliers (Normal, Needle-nose and vice-grip pliers)
- Flat head and Phillips screwdrivers
- 200 Grit and 400 grit or so sandpaper and a sanding block of some kind
- WD40 or other lubricant
- Brake fluid
- Brake pad anti-squeak compound
- Rags/Paper towels
* CAUTION: YOU ARE WORKING WITH BRAKE FLUID, ALWAYS WEAR EYE AND HAND PROTECTION AS IT IS EXTREMELY TOXIC*
Disassembly: (Front and Rear Calipers)
I will make this quick, as I have better pictures for re-assembly.
1) Take off the dust cover retaining rings around the caliper pistons. There should be 4, if you are unclear to what they are, scroll down.
2) Take an inch-thick piece of wood and put it in between the pistons of the caliper, or if the brake pads are still in the calipers, leave them there so that when you blow compressed air into the hole, the pistons will not be pushed out all the way.
3) Push the compressed air nozzle and GENTLY start feeding pressure into the brake caliper assembly through the hole where the brake line normally fits.
* CAUTION: WATCH YOUR FINGERS AND EYES. THE PISTONS CAN SHOOT OUT IF THEY ARE LOOSE SO BE VERY CAREFUL*
4) Once the pistons have all pushed out and are squeezing the pads or piece of wood, Pull the pads or wood out and shove a kitchen sponge or a wadded-up rag in the caliper to dampen the impact of the pistons when they push out. Gently apply air pressure again.
5) Once all the pistons have popped out, remove them, and if any are stuck gently pry on them with pliers, careful not to scratch or damage the sealing surface of the piston (the polished part).
6) Take a small flat head screwdriver and carefully pry the inner piston ring out, making sure not to scratch or damage the sealing surface of the caliper piston sleeve.
7) Bag and mark everything for later use, now it is time to clean your calipers however you choose. I will not cover this, as I recommend that you take the caliper to a professional powdercoater.
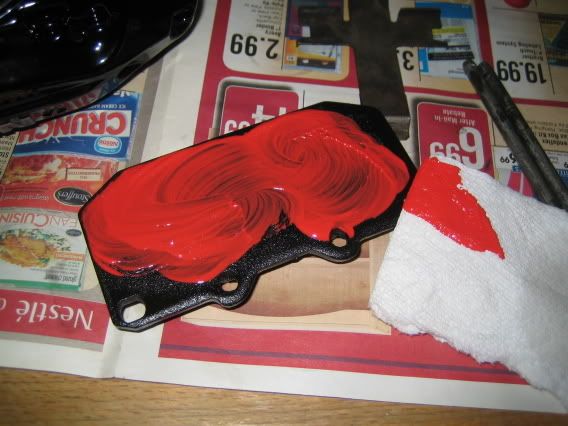
8) To get the shiny Nissan logo on the calipers, I took 200-grit sandpaper to the lettering, making sure to use masking tape to cover up parts of the caliper that I didn’t want to scratch. Sand until most of the paint is gone, then use the 400-grit to finish up the rest of the paint and to give the metal a shinier look. Alternatively you could paint the letters, but I found that sanding was faster.
![Image]()
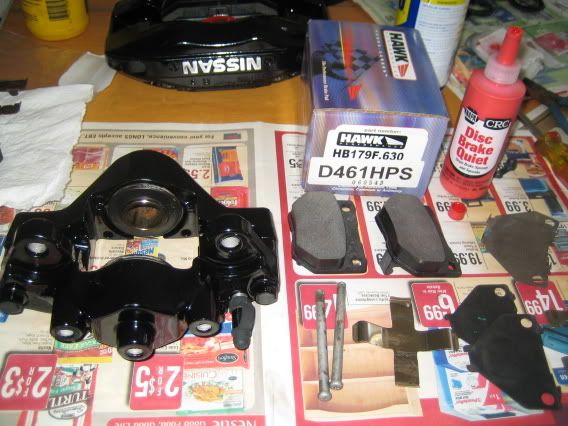
Front Reassembly:
![Image]()
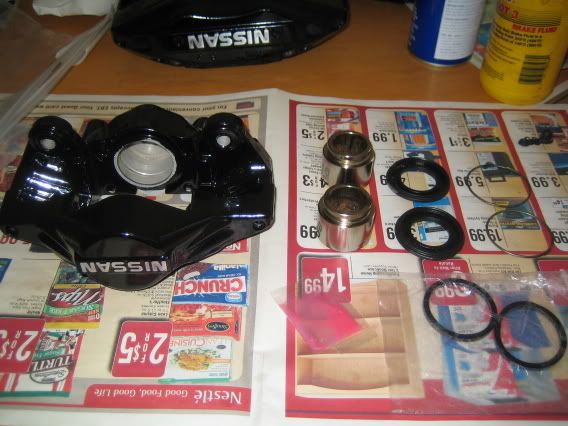
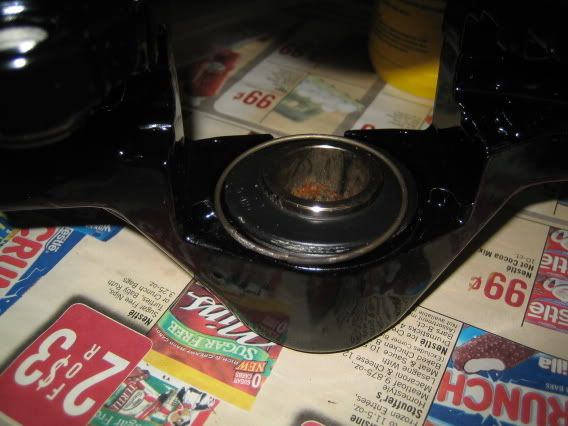
1) Use compressed air to blow all debris out of the fluid passages and out of the cylinders.
2) Spray some WD40 or other lubricant on a rag or paper towel and wipe down the inside of the cylinders as well as the outside of the pistons to clean them.
![Image]()
![Image]()
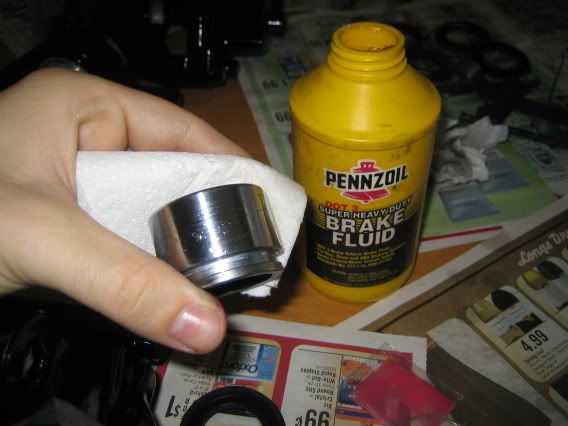
3) Once that has dried, on a separate rag, soak some brake fluid into it and wipe down the outside of the pistons and the inside of the cylinders to lubricate them. After that be careful not to touch the surfaces you just cleaned! Remember these are your brakes, your life depends on them, so be very careful!
![Image]()
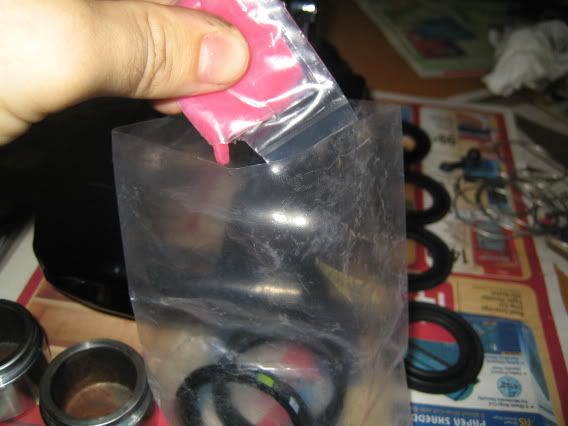
4) Take some of the supplied Nissan grease, and squeeze it into the bag holding the piston rings. Work it around so that the seals are completely covered in grease.
![Image]()
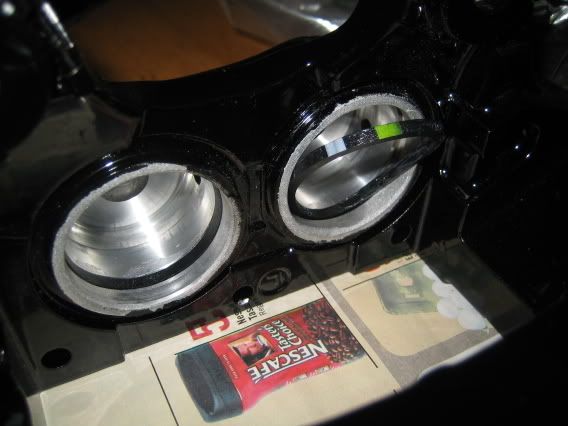
5) Insert the seals into the cylinder grooves, making sure they sit completely flush inside and that the piston will not pinch any part of it. The left cylinder is flush, the right is how you insert them in and work around.
![Image]()
6) Stretch the rubber dust boots over the top of the pistons, making sure to grease the inside of the boot a little bit before stretching over. These make sure no brake dust contaminates the piston seal. Also clean them with brake fluid after touching the lower part as I am in this picture.
![Image]()
7) Insert the clean pistons one at a time, and push them in until they bottom out. If they do not go in just with hand pressure, be sure they are in the cylinder correctly and that the seals are correctly seated.
![Image]()
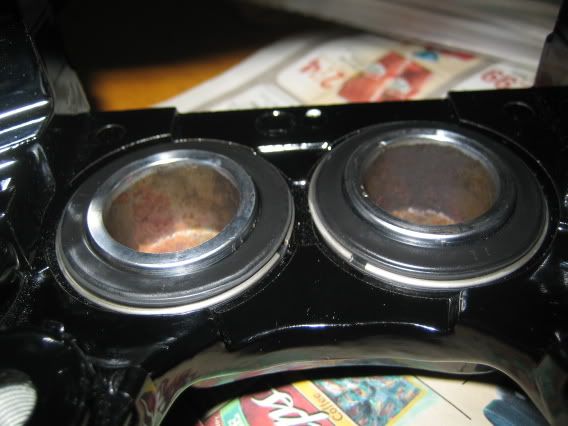
8) Snap the dust boot over the lip surrounding each piston, and clamp them down with the supplied snap rings.
![Image]()
![Image]()
Front Brake Pad Install:
![Image]()
1) As I was missing the front shim hardware, this is an alternate method. Coat the back of the supplied brake pads with the anti-squeal compound you should have. Put a pea-sized drop for each piston and spread it around with a paper towel or rag.
![Image]()
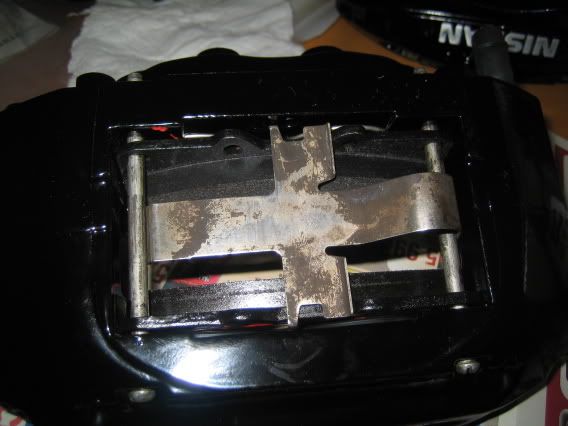
2) Insert the two pins from the outboard side first until they stick about an inch into the caliper. Slide the outboard brake pad (the one without the low pad warning tabs) onto the pins and push it until it rests against the pistons.
![Image]()
3) Repeat with the inboard pad and slide the pins all the way through until they stick through the inboard side of the caliper.
![Image]()
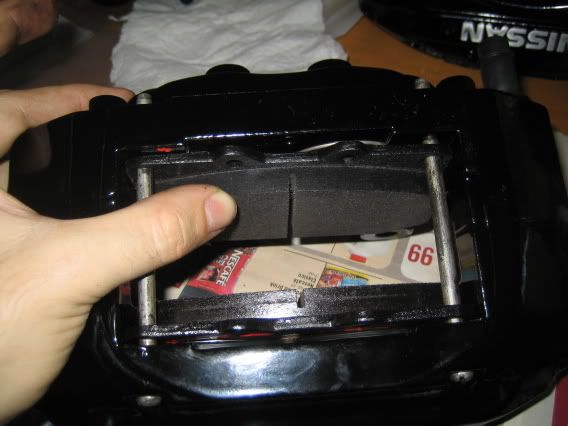
4) Install the anti-rattle spring with the bent part facing the top of the caliper (where the bleed nipple is).
![Image]()
5) Install the supplied spring or your own cotter pins or safety wire to the pins to ensure they do not slide out.
![Image]()
Rear Reassembly:
![Image]()
1) Use compressed air to blow all debris out of the fluid passages and out of the cylinders. Much of the reassembly is the same as the front calipers so follow the same steps again.
2) Spray some WD40 or other lubricant on a rag or paper towel and wipe down the inside of the cylinders as well as the outside of the pistons to clean them.
3) Once that has dried, on a separate rag, soak some brake fluid into it and wipe down the outside of the pistons and the inside of the cylinders to lubricate them. After that be careful not to touch the surfaces you just cleaned! Remember these are your brakes, your life depends on them, so be very careful!
4) Take some of the supplied Nissan grease, and squeeze it into the bag holding the piston rings. Work it around so that the seals are completely covered in grease.
5) Insert the seals into the cylinder grooves, making sure they sit completely flush inside and that the piston will not pinch any part of it.
![Image]()
6) Stretch the rubber dust boots over the top of the pistons, making sure to grease the inside of the boot a little bit before stretching over. These make sure no brake dust contaminates the piston seal.
7) Insert the clean pistons one at a time, and push them in until they bottom out. If they do not go in just with hand pressure, be sure they are in the cylinder correctly and that the seals are correctly seated.
![Image]()
8) Snap the dust boot over the lip surrounding each piston, and clamp them down with the supplied snap rings.
![Image]()
Rear Brake Pad Install:
![Image]()
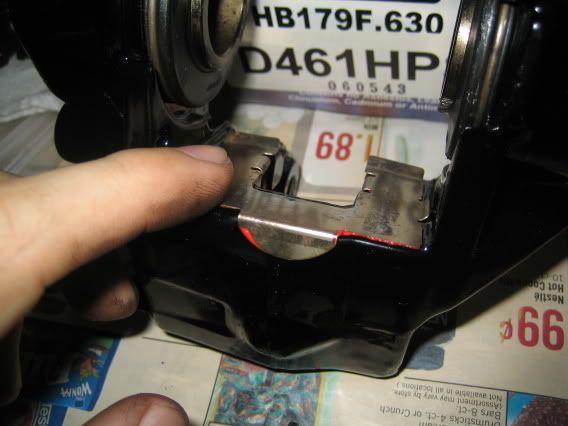
1) Coat the underside of the rear pad retaining clips with the anti-squeal compound, as these are the parts that will contact the caliper, and may rust in the future if not protected. Install them by clipping them to the top and bottom inside of the caliper.
![Image]()
![Image]()
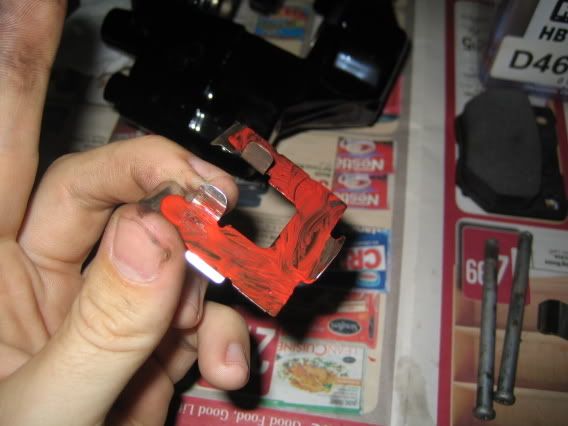
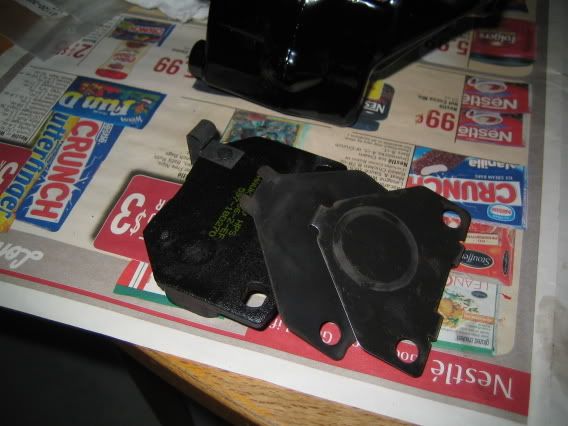
2) Arrange the shims on the pads so that the black shim is sandwiched between the silver shim which should clip to the brake pad itself.
![Image]()
3) Slide the pads into the caliper on their respective sides. The inboard pad should have the low pad warning clip on it.
![Image]()
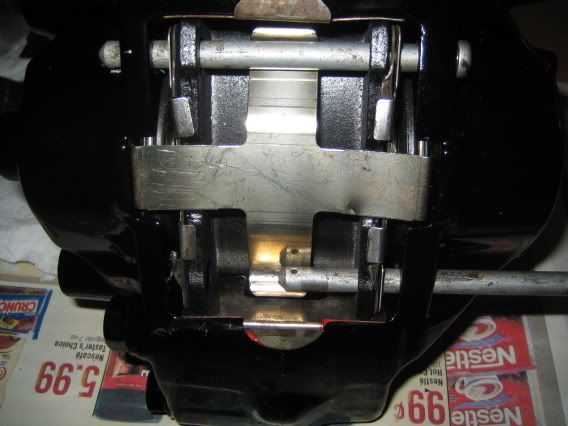
4) Slide the upper retaining pin all the way through the caliper and both pads. Install the anti-rattle clip in the center, then slide the lower pin all the way through as well.
![Image]()
5) Install the supplied retaining ring, or alternatively use cotter pins or safety wire to make sure the pins will not slide out while driving.
![Image]()
You’re done! The brakes are now ready to install on your car, which I will cover later on when I do my complete s13 5-lug swap and brake swap write-up.
Total Costs:
- R32 GTR Front and Rear Calipers (used) - $540.00
- Caliper Rebuilt Kit from Nissan - $24.88
- Caliper sandblasting and powdercoating - $135.00
- Hawk HPS front and rear brake pads - $140.00
------------
Total: $839.88
If you have any questions or comments feel free to contact me via Email at sdawson@ucsd.edu or on AIM at Rexbo2006, or PM me anytime on these forums. Thank you and I hope this helps!
Rexbo
This is a quick guide with pictures to rebuilding a set of used R32 GTR brake calipers. While doing this, remember that these are your brakes. Your life depends on your brakes working so do not shortcut or make any shady efforts. Use only new parts to rebuild the calipers, replace the pads and bleed the fluid correctly, replacing with new brake fluid. Please note that the rebuild kit is the same one as used to rebuild s14 as well as z32 front calipers. It will NOT work on s13 calipers or any Nissan Brembo caliper. Also remember to keep track of all your little pieces and parts! They can be a pain to replace if you lose them! The calipers as shown are already off the car, I will do a separate write-up of how to do a brake caliper swap as well as 5-lug
Tools Needed:
- Compressed Air
- Nissan front and rear brake caliper rebuild kit #INF22690-64Y12
- Pliers (Normal, Needle-nose and vice-grip pliers)
- Flat head and Phillips screwdrivers
- 200 Grit and 400 grit or so sandpaper and a sanding block of some kind
- WD40 or other lubricant
- Brake fluid
- Brake pad anti-squeak compound
- Rags/Paper towels
* CAUTION: YOU ARE WORKING WITH BRAKE FLUID, ALWAYS WEAR EYE AND HAND PROTECTION AS IT IS EXTREMELY TOXIC*
Disassembly: (Front and Rear Calipers)
I will make this quick, as I have better pictures for re-assembly.
1) Take off the dust cover retaining rings around the caliper pistons. There should be 4, if you are unclear to what they are, scroll down.
2) Take an inch-thick piece of wood and put it in between the pistons of the caliper, or if the brake pads are still in the calipers, leave them there so that when you blow compressed air into the hole, the pistons will not be pushed out all the way.
3) Push the compressed air nozzle and GENTLY start feeding pressure into the brake caliper assembly through the hole where the brake line normally fits.
* CAUTION: WATCH YOUR FINGERS AND EYES. THE PISTONS CAN SHOOT OUT IF THEY ARE LOOSE SO BE VERY CAREFUL*
4) Once the pistons have all pushed out and are squeezing the pads or piece of wood, Pull the pads or wood out and shove a kitchen sponge or a wadded-up rag in the caliper to dampen the impact of the pistons when they push out. Gently apply air pressure again.
5) Once all the pistons have popped out, remove them, and if any are stuck gently pry on them with pliers, careful not to scratch or damage the sealing surface of the piston (the polished part).
6) Take a small flat head screwdriver and carefully pry the inner piston ring out, making sure not to scratch or damage the sealing surface of the caliper piston sleeve.
7) Bag and mark everything for later use, now it is time to clean your calipers however you choose. I will not cover this, as I recommend that you take the caliper to a professional powdercoater.
8) To get the shiny Nissan logo on the calipers, I took 200-grit sandpaper to the lettering, making sure to use masking tape to cover up parts of the caliper that I didn’t want to scratch. Sand until most of the paint is gone, then use the 400-grit to finish up the rest of the paint and to give the metal a shinier look. Alternatively you could paint the letters, but I found that sanding was faster.

Front Reassembly:

1) Use compressed air to blow all debris out of the fluid passages and out of the cylinders.
2) Spray some WD40 or other lubricant on a rag or paper towel and wipe down the inside of the cylinders as well as the outside of the pistons to clean them.


3) Once that has dried, on a separate rag, soak some brake fluid into it and wipe down the outside of the pistons and the inside of the cylinders to lubricate them. After that be careful not to touch the surfaces you just cleaned! Remember these are your brakes, your life depends on them, so be very careful!
4) Take some of the supplied Nissan grease, and squeeze it into the bag holding the piston rings. Work it around so that the seals are completely covered in grease.
5) Insert the seals into the cylinder grooves, making sure they sit completely flush inside and that the piston will not pinch any part of it. The left cylinder is flush, the right is how you insert them in and work around.
6) Stretch the rubber dust boots over the top of the pistons, making sure to grease the inside of the boot a little bit before stretching over. These make sure no brake dust contaminates the piston seal. Also clean them with brake fluid after touching the lower part as I am in this picture.

7) Insert the clean pistons one at a time, and push them in until they bottom out. If they do not go in just with hand pressure, be sure they are in the cylinder correctly and that the seals are correctly seated.

8) Snap the dust boot over the lip surrounding each piston, and clamp them down with the supplied snap rings.

Front Brake Pad Install:

1) As I was missing the front shim hardware, this is an alternate method. Coat the back of the supplied brake pads with the anti-squeal compound you should have. Put a pea-sized drop for each piston and spread it around with a paper towel or rag.
2) Insert the two pins from the outboard side first until they stick about an inch into the caliper. Slide the outboard brake pad (the one without the low pad warning tabs) onto the pins and push it until it rests against the pistons.

3) Repeat with the inboard pad and slide the pins all the way through until they stick through the inboard side of the caliper.
4) Install the anti-rattle spring with the bent part facing the top of the caliper (where the bleed nipple is).
5) Install the supplied spring or your own cotter pins or safety wire to the pins to ensure they do not slide out.

Rear Reassembly:
1) Use compressed air to blow all debris out of the fluid passages and out of the cylinders. Much of the reassembly is the same as the front calipers so follow the same steps again.
2) Spray some WD40 or other lubricant on a rag or paper towel and wipe down the inside of the cylinders as well as the outside of the pistons to clean them.
3) Once that has dried, on a separate rag, soak some brake fluid into it and wipe down the outside of the pistons and the inside of the cylinders to lubricate them. After that be careful not to touch the surfaces you just cleaned! Remember these are your brakes, your life depends on them, so be very careful!
4) Take some of the supplied Nissan grease, and squeeze it into the bag holding the piston rings. Work it around so that the seals are completely covered in grease.
5) Insert the seals into the cylinder grooves, making sure they sit completely flush inside and that the piston will not pinch any part of it.

6) Stretch the rubber dust boots over the top of the pistons, making sure to grease the inside of the boot a little bit before stretching over. These make sure no brake dust contaminates the piston seal.
7) Insert the clean pistons one at a time, and push them in until they bottom out. If they do not go in just with hand pressure, be sure they are in the cylinder correctly and that the seals are correctly seated.

8) Snap the dust boot over the lip surrounding each piston, and clamp them down with the supplied snap rings.
Rear Brake Pad Install:
1) Coat the underside of the rear pad retaining clips with the anti-squeal compound, as these are the parts that will contact the caliper, and may rust in the future if not protected. Install them by clipping them to the top and bottom inside of the caliper.
2) Arrange the shims on the pads so that the black shim is sandwiched between the silver shim which should clip to the brake pad itself.
3) Slide the pads into the caliper on their respective sides. The inboard pad should have the low pad warning clip on it.

4) Slide the upper retaining pin all the way through the caliper and both pads. Install the anti-rattle clip in the center, then slide the lower pin all the way through as well.
5) Install the supplied retaining ring, or alternatively use cotter pins or safety wire to make sure the pins will not slide out while driving.

You’re done! The brakes are now ready to install on your car, which I will cover later on when I do my complete s13 5-lug swap and brake swap write-up.
Total Costs:
- R32 GTR Front and Rear Calipers (used) - $540.00
- Caliper Rebuilt Kit from Nissan - $24.88
- Caliper sandblasting and powdercoating - $135.00
- Hawk HPS front and rear brake pads - $140.00
------------
Total: $839.88
If you have any questions or comments feel free to contact me via Email at sdawson@ucsd.edu or on AIM at Rexbo2006, or PM me anytime on these forums. Thank you and I hope this helps!
Rexbo

") ).
).

